
Fashion
How to Use Nipple Cream for Comfortable Pumping

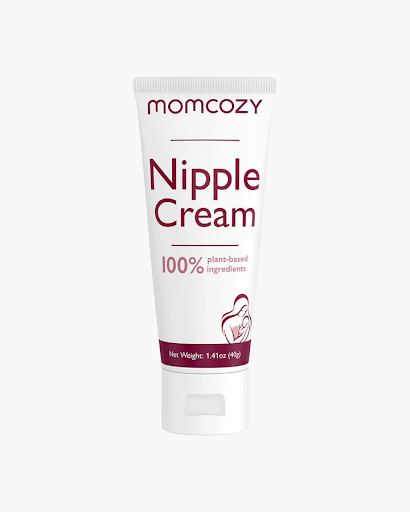
For many mothers, especially those returning to work, pumping is a lifeline that keeps their breastfeeding journey going. But the physical toll it takes on your body is something few people talk about openly. Unlike nursing directly, the repetitive suction of a breast pump can leave nipples feeling raw, dry, and irritated — sometimes after just a few sessions. When discomfort builds up over days and weeks, it can make an already demanding routine feel overwhelming.
Nipple cream is one of the most effective and underutilized tools for managing this challenge. More than just a soothing product, it serves as a protective barrier, an active healer, and a daily comfort ritual that helps your skin keep pace with a demanding pumping schedule. The right cream, used consistently and correctly, can make a measurable difference in how pumping feels — and how long you’re able to sustain it.
This guide is designed to give you practical, straightforward advice on everything from choosing the best nipple cream for your needs to building a simple application routine that fits into even the busiest days. Whether you’re just starting out or dealing with persistent soreness, you’ll find actionable steps here to help you pump with greater comfort and confidence.
Why Nipple Cream is Essential for Pumping Moms
Pumping puts your body through a type of physical stress that breastfeeding alone simply doesn’t replicate. When a baby nurses, the latch creates a natural seal that distributes pressure across a wider area, and the feeding rhythm is self-regulated. A breast pump, by contrast, applies consistent mechanical suction in a fixed, repetitive cycle — sometimes six to eight times a day for working mothers. Over time, this relentless friction and vacuum pressure strip away the skin’s natural moisture, leaving nipple tissue dry, tender, and increasingly vulnerable to cracking.
The moisture cycle itself becomes a problem. During pumping, the skin is repeatedly exposed to suction and warmth, then left damp inside a flange after the session ends. That cycle of wetting and drying is one of the leading causes of nipple irritation for pumping moms. Unlike direct nursing, where a baby’s saliva provides some natural lubrication and the skin recovers between feeds, pumping offers no such buffer. The skin has to withstand mechanical stress without any biological compensation.
This is exactly where nipple cream earns its place in your routine. A quality nipple cream does more than provide temporary relief — it creates a physical barrier that shields skin from friction during sessions, seals in moisture to prevent the damaging dry-out effect, and actively supports healing in tissue that’s already stressed. Think of it less as a treatment you reach for when things go wrong and more as daily maintenance that keeps things from going wrong in the first place.
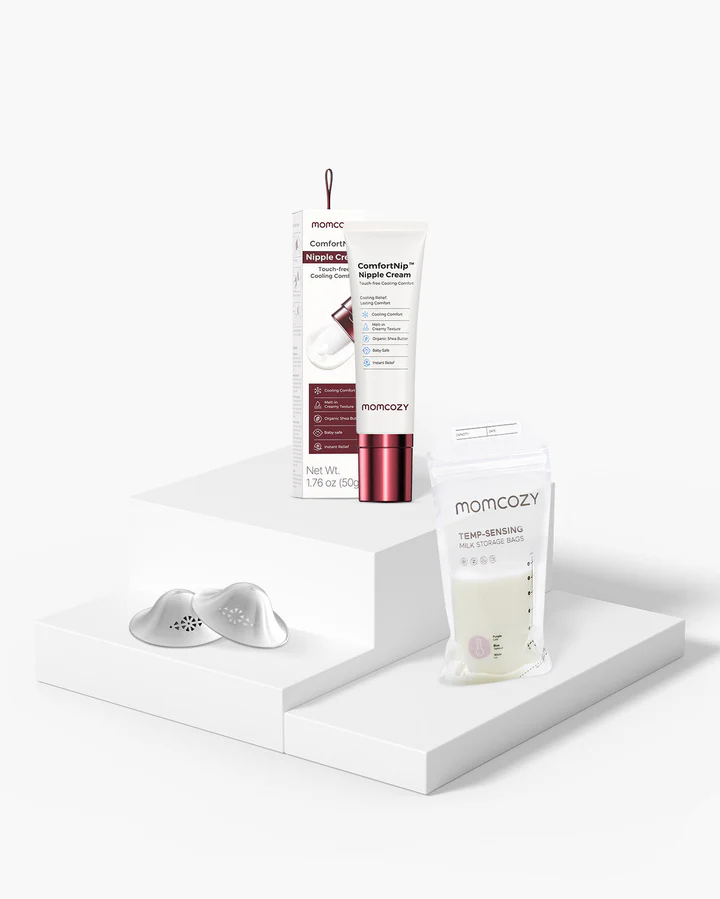
Addressing breastfeeding comfort proactively is especially important because pain has a direct impact on milk letdown. When your body associates pumping with discomfort, it becomes harder to relax enough to express milk efficiently. Using nipple cream consistently isn’t just about skin health — it’s about protecting the entire pumping experience before small irritations turn into real setbacks.
Choosing the Right Nipple Cream for Your Routine
With dozens of options on the market, picking the right nipple cream can feel more complicated than it needs to be. The most important starting point is safety: any cream you apply to your nipples will likely come into contact with your baby during feeding, so it needs to be non-toxic and ideally food-grade. Look for products that are free from artificial fragrances, parabens, and petroleum-based fillers. Beyond safety, the most practical feature a pumping mom can ask for is a formula that doesn’t require removal before feeding or pumping — that single factor eliminates a surprisingly time-consuming step from your day.
Lanolin is the most widely used ingredient in nipple creams, and for good reason. It’s derived from sheep’s wool, mimics the skin’s natural oils, and creates a semi-occlusive barrier that retains moisture without fully blocking airflow. It absorbs slowly but provides long-lasting protection, making it a reliable choice for moms dealing with cracked or raw skin. The main drawback is its thick consistency, which some find sticky or difficult to spread. If you have a wool allergy, lanolin is one to skip entirely.
Plant-based alternatives — particularly those formulated with coconut oil, shea butter, or calendula — have become increasingly popular. These tend to feel lighter on the skin, absorb more quickly, and suit moms who prefer a fully natural or vegan product. Coconut oil on its own has antimicrobial properties and works well for mild dryness, though it may not provide sufficient protection during heavy pumping schedules without reapplication.
Specialty blends that combine multiple moisturizing agents often offer the best of both worlds: the sealing power of a heavier ingredient alongside the fast absorption of lighter oils. Brands focused on the full pumping experience, like Momcozy, tend to develop their nipple creams with this kind of daily, repeated use in mind — formulating for compatibility with flanges and safe contact with infants. When choosing, prioritize a moisturizing nipple cream that stays comfortable under a flange, absorbs without leaving heavy residue, and supports your skin through repeated daily sessions — not just occasional use.
Step-by-Step Guide: How to Apply Nipple Cream for Pumping
Pre-Pumping Preparation and Application
Getting the application right takes less than two minutes, but the difference in how your skin holds up over the course of a day is significant. Start by washing your hands thoroughly — this step matters more than it might seem, since introducing bacteria to already-stressed skin can turn mild irritation into a genuine infection. Before reaching for the cream, make sure your nipples are dry. Applying any moisturizer to damp skin dilutes its effectiveness and can actually trap unwanted moisture against the tissue rather than sealing in the kind your skin needs.
Dispense a pea-sized amount of cream onto your fingertip — roughly the size of a small blueberry. That’s enough to cover both nipples with a thin, even layer. More isn’t better here; a thick application can interfere with flange fit and feel uncomfortable under suction. Use the pad of your finger to spread the cream in gentle circular motions, working from the center outward. Avoid rubbing or pressing hard, especially if the skin is already tender. Once applied, give the cream thirty to sixty seconds to settle before positioning your flanges. This brief window allows the product to begin forming its protective layer rather than being immediately displaced by the equipment.
During and Post-Pumping Care
If you’ve chosen a food-grade, lanolin-based, or plant-based cream that’s labeled safe for nursing, there’s no need to remove it before pumping. That’s intentional — the cream works throughout your session, reducing friction as the flange moves and maintaining the skin’s moisture balance under suction. Wiping it off beforehand negates the protection it was meant to provide and adds unnecessary steps to an already time-pressured routine.
After the session ends, resist the urge to scrub or aggressively dry your nipples. Pat them gently with a clean cloth or let them air dry for a minute. If your cream has been fully absorbed or the skin feels tight, apply another thin layer before putting your bra back on. This post-pump reapplication is actually the most important one — it locks in moisture during the recovery window between sessions, when the skin is most vulnerable to drying out. If you notice any residue from the cream that you’d like to clear before a feeding, a soft, damp cloth is all you need; harsh soaps strip the skin’s natural oils and undo the work the cream has done. For moms pumping six or more times daily, a simple rule of thumb is to reapply every other session at minimum, and after every session if your skin is showing signs of cracking or peeling.
Integrating Nipple Cream into a Busy Pumping Schedule
For working moms juggling meetings, commutes, and designated pumping breaks that rarely go according to plan, the biggest barrier to consistent nipple cream use isn’t motivation — it’s logistics. The fix is simpler than most people expect: keep a dedicated tube in your pump bag, separate from any you store at home. When the cream is already where you’re pumping, it removes the mental step of remembering to bring it, which is often all it takes to skip it altogether. A small travel-sized tube fits easily in any bag compartment and means you’re never caught without it during a back-to-back workday.
Building reapplication into the end of every pumping session works best when you treat it as part of winding down rather than an optional add-on. After you’ve detached your flanges and stored your milk, apply your cream before reassembling your bra. Doing it in this fixed sequence — pump, store, cream, dress — takes less than ninety seconds and quickly becomes automatic. That consistency is what separates moms who see real improvement in skin condition from those who use cream sporadically and wonder why they’re still uncomfortable.
On days when soreness is more acute — whether from a longer pumping stretch, a new flange size, or skin that’s visibly cracking — hydrogel pads used between sessions can pair well with your nipple cream routine. Apply the cream immediately after pumping, let it absorb, and then place a chilled hydrogel pad on top during your break for additional soothing relief. The two work in different ways, and together they address both the surface pain and the underlying skin repair.
It’s also worth taking thirty seconds every few days to genuinely check in with your skin. Redness, peeling, or persistent tenderness that doesn’t improve with consistent cream use may signal a fit issue with your flanges or the early signs of an infection — both of which are worth addressing with your lactation consultant sooner rather than later. Nipple cream does its best work as part of an attentive routine, not as a substitute for one.
Building Comfort into Your Daily Pumping Routine
Pumping is demanding enough without adding avoidable skin pain to the equation. As this guide has covered, nipple cream isn’t a luxury or a last resort — it’s a frontline tool for preventing the dryness, cracking, and irritation that come from repeated mechanical suction. The skin on your nipples simply isn’t built to handle that kind of daily stress without support, and a quality cream applied consistently gives it the protection and recovery it needs to keep up.
The practical takeaways are straightforward: choose a formula that’s safe, effective under a flange, and ideally requires no removal before feeding or pumping. Apply it before and after every session using a thin, even layer. Keep a tube in your pump bag so it’s always within reach. Build reapplication into the fixed sequence of your pumping routine until it becomes second nature. None of these steps require significant time or effort — but together, they make a real difference in how your body holds up across weeks and months of pumping.
More than anything, prioritizing your own physical comfort isn’t a small thing. It directly supports milk letdown, sustains your pumping routine longer, and makes the overall breastfeeding experience more manageable. You’re already doing the hard work — a consistent nipple cream routine is one of the simplest ways to make sure that work doesn’t come at unnecessary cost to your body.


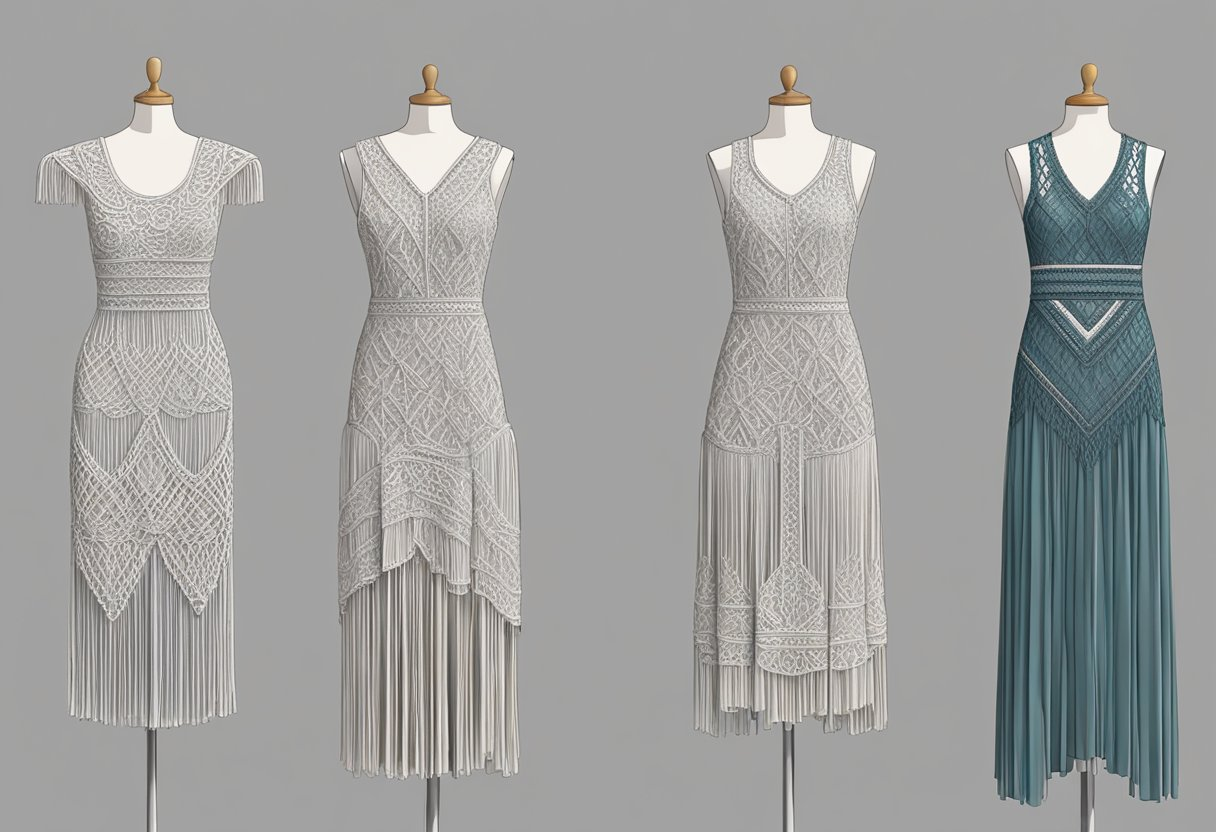
Finding a dress that feels both elegant and personal can transform the way you approach fashion. Among handcrafted designs, macrame dresses stand out for their intricate knotting techniques, artistic craftsmanship, and timeless appeal. Whether you are preparing for a beach getaway, attending a summer celebration, or searching for a statement piece for a special event, the right macrame design reflects your personality while offering exceptional style.
Unlike mass-produced garments, handcrafted macrame clothing celebrates individuality. Every knot, pattern, and detail contributes to a distinctive look that cannot be replicated by machine-made fashion. From flowing silhouettes to structured designs, there is a macrame style suited to every wardrobe and occasion.
This guide explores how to choose macrame dresses that complement your personal style, body shape, and lifestyle. Along the way, you’ll discover the differences between popular designs, learn how various lengths create unique looks, and understand what makes handcrafted fashion a lasting investment.
Why Macrame Dresses Continue to Capture Attention
Fashion trends come and go, but handcrafted clothing has maintained its appeal because it combines artistry with individuality. A beautifully made dress macrame design offers more than visual beauty—it tells a story through craftsmanship.
Traditional macrame techniques involve carefully tying cords into decorative patterns without sewing. Modern designers have transformed these classic methods into sophisticated dresses that blend bohemian charm with contemporary luxury. The result is clothing that feels both timeless and fashion-forward.
Another reason people are drawn to macrame dresses is their versatility. Depending on the design, the same dress can become an elegant evening outfit, a stylish resort look, or a relaxed festival ensemble simply by changing accessories and footwear.
Understand Your Personal Style Before Choosing a Dress
Before selecting a macrame design, it helps to understand what naturally suits your personality and lifestyle. Rather than following seasonal trends, focus on pieces that make you feel comfortable and confident.
Ask yourself how you usually dress throughout the year. Do you prefer minimalist fashion with clean lines, or do you enjoy expressive clothing with handcrafted details? Knowing your preferences makes it easier to narrow your choices.
Consider these style personalities before purchasing a macrame piece:
- Classic Elegance: Clean silhouettes with subtle handcrafted textures.
- Bohemian Spirit: Relaxed fits, intricate knot patterns, and flowing movement.
- Modern Chic: Contemporary cuts with refined macrame accents.
- Resort Luxury: Lightweight designs perfect for holidays and warm-weather destinations.
Identifying your preferred aesthetic helps ensure your investment becomes a wardrobe favorite instead of a dress worn only once.
Explore Different Types of Macrame Dresses
Not every macrame design serves the same purpose. Understanding the characteristics of different styles makes choosing the right piece much easier.
Macrame Beach Dress
A macrame beach dress is designed for relaxed coastal settings. Lightweight construction, breathable materials, and open knot patterns make it ideal for layering over swimwear while maintaining an effortlessly stylish appearance.
Many travelers choose these dresses because they transition easily from the beach to seaside cafés without requiring a complete outfit change.
Macrame Maxi Dress
A flowing macrame maxi dress creates an elegant silhouette that works beautifully for destination weddings, sunset dinners, and outdoor celebrations.
The longer length adds sophistication while allowing the handcrafted details to become the focal point of the design. Maxi styles are especially popular among women seeking graceful movement and timeless elegance.
Macrame Midi Dress
For those looking for versatility, a macrame midi dress offers the perfect balance between casual and formal wear.
Its mid-length silhouette works well for brunches, garden parties, vacations, and creative workplaces. Paired with heels or sandals, it adapts easily to different occasions throughout the year.
Macrame Fringe Dress
A macrame fringe dress introduces texture and movement into every step. Fringe details enhance the handcrafted aesthetic while creating a playful, eye-catching finish.
This style is particularly suited for music festivals, fashion events, evening gatherings, and occasions where statement fashion is encouraged.
Choose the Right Length for Your Lifestyle
Dress length influences not only appearance but also comfort and practicality. Selecting the appropriate length ensures your new piece aligns with how you plan to wear it.
| Dress Length | Best For | Style Impression |
| Mini | Beach vacations, festivals | Youthful and playful |
| Midi | Daily wear, brunches, casual events | Balanced and versatile |
| Maxi | Weddings, evening occasions, luxury vacations | Elegant and sophisticated |
Your daily routine should also influence your decision. If you frequently attend formal gatherings, longer silhouettes may become wardrobe essentials. If versatility matters most, a midi design often provides the greatest flexibility.
Find a Silhouette That Complements Your Shape
Everybody type can wear macrame dresses beautifully when the silhouette matches natural proportions. Rather than focusing on trends, choose designs that enhance comfort while highlighting your favorite features.
Flowing cuts often create graceful movement and flatter many body shapes. Structured waistlines provide definition, while relaxed fits offer effortless elegance without sacrificing sophistication.
Necklines also influence the overall appearance. V-neck styles elongate the neckline, halter designs highlight the shoulders, and square necklines create a modern, balanced look. Paying attention to these details helps create a more harmonious outfit.
The handcrafted patterns themselves can also affect visual balance. Vertical knot designs naturally lengthen the silhouette, while symmetrical geometric patterns create structure and refinement.
Consider the Craftsmanship Behind Every Piece
One of the defining qualities of premium macrame clothing is the craftsmanship invested in every garment. Unlike factory-produced fashion, handmade pieces require patience, precision, and artistic skill.
Each knot contributes to the overall design, creating texture that machines cannot easily reproduce. High-quality macrame dress often involves hours of detailed handwork, resulting in garments that feel truly unique.
When evaluating craftsmanship, pay attention to several important elements:
- Uniform knot patterns and clean finishing.
- Strong, durable construction without loose threads.
- Comfortable materials that balance softness with durability.
- Thoughtful design details that enhance both beauty and wearability.
Choosing handcrafted quality means investing in a piece that remains stylish well beyond seasonal fashion trends.
Select Fabrics That Feel as Good as They Look
The beauty of a macrame design is enhanced by the materials used to create it. Comfortable, breathable fabrics allow intricate knotwork to remain lightweight while providing an enjoyable wearing experience.
Natural fibers often offer excellent breathability, making them suitable for warm climates and destination travel. Blended materials may introduce additional flexibility while helping garments maintain their shape over time.
Beyond comfort, fabric choice also affects how a dress moves. Softer materials create flowing silhouettes, while structured fibers emphasize architectural knot patterns and refined detailing.
Considering both comfort and aesthetics ensures your chosen macrame dress feels just as luxurious as it looks, whether worn for everyday elegance or memorable occasions.
Choose Colors That Reflect Your Personality
Color plays a significant role in how macrame dresses look and feel. While the handcrafted knotwork is often the focal point, the right shade can enhance your complexion, complement your wardrobe, and suit different occasions.
Neutral tones such as ivory, beige, cream, and sand are timeless choices that emphasize the intricate craftsmanship of macrame. These shades work beautifully for vacations, beach weddings, and elegant daytime events. They also pair effortlessly with a variety of accessories, making them versatile additions to any collection.
For those who enjoy making a statement, richer colors like black, emerald, navy, or terracotta offer a contemporary twist. These hues highlight the texture of handcrafted designs while creating a sophisticated appearance suitable for evening occasions.
Match Colors to the Occasion
Different settings often call for different color palettes. Choosing a shade that aligns with the event helps create a polished and appropriate look.
| Occasion | Recommended Colors | Style Effect |
| Beach Vacation | White, Sand, Beige | Fresh and effortless |
| Garden Party | Blush, Sage, Lavender | Soft and romantic |
| Evening Event | Black, Navy, Emerald | Elegant and refined |
| Resort Getaway | Cream, Gold, Terracotta | Luxurious and relaxed |
Building your wardrobe around versatile colors allows your macrame pieces to remain wearable across multiple seasons.
Create a Complete Macrame Outfit
Choosing the right dress is only the beginning. A thoughtfully styled macrame outfit combines clothing, footwear, accessories, and layering pieces to create a cohesive look.
Rather than overwhelming the handcrafted details, select complementary pieces that enhance the artistry of the dress. Minimalist accessories often work best because they allow the knot patterns to remain the center of attention.
Footwear also influences the overall appearance. Flat sandals create a relaxed coastal style, while block heels or elegant wedges elevate the outfit for formal gatherings. Leather accessories, woven handbags, and delicate jewelry pair naturally with handcrafted fashion without competing for attention.
A lightweight shawl or tailored jacket can also extend the versatility of your macrame dress, making it suitable for cooler evenings or transitional seasons.
Style a Boho Macrame Dress with Confidence
A boho macrame dress embodies creativity, freedom, and effortless elegance. Although inspired by bohemian fashion, today’s designs often incorporate modern tailoring that makes them appropriate for a wide variety of settings.
The key to styling this look is maintaining balance. Since macrame already introduces texture and visual interest, avoid combining it with heavily patterned accessories or oversized statement pieces. Instead, focus on creating harmony through natural materials and understated details.
Layered necklaces, woven belts, handcrafted handbags, and neutral footwear enhance the relaxed aesthetic while preserving the sophisticated appearance of the dress. Soft waves, natural makeup, and simple hairstyles further complement the artisanal character of macrame fashion.
The result is a refined outfit that feels authentic rather than overly styled.
Select the Right Macrame Dress for Every Occasion
One of the greatest advantages of handcrafted fashion is its versatility. With thoughtful styling, the same dress can transition between casual daytime wear and elegant evening occasions.
Understanding where and how you’ll wear your dress makes choosing the right design much easier.
Resort and Beach Holidays
A lightweight macrame beach dress is ideal for tropical destinations. Worn over swimwear during the day or paired with elegant sandals for dinner, it provides comfort while maintaining a polished appearance.
Natural fabrics and breathable construction help keep you cool without compromising style.
Weddings and Celebrations
Formal occasions often call for a flowing macrame gown or an elegant macrame maxi dress. These longer silhouettes create graceful movement while showcasing the intricate craftsmanship that defines handmade fashion.
Choosing subtle jewelry and refined footwear allows the handcrafted detailing to remain the highlight of the outfit.
Everyday Luxury
Not every macrame dress needs to be reserved for special events. A versatile macrame midi dress works beautifully for brunches, art exhibitions, weekend shopping, or outdoor lunches.
Its balanced length makes it easy to dress up or down with the accessories you choose, allowing you to enjoy handcrafted fashion more often.
Balance Comfort with Elegance
Luxury fashion should feel as comfortable as it looks. When selecting macrame dresses, pay attention to how the garment fits, moves, and adapts to different environments.
A well-designed dress should allow natural movement without feeling restrictive. Adjustable straps, thoughtfully placed linings, and breathable construction all contribute to a comfortable wearing experience.
The weight of the garment is another important consideration. While detailed knotwork creates visual appeal, the dress should remain lightweight enough for extended wear, especially during warmer seasons.
Investing in comfort ensures your macrame dress becomes a favorite piece rather than one reserved only for occasional use.
Pay Attention to Handmade Details
The finest macrame clothing distinguishes itself through exceptional attention to detail. Every handcrafted element contributes to the overall character of the garment, making close inspection worthwhile before making a purchase.
Look for consistency in the knot patterns, smooth finishing, and carefully integrated decorative elements. Balanced symmetry and clean edges often indicate experienced craftsmanship and meticulous quality control.
Decorative features such as fringe, layered textures, or geometric motifs should feel intentional rather than excessive. High-quality handmade fashion embraces artistry while maintaining wearability, ensuring the finished piece remains elegant from every angle.
Thoughtful craftsmanship also contributes to durability, allowing your dress to retain its beauty through repeated wear with proper care.
Preserve the Beauty of Handmade Macrame
Proper care helps maintain the intricate appearance of handcrafted garments for years to come. Because macrame relies on detailed knotwork rather than conventional stitching alone, gentle handling is essential.
Whenever possible, follow the care instructions provided by the designer. Hand washing or using delicate cleaning methods often protects both the fibers and the handcrafted structure of the garment.
Allow the dress to air dry naturally rather than exposing it to excessive heat, which may affect the shape of certain natural fibers. When storing your macrame pieces, keep them in a cool, dry space away from prolonged direct sunlight to preserve both color and texture.
With consistent care, a beautifully handcrafted macrame dress can remain a cherished part of your wardrobe for many seasons.
Build a Wardrobe Around Timeless Pieces
Fashion trends change from season to season, but thoughtfully selected handcrafted garments continue to offer lasting value. Instead of purchasing numerous trend-driven items, many women prefer investing in versatile pieces that can be styled in multiple ways.
A carefully curated wardrobe might include a flowing macrame maxi dress for formal occasions, a comfortable macrame midi dress for everyday elegance, and a lightweight macrame beach dress for holidays and resort wear. Together, these styles provide flexibility while maintaining a cohesive aesthetic.
Choosing timeless designs also encourages more mindful fashion decisions. Handcrafted pieces often remain relevant for years, making them worthwhile additions to a collection built around quality rather than quantity.
Avoid These Common Mistakes When Buying Macrame Dresses
A beautifully handcrafted dress deserves careful consideration before making a purchase. While style is important, overlooking practical details can result in a piece that spends more time in the wardrobe than being worn.
One common mistake is focusing only on appearance without considering the occasion. A dramatic macrame fringe dress may be perfect for festivals or fashion events, while a refined macrame midi dress or elegant macrame gown is often better suited for formal gatherings. Matching the design to your lifestyle ensures greater versatility.
Another mistake is ignoring craftsmanship. Handmade fashion should display consistent knotwork, secure finishing, and quality materials. These details influence not only the appearance of the garment but also its durability over time.
Finally, avoid choosing a dress simply because it follows a trend. The most valuable additions to your wardrobe are pieces that reflect your personality and remain stylish long after seasonal fashions have changed.
Invest in Quality Instead of Quantity
Building a wardrobe filled with timeless pieces often provides greater value than purchasing multiple trend-driven garments. Handcrafted macrame dresses are designed with artistry and attention to detail, making them suitable for repeated wear across different occasions.
A carefully made dress can transition effortlessly from daytime elegance to evening sophistication with only minor styling changes. This versatility reduces the need for multiple outfits while allowing you to enjoy a distinctive handcrafted look.
Quality also extends beyond appearance. Premium materials, thoughtful construction, and skilled craftsmanship contribute to a garment that maintains its beauty and structure for years with proper care.
Choosing fewer, higher-quality pieces encourages a more intentional approach to fashion while supporting craftsmanship that values creativity over mass production.
Express Your Individual Style with Confidence
Fashion is one of the most personal forms of self-expression, and handcrafted macrame offers an opportunity to wear something truly distinctive. Every knot, texture, and silhouette contributes to a design that feels unique rather than ordinary.
Whether your preference leans toward understated elegance or bold statement pieces, there is a macrame style that complements your personality. Some people are naturally drawn to flowing boho macrame dress designs with relaxed movement, while others prefer structured silhouettes that deliver a contemporary, refined appearance.
Confidence comes from wearing clothing that feels authentic to your style rather than simply following current trends. Selecting a dress that aligns with your lifestyle makes it easier to wear it often and enjoy it for years.
Why Handcrafted Macrame Fashion Stands Apart
The appeal of handcrafted fashion lies in the dedication behind every finished piece. Unlike factory-produced garments, macrame requires patience, precision, and skilled craftsmanship that transforms simple fibers into wearable works of art.
Every dress macrame design reflects countless hours of careful hand-knotting, creating textures and patterns that cannot easily be replicated by machines. This level of detail gives each garment its own character while celebrating traditional artisan techniques.
Handmade fashion also promotes a deeper appreciation for quality. Rather than producing large quantities of identical garments, artisans focus on creating pieces that emphasize originality, durability, and timeless design.
For those who value craftsmanship and thoughtful design, macrame represents more than clothing—it becomes an expression of creativity and individuality.
Choosing the Right Piece for Your Collection
As your appreciation for handcrafted fashion grows, you may wish to build a collection that suits different occasions throughout the year. Selecting complementary styles allows you to enjoy the versatility of macrame while maintaining a cohesive wardrobe.
A lightweight macrame beach dress is ideal for tropical holidays and resort escapes, while a sophisticated macrame maxi dress offers elegance for weddings and evening celebrations. Adding a versatile macrame midi dress provides an option that works equally well for daytime outings and casual events.
If you enjoy fashion with movement and artistic detail, a macrame fringe dress can become a standout piece for creative gatherings and celebrations. Together, these styles create a wardrobe that combines practicality with timeless elegance.
Rather than purchasing multiple similar garments, focus on selecting designs that each serve a distinct purpose. This approach maximizes versatility while allowing every handcrafted piece to shine.
Final Thoughts
Finding the perfect macrame dresses begins with understanding your personal style, choosing designs that suit your lifestyle, and appreciating the craftsmanship behind every garment. From relaxed resort wear to sophisticated evening attire, handcrafted macrame offers remarkable versatility without sacrificing elegance.
Whether you are looking for refined macrame clothing, a flowing macrame gown, or a beautifully detailed boho macrame dress, selecting high-quality handmade designs ensures your wardrobe reflects both artistry and individuality.
At OMG Macrame, every collection celebrates timeless craftsmanship, luxurious materials, and distinctive design. By investing in thoughtfully created macrame fashion, you choose clothing that tells a story, inspires confidence, and remains beautiful season after season.
Frequently Asked Questions
What makes macrame dresses different from traditional dresses?
Macrame dresses are created using intricate hand-knotting techniques rather than relying solely on conventional sewing methods. This handcrafted approach produces distinctive textures, artistic patterns, and unique designs that make every piece feel special.
Can I wear a macrame beach dress away from the beach?
Yes. A macrame beach dress can easily transition beyond the shoreline when paired with a slip, stylish sandals, and understated accessories. Many designs work beautifully for vacations, outdoor lunches, and casual summer events.
Is a macrame maxi dress suitable for formal occasions?
Absolutely. A well-crafted macrame maxi dress is an elegant choice for weddings, evening receptions, destination celebrations, and upscale resort events. Its flowing silhouette and handcrafted details create a sophisticated appearance.
How should I care for handmade macrame clothing?
Most macrame clothing benefits from gentle hand washing or delicate cleaning methods. Always follow the care instructions provided with the garment, allow it to air dry naturally, and store it in a cool, dry place to help preserve its craftsmanship.
Which macrame dress is the most versatile?
A macrame midi dress is often considered the most versatile option because it can be styled for casual outings, vacations, brunches, and semi-formal occasions. With different accessories, it easily adapts to a variety of settings.
What accessories pair best with a boho macrame dress?
Natural materials such as woven handbags, leather sandals, delicate jewelry, and straw hats complement a boho macrame dress beautifully. Keeping accessories simple allows the handcrafted knotwork to remain the focal point of your outfit.
How do I know if a macrame dress is handcrafted?
A handcrafted dress macrame design typically features consistent knot patterns, carefully finished edges, and intricate details that reflect skilled artisan work. These characteristics distinguish handmade garments from mass-produced alternatives.
Are macrame dresses comfortable for warm weather?
Yes. Many macrame dresses are designed using breathable materials and open knot patterns that promote airflow, making them an excellent choice for warm climates, summer events, and tropical vacations.


5 Easy Ways To Hide Thinning Hair
The five most effective investments for thinning hair are a sulfate-free shampoo routine, a silk or satin pillowcase, a quality detangling brush, a professional scalp consultation, and a high-quality human hair wig, with the hairpieces delivering the only same-day result. Most beauty advice stops at dry shampoo and root spray, which act as daily band-aids that last a few hours before needing reapplication.
These five investments operate differently because they address the structural problem directly without requiring significant ongoing effort. Replacing daily frustration with lasting solutions starts with small adjustments to what touches your hair every day and ends with options that change appearance instantly.
For individuals seeking an immediate transformation rather than waiting months on gradual routines, securing silky human hair wigs from Daniel Alain bypasses the waiting period entirely. While the first four steps build a foundation for long-term strand health, a premium wig stands as the single fastest method to restore complete volume.
1. A Gentle, Sulfate-Free Shampoo and Scalp Care Routine
Sulfates act as the primary detergent agents in most standard shampoos, but they strip the protective sebum layer on every single wash. This leaves follicles vulnerable and makes existing strands far more prone to snapping near the root, particularly for the estimated 11.3 per cent of women who recently used chemical straighteners or relaxers.
For hair that is already thinning, this chemical stress compounds over time and accelerates the visible breakage rate. Switching to a sulfate-free formula reduces that damage cycle without requiring extra steps in your morning shower.
Scalp care functions as the structural foundation of hair health rather than a separate chore. Gentle circular massage during shampooing stimulates blood circulation to the follicles, keeping the environment active and clean without over-stripping essential moisture.
Wash with lukewarm water to prevent the cuticle from opening unnecessarily, and pat your hair dry instead of rubbing it. Towel friction on wet, fragile strands stands as a measurable cause of additional breakage, making a gentle pat-down a highly effective preventative measure.
2. A Silk or Satin Pillowcase
Cotton pillowcases generate high levels of friction across multiple hours of nightly movement. This material snags individual strands and pulls at the hair shaft repeatedly before morning arrives. Thinning hair remains disproportionately vulnerable to this specific mechanical stress because each strand is finer and structurally weaker than normal.
Silk and satin surfaces reduce that friction significantly, minimise overnight tangling, and help the shaft retain moisture rather than losing it to a highly absorbent cotton weave.
Upgrading your bedding counts as a one-time purchase that requires zero technique, allowing the material to do all the protective work passively while you sleep. While a smooth surface cannot reverse existing loss, it actively stops the avoidable overnight snapping that accelerates visual thinning.
| Key Insight: A silk pillowcase is the ultimate solution, providing hours of passive protection every night without changing a single step of your routine. |
3. A Quality Detangling Brush
Aggressive brushing stands out as one of the most preventable causes of additional hair loss, particularly on damp hair. Standard brushes with densely packed, rigid bristles apply uneven tension across the shaft and snap fragile sections rather than releasing the knot.
A tool designed specifically for fine profiles uses flexible bristles with wider spacing between tines. This scattered layout distributes tension evenly and works through complex knots without forcing or snapping the fibre.
Always detangle from the ends upward toward the roots to avoid dragging a tight knot downward through the entire length of the strand. Starting at the base multiplies breakage points and maximises tension on the weakest parts of the hair. Working patiently from the ends up removes tangles before they escalate into points of concentrated force.
4. A Professional Scalp Treatment or Consultation
Hair thinning stems from multiple distinct causes, including hormonal fluctuations, nutritional deficiencies, and chronic scalp conditions like seborrheic dermatitis. In fact, female pattern hair loss is the most common form of alopecia in women.
No single over-the-counter scalp serum possesses the chemical ability to address all of these underlying factors simultaneously. Booking a clinical consultation provides an accurate baseline rather than relying on guesswork, especially since over 50 per cent of women develop some element of female pattern hair loss by age 79.
A dermatologist evaluates the internal medical picture, while a trichologist focuses specifically on local cellular health at the follicle level. Once a specialist identifies the specific trigger, in-salon professional treatments can complement a clinical care plan effectively.
Providers frequently use targeted scalp exfoliation to clear follicle-blocking keratin buildup, or they apply growth serums containing active peptides. These clinical interventions work best when layered onto a confirmed medical diagnosis, functioning as targeted medical solutions rather than generic beauty treatments.
| Important: Guessing at the cause of your thinning hair is an expensive gamble. A professional diagnosis ensures you aren’t wasting time and money on treatments that won’t work. |
5. A Human Hair Wig for Immediate Transformation
For anyone unwilling to wait months for gradual improvement, a premium hairpiece delivers complete volume from the first day of application. You no longer need to spend mornings managing sparse coverage, checking mirrors for awkward gaps, or reapplying texture sprays mid-afternoon. The visual difference between a medical-grade piece and a lower-tier option depends entirely on material quality, cap construction, and sizing accuracy.
Natural human hair moves fluidly, responds predictably to heat styling with a flat iron, and behaves exactly like biological growth. Synthetic fibres simply cannot replicate that organic movement or heat tolerance regardless of the manufacturing technique. Cap construction determines whether a hairpiece looks purchased or completely undetectable under bright lighting.
Hand-tied manufacturing means artisans knot each strand manually to a soft base cap, creating natural multidirectional movement and a realistic parting line. This labour-intensive technique avoids the flat, bulky appearance commonly associated with older machine-wefted alternatives. Custom colour matching and precise anatomical sizing ensure the piece fits securely while matching the wearer’s authentic base tone.
| Pro Tip: Only a high-quality, hand-tied human hair wig delivers a complete, same-day transformation that looks undetectable. Forget the wait; this is for results now. |
The Bottom Line
A sulfate-free shampoo routine, a silk pillowcase, and a flexible detangling brush establish a reliable daily foundation that blocks preventable mechanical damage. Seeking a professional clinical consultation provides the diagnostic accuracy required to avoid wasting capital on ineffective masking products.
Finally, choosing a hand-tied human hair wig provides the only solution capable of generating immediate, fully visible density without a waiting period.
Frequently Asked Questions
What is the most effective hair thinning solution for immediate results?
A high-quality human hair wig featuring hand-tied cap construction delivers the fastest transformation currently available on the market. This specific structural build removes the need to wait on gradual topical treatments or multi-month clinical regimens.
Selecting real human hair over synthetic blends guarantees realistic movement, heat styling versatility, and long-term durability for daily wearers.
Can a scalp care routine actually slow down hair thinning?
Consistently reducing chemical and mechanical stress through sulfate-free cleansers measurably lowers the overall breakage rate across the strand lifecycle. While gentle handling cannot reverse genetic loss, eliminating harsh detergent exposure and aggressive towel friction removes two common contributors to accelerated damage.
For many women, adopting these gentle washing practices successfully slows the visible progression of volume loss.
How do I know if a wig is good quality?
Three distinct construction markers separate a premium garment from a standard synthetic option. Shoppers should look for pure biological hair, hand-tied manual knotting techniques, and customised sizing frameworks.
These specific manufacturing standards control how realistic the hairline appears and dictate how comfortable the base cap feels during demanding wear sessions.
Is a silk pillowcase actually worth it for thinning hair?
A silk or satin pillowcase represents one of the most effective, low-effort protections available for structurally compromised follicles. The smooth material reduces nightly friction and static accumulation entirely passively, requiring zero active morning styling technique.
This compounding nightly protection proves highly valuable for fragile strands because it targets a long block of time where no other protective product actively works.
| Author Profile: Daniel Alain is the leading manufacturer and supplier of premium European human hair wigs and toppers for women experiencing hair loss. |

Luxury can often be mistaken for exclusivity, hype, or short-lived trends. Yet the finest watches are rarely defined by what is fashionable at a particular moment. Instead, they earn their place through craftsmanship, timeless design, and enduring value. This philosophy has been at the heart of King Seiko since it first emerged in the 1960s.
Originally developed during a period of intense innovation within Japanese watchmaking, King Seiko represented Seiko’s pursuit of precision, refinement, and sophisticated design. Decades later, the collection continues to embody these values through carefully crafted mechanical timepieces that prioritize longevity, reliability, and timelessness.
A King Seiko Luxury Wrist Watch offers something increasingly rare: a watch designed to remain relevant as the years pass. King Seiko focuses on clean proportions, exceptional finishing, reliable mechanical movements, and cultural inspiration from its rich heritage. Today, we’re looking at three standout pieces from the King Seiko collection that will stand the test of time.
King Seiko KSK SJE091J1: A Pure Expression of King Seiko Elegance
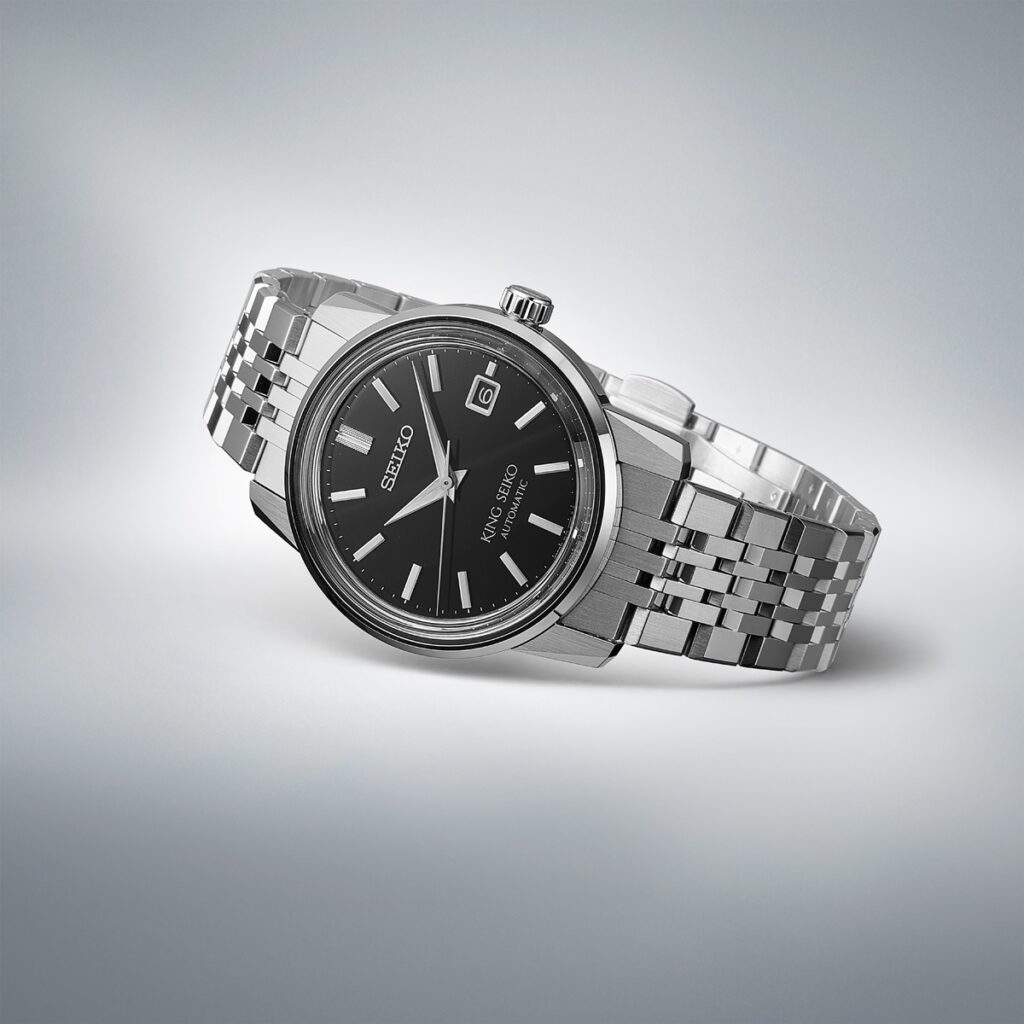
The King Seiko SJE091 is a modern interpretation of the original 1965 KSK models, highlighting the brand’s simplicity and craftsmanship through its clean, sharp aesthetic.
The minimalist proportions and high-level finishing are evident in the 38.6 mm-diameter, 10.7 mm-thick stainless steel case. The case has a mixture of brushed and mirror-polished surfaces for a dynamic look, a simple design, a screw caseback with the traditional King Seiko emblem for 5-bar water resistance, and a box-shaped sapphire crystal with an anti-reflective coating to enhance its vintage aesthetic.
This simplicity through artistry carries over to the dial of the SJE091J1, which features a cool, deep black that contrasts well with the faceted Dauphine hands and applied markers. It also retains the iconic knurled pattern for the 12 o’clock marker. Inside the SJE091J1 is Seiko’s Caliber 6L35, a slim automatic movement with manual winding and hacking seconds functionality, a date display, and approximately 45 hours of power reserve.
The SJE091J1 epitomizes the classic men’s watch that will never feel dated and will naturally stand out whether dressed up or down, thanks to its understated and elegant look that is undoubtedly King Seiko.
King Seiko KSK SJE103J1: Reimagining Tradition Through Color
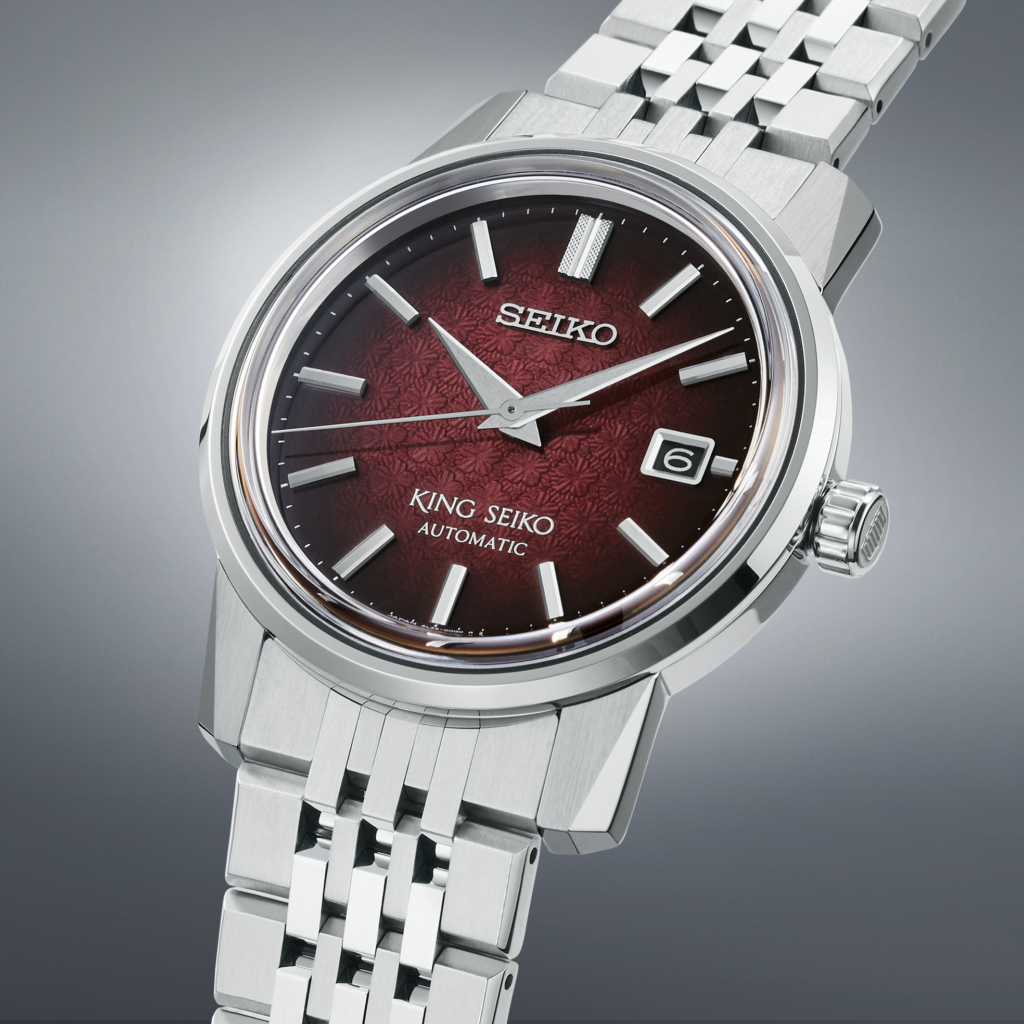
If you want something bolder while still keeping things classy, the SJE103J1 is just that and more. While the SJE091J1 speaks through restraint, the SJE103J1 is a heritage-rich piece that highlights the colorful possibilities for an iconic silhouette.
The SJE103J1 has the same specs as the SJE091J1: a 38.6mm-diameter stainless steel case with a 10.7mm thickness, a box-shaped sapphire crystal with anti-reflective coating, faceted lugs, brushed and polished surfaces on the case, and a screw caseback with the King Seiko emblem to secure the movement, giving the watch a 5-bar water resistance.
The SJE103J1 also runs on the Caliber 6L35, a slim-high precision automatic movement by Seiko. This workhorse movement allows the watch to have a date display, manual hacking and winding seconds, and approximately 45 hours of power reserve.
What clearly sets the SJE103J1 apart from the established King Seiko timepieces inspired by older references is its dial. The SJE103J1 features a bold plum-red “Garyu-bai” dial inspired by the plum orchards of Kameido, Tokyo, the birthplace of King Seiko. It has five-petaled Japanese plum blossom motifs all over the dial, which is also inspired by traditional ukiyo-e prints. These geometric patterns are complemented by faceted markers and Dauphine hands, including the knurled pattern at the 12 o’clock marker.
The boldness of the SJE103J1 has the rich heritage of King Seiko as its backdrop, which is why this timepiece is a perfect choice for those who appreciate artistic expression that balances tradition and modernity perfectly.
King Seiko KSK SJE105J1: An Homage to Seiko’s Birthplace
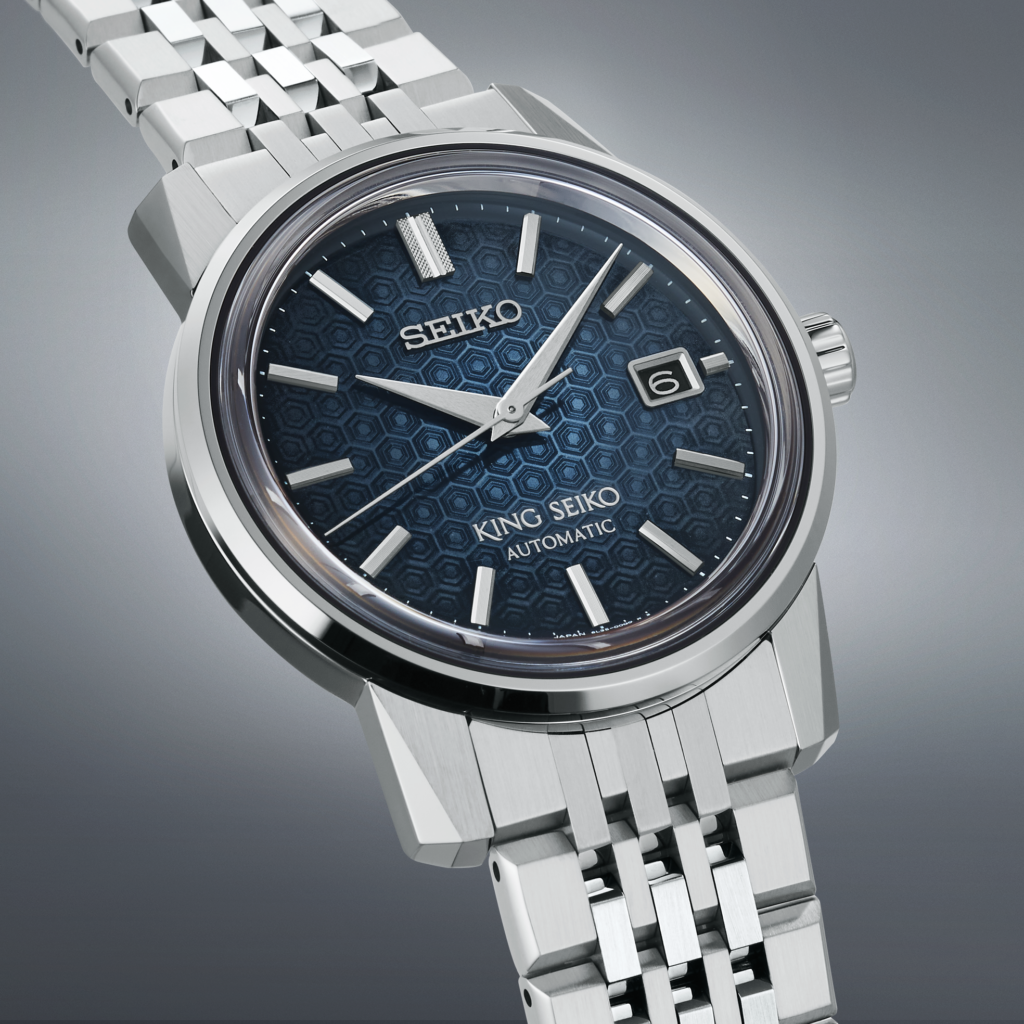
The King Seiko SJE105J1 is another heritage-inspired timepiece, this time with a subtler take on Seiko’s origins.
The SJE105J1 also features a 38.6mm-diameter, 10.7mm-thick stainless steel case. The case retains the sharp faceted lugs, brushed and polished surfaces, a slim profile, and a box-shaped sapphire crystal with anti-reflective coating for that neo-vintage appeal. The screw caseback also has the classic King Seiko emblem and allows for a 5-bar water resistance.
Like its siblings, the SJE0105J1 also runs on Seiko’s Caliber 6L35 movement. This slim automatic movement gives the watch approximately 45 hours of power reserve, a date display, and manual hacking and winding seconds.
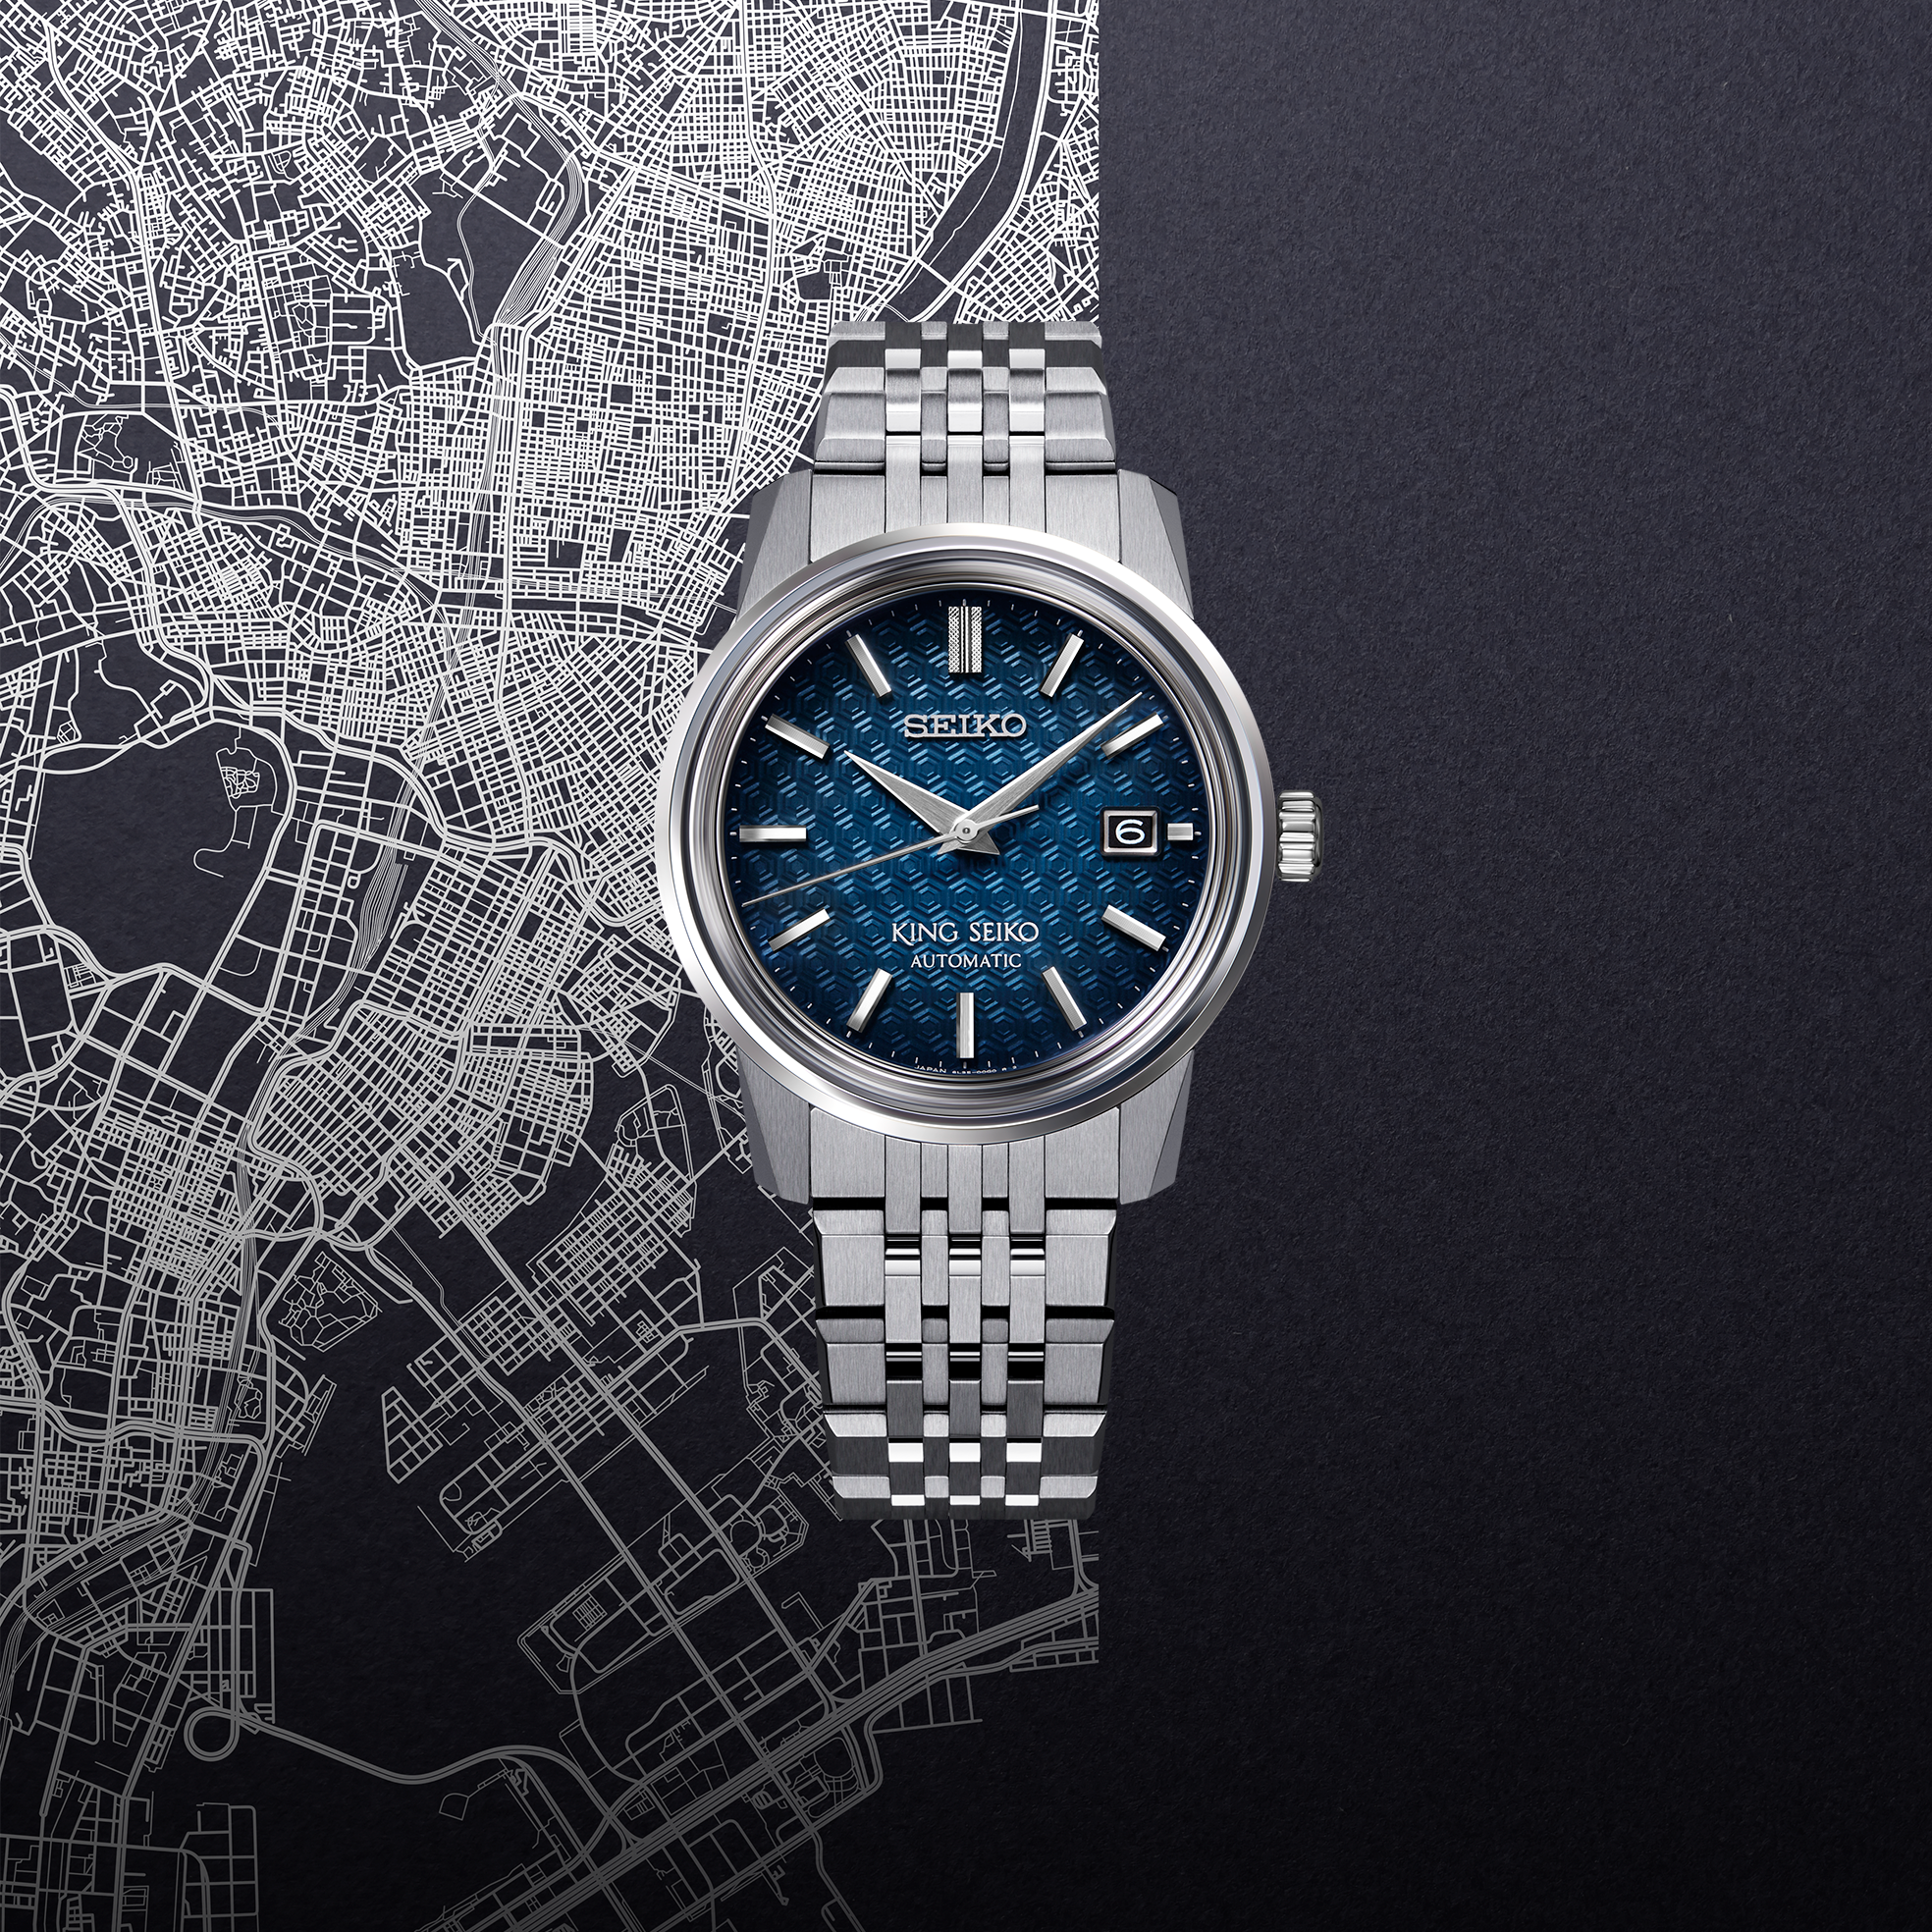
The standout characteristic of the SJE105J1 is its dial. The deep blue dial is backed by geometric turtle-shell patterns inspired by Kameido-Kikko motifs. The blue hues are reminiscent of the Sumida River near the Kameido district, which is the birthplace of Seiko. Contrasting with the deep blue dial are diamond-cut Dauphine hands and applied markers, enhancing legibility while still giving the watch a clean, elegant look.
The SJE105J1 perfectly captures the compelling timelessness of King Seiko watches. These luxury Japanese timepieces are culturally and historically inspired and highlights the meticulous craftsmanship of King Seiko while mixing in the right amount of modern appeal.
A Smart Investment in Long-Term Luxury
Choosing a luxury watch is ultimately about selecting something that will remain meaningful long after current trends have disappeared. King Seiko understands this better than most brands. Its modern KSK collection demonstrates how heritage, craftsmanship, and thoughtful design can create watches that continue to reward ownership year after year.
For collectors seeking a King Seiko Luxury Wrist Watch with genuine long-term value, these references prove that timeless design will always outlast trends.

Buggy Ride Dubai: Complete Prices, Types, and Booking Guide

How to Use Nipple Cream for Comfortable Pumping

The Best Moth Treatment Companies in the UK: Our 2026 Picks

Spray Adhesive vs Traditional Glue: Which Is Better for Carpet Installation?

How HDMI RF Modulator Performance Depends on Alumina Density

Apex Answer Bot: Student Guide to Knowing Its Features Before Using It

The 15 Highest-Paid Rugby Players in the World

Christopher Dare: The Untold Story of Engineer and Former Husband of Angela Rippon

How to Ensure Your Home is Valued Correctly for a Quick Sale

Nancy Hallam: The Inspiring Life, Career, and Success Story Behind Ian Wright’s Wife

Who Is Maisie Mae Roffey? The Private Life, Family Story, and Quiet Success of Julie Walters’ Daughter

Simon Dixon Biography: Lifestyle, Net Worth, Family, Career and Success Story
The 15 Highest-Paid Rugby Players in the World
Christopher Dare: The Untold Story of Engineer and Former Husband of Angela Rippon
How to Ensure Your Home is Valued Correctly for a Quick Sale
Nancy Hallam: The Inspiring Life, Career, and Success Story Behind Ian Wright’s Wife
Who Is Maisie Mae Roffey? The Private Life, Family Story, and Quiet Success of Julie Walters’ Daughter
Simon Dixon Biography: Lifestyle, Net Worth, Family, Career and Success Story
-
 Sports2 months ago
The 15 Highest-Paid Rugby Players in the World
-
Celebrity8 months ago
Christopher Dare: The Untold Story of Engineer and Former Husband of Angela Rippon
-
 Real Estate6 months ago
How to Ensure Your Home is Valued Correctly for a Quick Sale
-
Celebrity9 months ago
Nancy Hallam: The Inspiring Life, Career, and Success Story Behind Ian Wright’s Wife
-
Celebrity8 months ago
Who Is Maisie Mae Roffey? The Private Life, Family Story, and Quiet Success of Julie Walters’ Daughter
-
Business8 months ago
Simon Dixon Biography: Lifestyle, Net Worth, Family, Career and Success Story
-
 Celebrity9 months ago
Johnny Carell: Inside the Life, Family, and Rising Success of Steve Carell’s Son
-
 Celebrity7 months ago
Draven Duncan: Tim Duncan’s Rising Star Son and His Inspiring Basketball Journey