
Home Improvement
Why Interior Blinds May Not Be Enough for Summer Heat?

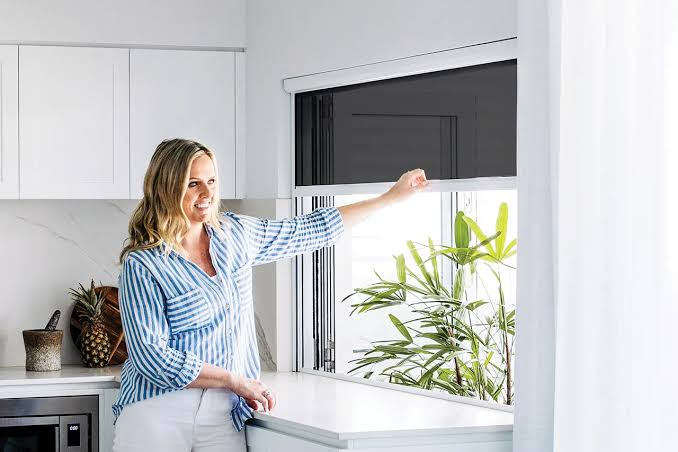
When summer heat builds up indoors, many homeowners instinctively close the curtains or pull down interior blinds. It helps a little, but often not enough. Rooms with large windows, glass doors, conservatories, or south-facing glazing can still feel hot, stuffy, and uncomfortable. The reason is simple: once sunlight passes through the glass, much of the heat is already inside. This article looks at why interior blinds have limits and when external shading can be a more effective solution.
Interior blinds control light, but not always heat
Interior blinds are excellent for privacy, glare reduction, and everyday light control. They can soften harsh sunlight, protect screens from reflections, and make a room feel more comfortable visually. However, they sit behind the glass, so they deal with heat after it has already entered the room.
In summer, comfort is often about combining shade with airflow. For example, solutions such as roller fly screens for windows can help homeowners keep windows open for ventilation while reducing the inconvenience of insects. But when the main issue is solar heat through the glass, shading the window from the outside can make a bigger difference.
Why external roller blinds work differently
External roller blinds are fitted outside the window, where they block or reduce sunlight before it reaches the glass. This helps limit heat gain at the source. Instead of trying to cool down a room after it has warmed up, external shading helps prevent the room from overheating in the first place.
This can be especially useful for patios, balconies, large windows, garden rooms, and glazed extensions. In these spaces, summer heat can affect not only comfort but also furniture, flooring, and daily use of the room. Reducing direct sun exposure can help protect interiors from UV damage and make the space easier to enjoy during warmer months.
When interior blinds may still be enough
Interior blinds are still a smart choice in many situations. Bedrooms, offices, and smaller rooms may only need good light control, privacy, or blackout performance. If the window does not receive strong direct sun, an interior blind may provide the right balance of function and style.
When to consider external shading
External roller blinds become more valuable when heat is the main problem. If a room regularly feels too warm, air conditioning works harder, or sunlight makes the space unusable at certain times of day, interior blinds may not solve the issue alone.
The best shading choice is not always the one that looks good when the weather is mild. It is the one that still works when the sun is at its strongest, and the room is being tested by real summer conditions.



When undertaking a home makeover, choosing the right furnishings is paramount to achieving the desired aesthetic and atmosphere. For residents and professionals in the region, the option to hire furniture in Sydney offers flexibility, style, and convenience. This guide explores the key considerations and benefits associated with furniture hire services in Sydney to ensure a successful and stylish home transformation.
Understanding Furniture Hire Services
Furniture hire services provide the opportunity to rent quality furniture pieces for short or long-term periods. This is particularly advantageous for those who seek to refresh their home’s appearance without committing to permanent purchases. In Sydney, a diverse range of hire options is available to cater to different styles, budgets, and project scopes.
Advantages of Hiring Furniture in Sydney
Hiring furniture instead of purchasing new items presents several benefits. Primarily, it allows homeowners and designers to experiment with various designs and layouts without the financial burden of ownership. Furthermore, hiring furniture is an environmentally responsible choice, reducing waste and encouraging the reuse of quality products.
Styling a home for sale or staging an investment property is a common reason to utilise furniture hire services. This approach enables the creation of a welcoming environment that appeals to potential buyers or tenants without the need for permanent changes to the property.
Factors to Consider When Renting Furniture
When selecting furniture hire options in Sydney, it is important to consider the size and layout of the space. Measuring rooms accurately and determining the function of each area helps in choosing adaptable and proportionate furnishings.
Quality and style are also critical factors. It is recommended to choose furniture pieces that complement the architectural features of the home and adhere to the intended design theme, be it modern minimalism, classic elegance, or contemporary comfort.
Popular Furniture Pieces for Hire in Sydney
Available hire items typically range from essential seating such as sofas and chairs to dining sets, bedroom furniture, and decorative accessories. These elements collectively contribute to a cohesive look and can be customised according to specific requirements.
Cost Implications and Budget Planning
The cost of hiring furniture is influenced by the type and quantity of items required, duration of the hire, and service provider rates. Setting a clear budget at the outset allows for efficient selection within financial parameters.
Many hire companies in Sydney offer flexible packages that include delivery, setup, and pick-up services, ensuring a hassle-free experience for clients.
Planning for Delivery and Installation
Coordinating the timing of furniture delivery with other renovation or styling activities is essential to avoid delays. Professional furniture hire providers often assist with assembly and placement, ensuring that the hired items enhance the space effectively.
Understanding Terms and Conditions
Clients should carefully review the hire agreement to comprehend responsibilities relating to maintenance, damage liability, and cancellation policies. Clear communication with the service provider helps prevent misunderstandings and ensures a smooth process.
Environmental Considerations
Furniture hire supports sustainable practices by promoting reuse and reducing the demand for new furniture production. Homeowners engaging in furniture rental contribute to a more circular economy and lower environmental impact.
Choosing a Reputable Furniture Hire Service in Sydney
Selecting an experienced and trustworthy hire service is integral to a successful home makeover. Checking customer reviews, service portfolios, and company credentials provides insight into reliability and quality assurance.
Many Sydney-based providers offer curated collections tailored to different interior design styles, equipped to serve both residential and commercial clients.
Integration with Property Styling Services
Hiring furniture is often part of a broader property styling strategy. Professional stylists combine rented items with existing features to create inviting interiors that resonate with target audiences.
Clients seeking comprehensive solutions benefit from hiring furniture as well as engaging styling experts who understand market trends and buyer preferences.
Customisation and Flexibility
Furniture hire arrangements in Sydney commonly allow for modifications, such as swapping pieces or altering rental periods. This adaptability supports dynamic styling needs and project evolution.
Maintenance Tips for Hired Furniture
Although furniture hire companies maintain their inventory, clients are encouraged to handle rented items with care, avoid spills or damage, and report any issues promptly. Proper management preserves the condition of the furniture and avoids additional charges.
Case Studies of Successful Home Makeovers
Several Sydney homeowners and property developers have achieved remarkable results through furniture hire. By leveraging stylish pieces, they transformed spaces into appealing environments that contributed to swift sales or improved tenant satisfaction.
Conclusion
Hiring furniture in Sydney presents a practical and stylish solution for home makeovers, staging, and interior refreshment. With an array of options, expert guidance, and flexible arrangements, clients can transform their living spaces efficiently while managing costs and sustainability.
For those embarking on a home makeover journey, engaging a reputable furniture hire service offers the advantage of professional quality at manageable investment, ultimately enhancing the overall aesthetic and functionality of the property.
Home Improvement
Drain Unblocking London: How to Clear Problems Properly and Prevent Repeat Blockages


A blocked drain can become disruptive very quickly, especially in a busy London home or commercial property where several fixtures may depend on the same drainage line. Slow sinks, gurgling toilets, unpleasant smells and rising water are often the first signs that flow is restricted. The best response is not simply to force water through the pipe, but to understand where the blockage is, what caused it and whether the system has a deeper condition that could make the problem return.
Read the Symptoms Before Choosing a Method
The pattern of symptoms gives useful clues. A single slow basin may point to a local trap or short branch, while several affected fixtures can indicate a blockage deeper in the system. External gullies, inspection chambers and manholes can also help identify where flow stops. Taking a few minutes to understand this pattern can prevent unnecessary work and help the engineer choose the most suitable access point.
Professional drain unblocking London services are most useful when the engineer combines fast clearance with practical diagnosis. The objective should be to restore flow while also explaining whether the restriction was caused by grease, wipes, silt, roots, scale or a structural defect. That information matters because each cause has a different risk of returning and may require a different follow-up.
Reduce Water Use if the Drain Is Backing Up
If wastewater is rising, stop adding more water to the system where possible. Repeated flushing, running washing machines or emptying baths can increase pressure behind the blockage and create an overflow elsewhere. In a commercial setting, staff should know which facilities are affected so the problem is not unintentionally made worse while assistance is being arranged.
Where wastewater has escaped, hygiene becomes important. People should be kept away from contaminated areas, porous materials may need special cleaning and the flow problem should be controlled before normal use resumes. Fast action can reduce the amount of cleaning and disruption required afterwards.
Use the Right Clearance Technique
Different obstructions respond to different methods. Mechanical rods and specialist tools can remove local blockages, while high-pressure water jetting is often effective for grease, silt and deposits along a longer section of pipe. The engineer should choose equipment based on pipe material, condition, access and the suspected obstruction rather than using one technique automatically.
A good clearance aims to restore the full bore of the pipe rather than punch a narrow hole through the blockage. Partial openings may allow water to move again for a short time while leaving material around the edges that catches more debris and causes another restriction.
Be Careful With Chemical Products
Drain chemicals can sometimes help with a small local buildup, but they are not a reliable answer for roots, displaced joints, heavy scale or collapsed pipework. Repeated use can also create unpleasant working conditions for anyone who later opens the system. Persistent blockages deserve mechanical clearance or inspection rather than stronger and stronger chemical treatment.
If a product has already been used, the engineer should be told. This helps them choose equipment and personal protection appropriately and avoids unexpected exposure during clearance.
Investigate Repeat Blockages
A drain that blocks again in the same place is providing valuable information. Root ingress, poor gradient, damaged joints or a partially collapsed section can create a predictable catch point. Repeated unblocking without investigation may become more expensive than identifying and addressing the underlying cause.
A CCTV drain survey can be useful after the line has been cleaned because the camera can show whether the pipe is structurally sound. It can reveal cracks, roots, displaced joints and sections where deposits repeatedly collect. This is often the point where the difference between routine maintenance and repair becomes clear.
Consider Shared Drainage and Boundaries
London properties often have complex drainage layouts, and some pipes may serve more than one property. A blockage that appears to be inside one premises can sometimes sit on a shared run or a section beyond the immediate boundary. Understanding the route of the system helps clarify which access point to use and who may need to become involved if repair is required.
Inspection chambers and drain mapping can be especially useful where extensions, conversions or older alterations have changed the original layout. Clear information reduces unnecessary excavation and speeds up future maintenance.
Prevent Predictable Problems
Some blockages are avoidable. Fats and oils should not be poured into kitchen drains, wipes should be disposed of in bins and external gullies should be kept clear of leaves, soil and construction debris. These habits will not prevent structural defects, but they reduce the amount of material entering the system and make genuine drainage problems easier to diagnose.
Commercial sites may also benefit from planned cleaning where usage creates predictable buildup. A restaurant kitchen, busy office or multi-occupancy building can place much more demand on drainage than a lightly used home.
Keep a Simple Maintenance Record
A practical record of previous problems can save time later. Note when the blockage happened, which fixtures were affected, what method cleared it and whether the same section has failed before. This history can help an engineer recognise a pattern and decide whether further inspection is justified.
For managed properties, this information also supports maintenance planning and budgeting. Repeated emergency call-outs to the same section may indicate that a planned repair would offer better long-term value.
Choose a Contractor That Explains the Cause
A professional drainage company should provide more than temporary flow restoration. The engineer should explain what was found, what method was used and whether the pipe appears otherwise sound. Clients should also understand whether any further inspection or repair is necessary, optional or simply precautionary.
Working with Quick Clear Drainage or another experienced contractor should leave the property owner with a clearer understanding of both the immediate fix and the longer-term risk. The second-last consideration is whether the recommendation is proportionate to the evidence rather than based on a standard one-size-fits-all process.
Drainage problems are easier to manage when fast clearance is combined with accurate diagnosis. By reducing water use during a backup, using the right equipment, investigating repeat failures and keeping simple records, London property owners can reduce disruption and make more confident decisions about maintenance and repair Regular preventative checks can also identify developing issues before they become urgent, expensive or disruptive..
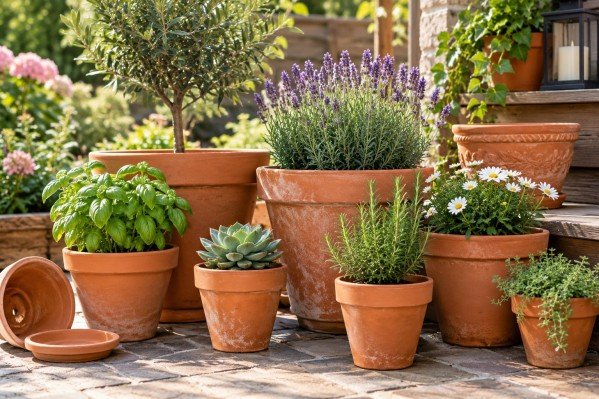
Terracotta pots are a classic choice for gardeners who value both aesthetics and functionality. Their warm, earthy tones complement any garden style while providing an ideal environment for plant health. When selecting containers for plants, it is essential to consider materials that allow for proper aeration and moisture regulation, qualities that terracotta pots excel in.
Gardeners seeking reliable and attractive planters often turn to Terracotta pots due to their long-standing reputation. These pots have been utilised across cultures for centuries, testament to their durability and timeless appeal. From Mediterranean courtyards to modern suburban gardens, terracotta remains a top choice.
Material Composition and Benefits
Terracotta pots are crafted from natural clay that is fired at a relatively low temperature. This process results in a porous, breathable container that facilitates the evaporation of excess moisture. This breathability reduces the risk of root rot by allowing air to circulate through the pot walls.
Furthermore, terracotta’s porous nature helps regulate soil temperature, preventing overheating during hotter months and insulating roots during cooler periods. This natural climate moderation supports healthier plant growth compared to plastic or ceramic alternatives.
Aesthetic Versatility
The distinct orange-brown hue of terracotta adds a rustic and organic feel to garden spaces. Their neutral yet warm colour enables them to blend harmoniously with diverse garden themes, from classic cottage gardens to contemporary minimalist designs.
Additionally, terracotta pots develop a charming patina over time, often characterised by subtle white mineral deposits. Many gardeners appreciate this weathered appearance as it enhances the character and natural feel of their garden.
Durability and Longevity
Despite their earthy appearance, terracotta pots are robust and can endure years of outdoor exposure when properly cared for. Their solid construction can withstand typical garden conditions, though protection from harsh frost is advisable to prevent cracking.
To extend their lifespan, it is recommended to avoid leaving terracotta pots waterlogged during cold spells. Lifting pots off the ground or storing them in a sheltered area during winter months can also minimise frost damage.
Drainage and Plant Health
Effective drainage is crucial for plant health, and terracotta pots generally feature drainage holes that prevent water accumulation. This design ensures excess water escapes, reducing the risk of root diseases caused by soggy soil.
Gardeners should ensure drainage holes remain unobstructed, and the pot is placed on a surface that allows for water outflow. Placing a saucer underneath can catch runoff while still enabling proper drainage.
Maintenance Tips for Terracotta Pots
Maintaining terracotta pots is straightforward. Cleaning them periodically to remove accumulated salts and debris prevents discoloration and prolongs their lifespan.
It is advisable to use a soft brush and mild detergent to clean the pots, avoiding harsh chemicals that might compromise the clay’s integrity. Allowing pots to dry thoroughly before reuse helps deter mould growth.
Suitable Plant Selections
Terracotta pots are suitable for a wide variety of plants, especially those that prefer well-drained soil such as succulents, herbs, and Mediterranean species like lavender and rosemary. Their breathability promotes healthy root systems, which is beneficial for plants susceptible to overwatering.
Gardeners may opt to use terracotta pots indoors or outdoors, mindful that indoor use might require additional care to manage moisture retention on surfaces beneath the pot.
Environmental Considerations
Terracotta pots are environmentally friendly as they are made from natural, non-toxic clay. Their production involves less energy compared to plastic alternatives, and they are fully biodegradable at the end of their life cycle.
Gardeners who prioritise sustainability often prefer terracotta pots due to these eco-conscious attributes.
Styles and Sizes Available
A broad range of terracotta pots is available to fit various gardening needs. From small seedling trays to large decorative planters, the versatility in size allows for creative garden design.
Some styles include traditional round pots, square containers, and ornate shapes featuring embossed patterns. These options provide gardeners with choices to suit both function and design preferences.
Conclusion
Overall, terracotta pots offer a blend of beauty, practicality, and environmental friendliness that makes them an excellent investment for any garden enthusiast. Their breathable material supports healthy plant growth while their timeless charm enhances garden aesthetics.
Choosing terracotta pots from reliable suppliers ensures gardeners receive high-quality clay pots that will serve their gardening needs for years to come. The combination of durability, natural appeal, and plant-friendly features makes terracotta pots a steadfast favourite.

Why Multi-Model AI Image Generation Marks the End of Multi-Tool Visual Production

The Realities of Electric Scooter Ownership: Battery Care, Maintenance and Everyday Running Costs

The Ultimate Guide to Women’s Sandals for Style and Comfort

Essential Guide to Hire Furniture in Sydney for Stylish Home Makeovers

Publishing AI-Assisted Drafts as PDFs: A Free Markdown Workflow with iBoomto

Spinal Alignment in Kuala Lumpur: What It Involves and What It Costs

The 15 Highest-Paid Rugby Players in the World

How to Ensure Your Home is Valued Correctly for a Quick Sale

Christopher Dare: The Untold Story of Engineer and Former Husband of Angela Rippon

What Is Fanquer? The Digital Creator Platform Transforming Direct-to-Fan Engagement

Dr Jared Ross: Missouri Appeals Court Upholds Protection Order Over Graphic Torture and Murder Threats

Nancy Hallam: The Inspiring Life, Career, and Success Story Behind Ian Wright’s Wife
The 15 Highest-Paid Rugby Players in the World
How to Ensure Your Home is Valued Correctly for a Quick Sale
Christopher Dare: The Untold Story of Engineer and Former Husband of Angela Rippon
What Is Fanquer? The Digital Creator Platform Transforming Direct-to-Fan Engagement
Dr Jared Ross: Missouri Appeals Court Upholds Protection Order Over Graphic Torture and Murder Threats
Nancy Hallam: The Inspiring Life, Career, and Success Story Behind Ian Wright’s Wife
-
 Sports5 months ago
The 15 Highest-Paid Rugby Players in the World
-
 Real Estate9 months ago
How to Ensure Your Home is Valued Correctly for a Quick Sale
-
Celebrity11 months ago
Christopher Dare: The Untold Story of Engineer and Former Husband of Angela Rippon
-
 Technology5 months ago
What Is Fanquer? The Digital Creator Platform Transforming Direct-to-Fan Engagement
-
 Celebrity5 months ago
Dr Jared Ross: Missouri Appeals Court Upholds Protection Order Over Graphic Torture and Murder Threats
-
Celebrity11 months ago
Nancy Hallam: The Inspiring Life, Career, and Success Story Behind Ian Wright’s Wife
-

 Celebrity8 months ago
Who Is Azriel Crews? Inside the Life and Career of Terry Crews’ Daughter
-

 Health9 months ago
Enclomimed 25 (Enclomiphene) – Effective PCT Protocol