
Tech
Best Budget Laser Engraver in the UK: Top Picks for DIYers and Small Businesses

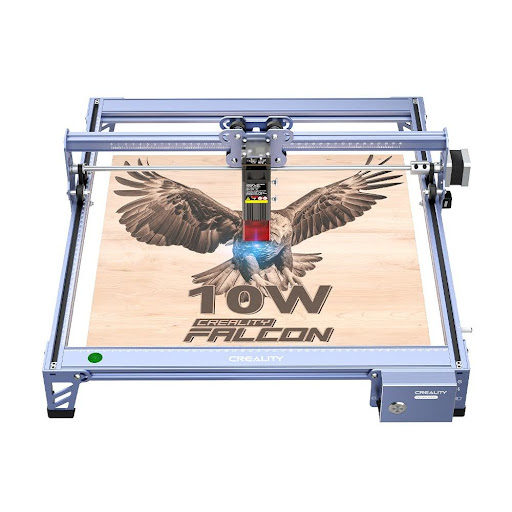
What Is the Best Budget Laser Engraver in the UK?
The best budget Laser Engraver in the UK is not always the cheapest machine available.
For most DIYers, hobbyists, and small business users, the right choice depends on material type, safety, software, work area, UK availability, and long-term support.
A diode laser engraver is usually the best starting point for beginners because it is more affordable, compact, and easier to set up.
A CO2 laser engraver costs more but is better for acrylic cutting, faster production, and more workshop-style projects.
For UK buyers, the most practical budget options usually come from brands such as xTool, OMTech, and Creality Falcon.
Other brands that UK buyers may compare include Sculpfun, AtomStack, and Glowforge.
Quick Answer: Best Budget Laser Engravers for UK Buyers
For most UK beginners, an enclosed diode laser is the safest and most practical starting point.
For users who want stronger cutting performance or acrylic capability, a compact CO2 laser makes more sense.
Recommended options include:
xTool S1: Best enclosed diode laser for beginners and hobby users.
Creality Falcon Falcon2 Pro: Best enclosed high-power diode option for serious hobby users.
Creality Falcon A1: Best compact beginner-friendly laser engraver.
OMTech Polar: Best budget-friendly desktop CO2 option for acrylic and workshop use.
xTool M1 Ultra: Best option for mixed-media craft users.
Understanding Your Budget Laser Engraving Needs
Before choosing a model, it is important to define what “budget” means for your use case.
A hobbyist who wants to engrave wooden gifts has very different needs from a small business owner producing acrylic signs or custom merchandise.
Budget laser engravers usually fall into two main types: diode lasers and entry-level CO2 lasers.
Diode lasers are generally more affordable and suitable for wood, leather, card, paper, coated metals, and some acrylic colours.
CO2 lasers usually cost more but perform better on clear acrylic, thicker materials, and cleaner cutting jobs.
If your main goal is engraving personalised gifts, a diode laser is usually enough.
If your main goal is cutting acrylic, making signage, or producing batches for a small business, a CO2 laser is usually the better long-term choice.
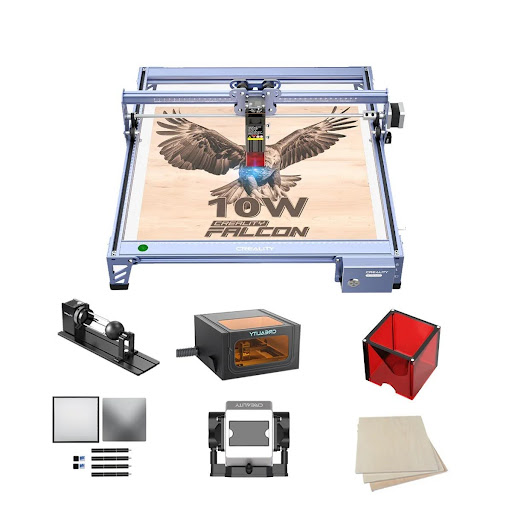
Best Budget Laser Engravers for UK Enthusiasts
The UK market has many affordable laser engravers, but not every low-cost machine is a good long-term purchase.
A strong budget laser engraver should offer a reasonable balance of safety, software compatibility, real material capability, spare part availability, and UK shipping support.
The following options are better aligned with UK buyers who want a practical machine for DIY projects, hobby use, or small business production.
xTool S1
The xTool S1 is a strong budget-friendly choice for UK users who want an enclosed diode laser with beginner-friendly controls.
It is available in different diode power options, including 10W, 20W, and 40W versions.
Compared with older open-frame diode machines, the xTool S1 is a more suitable recommendation for 2026 because it has an enclosed design, better safety positioning, and stronger everyday usability.
The S1 is a good fit for engraving wood, leather, card, coated metal tags, and personalised gifts.
It can also cut thinner wood and darker acrylic, depending on power and settings.
For UK hobby users, the biggest advantage is that it feels more controlled and less intimidating than an open-frame laser.
Best for:
Beginners
Home craft users
Personalised gift makers
Small workshop users
Users who want an enclosed diode laser
Strengths:
Enclosed design
Beginner-friendly workflow
Multiple power options
Suitable for wood, leather, card, and coated items
Software support through xTool Creative Space and LightBurn
Watch out for:
It is still a diode laser, so it is not the best option for clear acrylic cutting.
Creality Falcon Falcon2 Pro
The Creality Falcon Falcon2 Pro is a strong option for UK users who want more diode power while still keeping an enclosed setup.
It is more suitable for serious hobbyists, small craft sellers, and users who want to cut and engrave more regularly.
Compared with basic open-frame diode engravers, the Falcon2 Pro is better positioned for users who care about safety, visual positioning, and batch workflow.
The machine is especially suitable for wood cutting, leather engraving, darker acrylic, coated metal tags, and personalised craft products.
For users who want a stronger diode machine but are not ready to move into CO2 lasers, the Falcon2 Pro is a practical middle-ground choice.
Best for:
Serious hobby users
Wood cutting
Leather engraving
Small batch production
Indoor workshop setups
Strengths:
Enclosed design
Strong diode power options
Visual positioning support
Works with Falcon Design Space, LightBurn, and LaserGRBL
Good fit for craft production
Watch out for:
Like other diode lasers, it is not the best choice for clear acrylic or highly reflective materials.
Creality Falcon A1
The Creality Falcon A1 is a compact laser engraver designed for beginners and home users who want a simpler setup.
Creality’s official product information highlights features such as auto material detection, a built-in camera, no assembly, high-speed operation, and compact design, which makes it suitable for beginner-friendly workflows.(creality.com)
For UK users with limited workspace, the Falcon A1 is easier to place than larger machines.
It is a good fit for smaller personalised products such as coasters, gift tags, ornaments, leather patches, cards, and small wooden items.
It is not designed to replace a high-power CO2 laser, but it works well for users who prioritise convenience, alignment, and compact design.
Best for:
Beginners
Small UK homes
Compact craft spaces
Gift makers
Light engraving projects
Strengths:
Compact footprint
Beginner-friendly setup
Built-in camera support
Good for small personalised items
Suitable for light-duty engraving and cutting
Watch out for:
The working area and cutting power are more limited than larger diode or CO2 machines.
OMTech Polar
The OMTech Polar is a better choice for UK users who want a budget-friendly desktop CO2 laser rather than a diode machine.
OMTech’s UK laser application page describes the Polar as a desktop CO2 laser engraver for wood, acrylic, plastic, and similar materials, with a 510 × 300 mm processing area.(OMTech UK)
This makes it more suitable for acrylic cutting, signs, thicker materials, and small business workflows.
Compared with diode lasers, the OMTech Polar requires more setup planning, especially around ventilation, cooling, and workspace.
However, for users who want CO2 capability without moving into a large industrial cabinet machine, it is one of the more practical options.
Best for:
Acrylic projects
Sign makers
Workshop-minded users
Small business production
Users who want CO2 cutting capability
Strengths:
CO2 laser performance
Better acrylic cutting than diode lasers
Desktop-friendly format
Larger processing area than many compact diode machines
Suitable for workshop-style workflows
Watch out for:
UK buyers should check stock, warranty, plug type, shipping, and support terms before ordering.
xTool M1 Ultra
The xTool M1 Ultra is a good choice for users who want a flexible craft machine rather than a pure laser engraver.
It combines laser engraving with other creative functions such as blade cutting, pen drawing, and inkjet-style workflows.
This makes it useful for craft rooms, stickers, greeting cards, personalised gifts, labels, and mixed-media projects.
It is not the strongest option for thick cutting or acrylic-heavy production, but it can be more useful than a higher-power laser if your projects involve multiple craft processes.
Best for:
Craft rooms
Mixed-media projects
Personalised gifts
Card making
Light-duty engraving
Strengths:
Multi-function craft workflow
Compact design
Beginner-friendly software
Suitable for creative home projects
Good for users who do more than laser cutting
Watch out for:
It is less suitable for users whose main goal is strong cutting power.
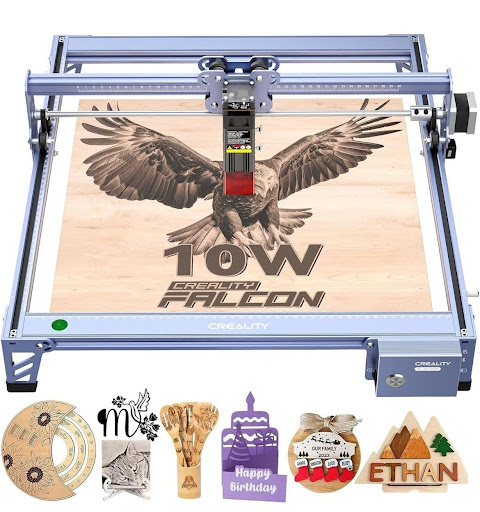
Why xTool D1 Is No Longer the Best 2026 Recommendation
The original draft recommended the xTool D1 as a top budget choice.
That made sense historically because the D1 and D1 Pro were popular diode laser engravers.
However, xTool’s UK site states that the D Series was discontinued effective January 1, 2025.(xTool UK Store)
For a 2026 buying guide, it is better to avoid recommending the xTool D1 as a main product unless the article is specifically discussing second-hand or legacy models.
A newer enclosed model such as the xTool S1 is a more stable recommendation for UK buyers.
Key Features to Consider for UK Buyers
When evaluating the best budget laser engraver in the UK, buyers should look beyond price.
A low upfront cost does not always mean better value.
The most important factors include work area, laser type, safety, software, material compatibility, UK availability, and after-sales support.
Work area matters because it determines the size of projects you can make.
A compact machine is easier to place in a home, but a larger work area is better for signs, templates, batches, and small business production.
Software compatibility is also important.
LightBurn is popular because it gives users more control over layouts and settings, but many brands also provide their own software.
Before buying, check whether key features such as camera positioning, autofocus, or smart material detection work inside your preferred software.
Safety should not be treated as optional.
For home use, an enclosed machine, emergency stop button, interlock system, air assist, and proper ventilation are all important.
What Materials Can Budget Laser Engravers Handle?
Most budget diode laser engravers are suitable for wood, leather, paper, card, cardboard, coated metals, and some acrylic colours.
They are popular for personalised gifts, wooden signs, craft products, leather tags, ornaments, and small business merchandise.
CO2 laser engravers are usually better for acrylic, glass engraving, cleaner cutting, and thicker material processing.
If you plan to cut clear acrylic regularly, a CO2 laser is usually the better choice.
Basic material guidance:
Wood: diode or CO2
Leather: diode or CO2
Paper and card: diode or CO2
Dark acrylic: diode or CO2
Clear acrylic: CO2
Glass engraving: CO2
Coated metal tags: diode, IR, or fiber depending on material
Bare metal marking: IR or fiber is usually more suitable
Budget buyers should avoid assuming that one laser can do everything.
Material colour, thickness, coating, and supplier differences can all affect results.
Safety Tips for Budget Laser Engravers in UK Homes
Budget laser engravers can be safe for home use, but only when used correctly.
Users should always plan ventilation before starting their first project.
Laser cutting and engraving can create smoke, fumes, residue, and fire risk depending on the material.
For home users, an enclosed machine is usually a better starting point than an open-frame machine.
It helps reduce exposure risk and makes smoke management easier.
However, enclosure does not replace proper ventilation, fire monitoring, or material testing.
UK buyers should avoid engraving unknown plastics, PVC, vinyl, or materials that may produce dangerous fumes.
They should also keep the machine supervised during operation.
Making the Most of Your Budget Laser Engraver
To get the best results from a budget laser engraver, users should spend time testing settings rather than relying only on default profiles.
Different woods, acrylic colours, leather types, and coatings can react differently.
Keeping a settings log can save time and reduce wasted materials.
Useful details to record include:
Material name
Thickness
Laser power
Speed
Passes
Focus height
Air assist setting
Final result
Users should also budget for accessories.
A honeycomb bed, air assist, rotary attachment, spare lenses, protective panels, and better ventilation can make a major difference to the final workflow.
For small business users, consistency matters more than maximum speed.
A slightly slower but repeatable setting is usually better than pushing the machine too hard.
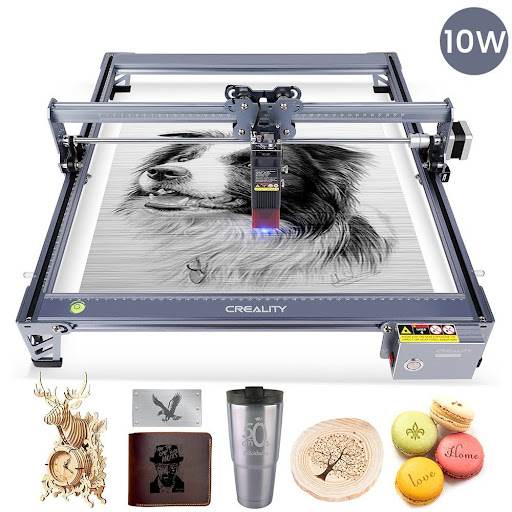
FAQ
Are budget laser engravers safe for home use in the UK?
Yes, budget laser engravers can be safe for home use when used with proper precautions.
Users should choose an enclosed machine where possible, use proper ventilation, monitor the machine during operation, and avoid unsafe materials.
Laser safety glasses, emergency stop functions, and fire awareness are also important.
What materials can a budget laser engraver in the UK handle?
Most budget diode laser engravers can handle wood, leather, paper, card, cardboard, coated metals, and some acrylic colours.
CO2 lasers are better for clear acrylic, glass engraving, and cleaner cutting across a broader range of materials.
Where is the best place to buy a budget laser engraver in the UK?
The best places are official brand websites, UK official stores, authorised retailers, and trusted maker equipment suppliers.
Before buying, compare price, VAT, delivery time, warranty, return policy, replacement parts, and after-sales support.
Do I need special software for a laser engraver?
Most laser engravers work with either brand software or third-party software such as LightBurn.
Beginners can usually start with the manufacturer’s own software.
Users who want more layout control, repeatable workflows, or multi-machine compatibility may prefer LightBurn.
Is a diode laser or CO2 laser better for budget buyers?
A diode laser is usually better for beginners because it is cheaper, smaller, and easier to set up.
A CO2 laser is better for acrylic, thicker materials, cleaner edges, and small business production.
The right choice depends on the materials you plan to use most often.
Conclusion
Finding the best budget laser engraver in the UK means balancing price, performance, safety, and long-term usability.
For most beginners, an enclosed diode machine such as the xTool S1 or Creality Falcon A1 is a practical starting point.
For users who want more diode power and a more serious hobby setup, the Creality Falcon Falcon2 Pro is a strong option.
For acrylic cutting and workshop-style production, the OMTech Polar is a better fit because it uses CO2 laser technology.
The smartest approach is to choose based on your main material first.
After that, compare enclosure, work area, software, UK availability, warranty, and ventilation requirements before making a final decision.



Welding puts more stress on protective gear than almost any other trade. Molten spatter, radiant heat, sparks that arc in unpredictable directions, and hours of friction against a bench all add up fast. Yet a lot of welders are wearing an apron that looks the part but quietly fails the moment it matters.
The problem is that apron damage is rarely obvious until it’s too late. A weak spot doesn’t announce itself — it just lets a spark through at the worst possible moment. Below are five warning signs that your current apron may not be doing its job, and what to look for in a replacement.
It Scorches, Chars, or Melts Instead of Resisting Heat
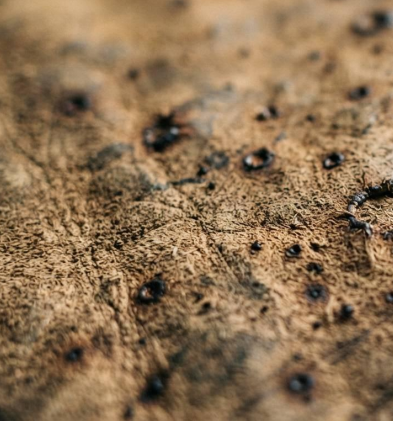
Run your hand over the apron after a session. If you find small burn marks, hardened or glazed patches, or areas where the surface has gone stiff and brittle, the material is absorbing damage it shouldn’t be.
This is usually a sign the apron isn’t made from real leather at all — or that it’s a lower grade that can’t take sustained heat exposure. A proper leather apron for welding should shrug off short contact with sparks and spatter without scorching through. If yours is showing char marks after every use, the material is degrading faster than it should, and each burn mark is a thinner spot the next spark can pass straight through.
You Can See or Feel Layers Peeling Apart
Pick up the edge of the apron and flex it slightly. If you notice separation — a top layer starting to lift, flake, or peel away from a backing material underneath — you’re dealing with bonded or reconstituted leather, not a single piece of hide.
Bonded leather is made from scraps of leather fiber glued together with a polyurethane coating. It looks convincing on a store shelf, but heat and constant flexing break down that adhesive layer quickly. Once it starts peeling, it only gets worse, and the protective barrier becomes inconsistent across the apron. A genuine full grain leather apron, by contrast, is cut from a single hide with the natural grain intact — there’s no glue layer to fail, so it doesn’t delaminate under heat and repeated bending.
The Stitching Is Single-Row, Uneven, or Already Fraying
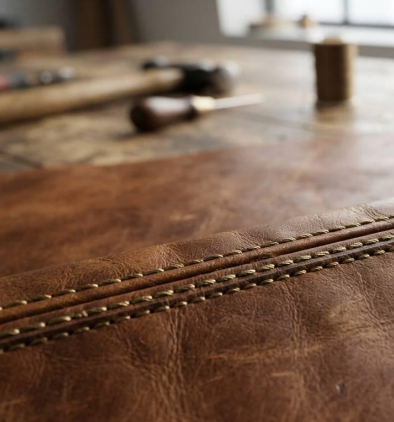
Stitching takes as much abuse as the leather itself, especially at stress points like the neck strap, waist ties, and pocket seams. If your apron uses a single row of stitching, has visibly uneven spacing, or already shows loose or broken threads after a few months, it’s a weak point waiting to fail.
Look for double-stitched seams at every load-bearing point. This isn’t just about longevity — a seam that rips open mid-shift can let the apron shift out of position exactly when you need full coverage. Reinforced stitching is one of the easiest things to check before buying, and one of the most commonly cut corners on cheaper aprons.
Hardware Is Rusting, Bending, or Already Broken
Cheap rivets, buckles, and D-rings are usually plated rather than solid metal. Under welding heat and shop humidity, that plating wears off fast, and what’s underneath starts to rust, bend, or snap. A broken buckle or a rivet that’s pulled loose from the leather isn’t just an inconvenience — it can mean straps that won’t stay adjusted, pockets that won’t hold tools securely, or an apron that shifts and exposes skin mid-task.
Solid brass hardware costs more to manufacture, which is exactly why manufacturers cut it first on budget aprons. If your hardware is showing rust spots or has already failed once, treat it as an early warning that the rest of the build quality is probably just as compromised.
It’s Thin Enough to See Light Through, or Flexes Like Fabric
Hold the apron up to a light source. If you can see light coming through the leather, or if the material folds and drapes more like heavy fabric than like leather, it’s too thin to offer real spark and heat protection.
Weld-grade protection generally calls for leather in the 1.2mm–1.6mm range — thick enough to absorb heat and resist punch-through from spatter, but still flexible enough to move with you over a full shift. Thinner leather (often marketed as “genuine leather” rather than full grain) is split or sanded down during processing, which strips away the dense, protective outer layer of the hide. A full grain leather apron keeps that outer layer intact, which is what gives it both the thickness and the natural resistance that thinner, processed leather can’t match.
What to Look for Instead
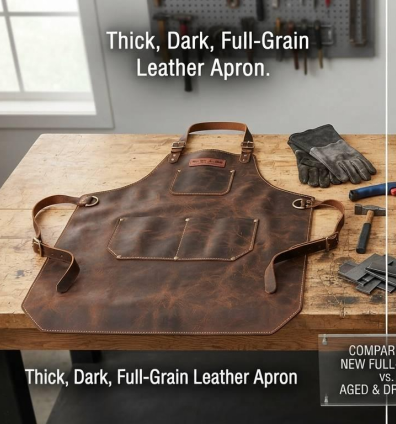
If your current apron is showing two or more of these signs, it’s not a maintenance problem — it’s a replacement problem. When shopping for a new one, prioritize:
- Full-grain cowhide, not bonded or heavily processed “genuine leather”
- 1.2mm–1.6mm thickness for real heat and spark resistance
- Double-stitched seams at every stress point
- Solid brass hardware, not plated metal
- Adjustable straps that let the apron sit close to the body without gaps
A well-made leather apron for welding isn’t just a uniform piece — it’s the last layer between you and a spark that’s traveling toward your skin. Worn-out gear is easy to overlook because the damage builds gradually, but the signs above are your apron telling you it’s already behind on the job.


Modern enterprises use numerous systems, servers, and devices, and they must all function properly. In complex IT environments, manually setting up and modifying these systems is laborious, repetitive, and prone to human error. Configuration automation comes into play here, enabling businesses to quickly and accurately manage their IT operations. Automation allows you to perform repetitive tasks reliably without human intervention for each little adjustment. Businesses can reduce mistakes, save time, and achieve more consistency and stability across their technology environment by automating routine configuration tasks.
1. Reducing Human Error in Daily Operations
A huge advantage of configuration automation is the minimization of human error. If engineers are manually configuring every day, tiny mistakes can eventually develop that could cause major issues. Automation removes this chance by always following set directions with no fatigue and distractions. Regardless of who started the process, this consistency guarantees that systems operate precisely as intended. Reduced errors result in fewer interruptions, and less troubleshooting, as well as more assurance in day-to-day operations.
2. Saving Valuable Time Across Teams
Hours that could be used for more productive work are frequently wasted on manual configuration procedures. Automation swiftly completes tedious setup procedures, allowing technical teams to concentrate on creativity in addition to problem-solving. Automated scripts can finish the same operation in minutes rather than requiring a whole day to configure similar systems one by one. Large-scale rollouts and urgent system changes make this time efficiency extremely essential. Operational tasks no longer consume teams, allowing them to focus on strategic goals.
3. Maintaining Consistency Across Systems
Inconsistencies are nearly inevitable when several systems are manually configured.
Automation allows you to standardize every server, device, and application to the same baseline configuration. Standardization is key for multi-site organizations and larger networks. It’s much easier to find problems, push updates, and ensure compliance with internal policies when everything is configured the same. Manually recording these variations becomes a laborious and error-prone operation in the absence of technology. A standardized environment strengthens the foundation for smoothly scaling operations as the business expands, streamlines management, and increases dependability.
4. Closing Security Gaps with Automation
Out-of-date or incorrectly configured systems leave gaps in your security. Automation lets you quickly and consistently apply security settings to close that gap. Automated procedures can implement security regulations instantly rather than waiting for manual updates, lowering exposure to possible attacks. In large environments with plenty of endpoints, this proactive strategy reduces the likelihood of oversight. It’s also easy to identify when someone has made unauthorized changes with automation. If something is different than how it’s configured to be, you’ll know. Automation can significantly improve your organization’s security.
Conclusion
For businesses looking to improve productivity, consistency, and security in complex IT settings, configuration automation has become crucial. Businesses can further automate their operations with Opkey by utilizing a single Cloud Application Lifecycle Management (CALM) platform driven by Argus AI. Opkey automates configuration, testing, impact analysis and training for Oracle, Workday, Salesforce, Coupa and more business applications so teams can confidently embrace change. The no-code AI automation platform helps businesses operate simpler, become more dependable and continuously improve enterprise applications across their lifecycle by decreasing manual effort up to 80%, cutting go-live schedules by 30% and mitigating risk of downtime by 92%.

You have great products, but they aren’t fetching you customers. They may be browsing and adding stuff to their cart. But they leave right before paying.
A lot is actually going wrong on your checkout page to cause this.
A shipping fee might show up too late. A form might ask for too many details before someone can pay. Sometimes your checkout might show payment methods your customers don’t prefer. Moreover, the experience might not be smooth on their mobiles.
Switching to a new ecommerce checkout solutions provider won’t change things overnight. You need to understand the problems impacting your revenue in depth. Let’s begin.
1. Too Many Steps at Checkout
Picture this. A customer loves your products and is ready to buy some. Just when they were about to complete the payment, your checkout page throws in lots of tricky steps. This can be requesting a password with strict rules or adding a CAPTCHA or “verify you are human” check.
That’s just going to make the checkout process annoying.
Start by cutting your checkout down to what’s essential. Keep it to a name, address, payment details, and confirmation. Nothing else belongs on that screen. Make sure shipping costs, taxes, and any fees are displayed on the product page or cart before checkout begins.
The page must have autofill for country/location based on the shipping address. Don’t just place a long dropdown country selector. You can add a shipping calculator that updates in real time. If you offer free shipping past a certain order value, let customers know that early on.
2. Payment Options Customers Don’t Fancy
A customer can love your product, breeze through your checkout, and still walk away because you didn’t offer a payment method they’d like. You see, buy-now-pay-later options and digital wallets aren’t extras anymore. They are the norm now.
But there are other related problems you need to tackle.
A card might get declined for no real reason, or billing details may not match what the issuer expects. A subscription renewal can also fail. Customers don’t think twice before leaving when these things happen. Here’s what to do.
- Include UPI, major cards, digital wallets like Apple Pay and Google Pay, and a BNPL option.
- Clean up your payment processor data. It must have consistent billing formats, correct customer details, and recognizable merchant descriptors.
For subscriptions, use smart retry logic and card updater functionality to make payments more seamless.
3. The Mobile Conversion Gap
The global mobile e-commerce market might be worth $5,009.99 billion by 2034. So, a large part of your traffic now already comes or will come from phones in the future. But if you’re still losing buyers, there are issues in your store’s mobile UX.
Look carefully at your store design. Ensure the buttons, dropdowns, and form fields have enough space to tap accurately on the first try. Autofill should handle names, addresses, and card details, cutting typing down to almost nothing.
For digital wallets like Apple Pay and Google Pay, you must offer buyers a super smooth interface to pay. They must not be typing a sixteen-digit card number on a phone keyboard.
Test the entire flow on an actual phone, not just a resized browser window. Use Android and Apple devices for testing. Many issues don’t stand out on a desktop, like a keyboard covering a button or buttons that appear too small on a phone screen.
4. Forcing an Account Creation
A customer who’s ready to pay can leave if the only path forward is creating an account first.
What’s the best way to solve this? Make guest checkout the default option. Put it at the front and center, and ask for account creation only after they place the order. This will let you track shipping or speed up the process next time.
You can offer quick one-click logins via their social media accounts, Google, or Apple accounts. Save their shipping and payment details securely during checkout. It’ll help buyers switch to a complete account later.
If you need customer data for marketing, collect their email addresses during guest checkout. Most customers create a full account if they like shopping from your store. But it’s all up to how your checkout treats them!
Run This Quick Checkout Audit
Before making any big changes, walk through your own checkout like a first-time buyer and look out for these:
- See your checkout loading time. It must not be more than 3 seconds.
- Try entering an incorrect or expired card number to check if you get an error message telling you what’s wrong.
- Add items to the cart. Check your cart after some time to see if it still contains those items.
- Look for glitchy coupon codes, since they can send people off to search for a discount instead of finishing the payment.
- You also need to confirm that the order confirmation page and email have complete order details. This must have product info, charges, and the expected date of arrival.
Most importantly, put yourself in the shoes of your buyer to see how the shopping experience actually feels. Gather inputs from your team about this. To get the best out of your checkout, you can consult CodeClouds. They’ve been offering custom checkout solutions for years across a variety of projects, so they have the expertise to solve your problems.

6 Best Lodges For Sale: Find Your Perfect Retreat

Unlocking the Best Deals with Rayslocker: Your Ultimate Guide to Affordable Shopping

Maximizing Utility and Security: The Ultimate Guide to UTE Tool Boxes

How to Read a Property Report Like a Pro

What Happenes to Your Muscles After a Workout? Understanding the Recovery Process

What Hospital Grade Breast Pump Means Before You Choose

The 15 Highest-Paid Rugby Players in the World

Christopher Dare: The Untold Story of Engineer and Former Husband of Angela Rippon

How to Ensure Your Home is Valued Correctly for a Quick Sale

What Is Fanquer? The Digital Creator Platform Transforming Direct-to-Fan Engagement

Dr Jared Ross: Missouri Appeals Court Upholds Protection Order Over Graphic Torture and Murder Threats

Nancy Hallam: The Inspiring Life, Career, and Success Story Behind Ian Wright’s Wife
The 15 Highest-Paid Rugby Players in the World
Christopher Dare: The Untold Story of Engineer and Former Husband of Angela Rippon
How to Ensure Your Home is Valued Correctly for a Quick Sale
What Is Fanquer? The Digital Creator Platform Transforming Direct-to-Fan Engagement
Dr Jared Ross: Missouri Appeals Court Upholds Protection Order Over Graphic Torture and Murder Threats
Nancy Hallam: The Inspiring Life, Career, and Success Story Behind Ian Wright’s Wife
-
 Sports4 months ago
The 15 Highest-Paid Rugby Players in the World
-
Celebrity10 months ago
Christopher Dare: The Untold Story of Engineer and Former Husband of Angela Rippon
-
 Real Estate8 months ago
How to Ensure Your Home is Valued Correctly for a Quick Sale
-
 Technology4 months ago
What Is Fanquer? The Digital Creator Platform Transforming Direct-to-Fan Engagement
-
 Celebrity4 months ago
Dr Jared Ross: Missouri Appeals Court Upholds Protection Order Over Graphic Torture and Murder Threats
-
Celebrity11 months ago
Nancy Hallam: The Inspiring Life, Career, and Success Story Behind Ian Wright’s Wife
-

 Health8 months ago
Enclomimed 25 (Enclomiphene) – Effective PCT Protocol
-
 Celebrity10 months ago
Who Is Maisie Mae Roffey? The Private Life, Family Story, and Quiet Success of Julie Walters’ Daughter