
Ai & Tools
6 common issues in SASSA status checks – and how to fix each one


Doing a SASSA status check sounds simple. You enter your ID number and phone number, and the result should be right there. But thousands of applicants run into problems every single month: a page that won’t load, a status that doesn’t make sense, or money that was approved but never arrived.
If any of that sounds familiar, you are probably dealing with one of the six issues listed below. Each one has a clear fix, so let’s get straight to it.
Issue 1: The SASSA website is not loading or keeps timing out
The status check page won’t open
The SASSA SRD website at srd.sassa.gov.za handles millions of requests each month, and it gets extremely busy around payment dates. If the page times out or gives you a blank screen, it is almost always a server load problem, not something you did wrong.
The fix is simple: try again during off-peak hours. Early mornings before 7am or weekday evenings after 8pm are usually much quieter. If you cannot wait, switch to the WhatsApp channel (082 046 8553) it runs on a separate system and is far more stable during peak periods.
Issue 2: “No application found” even though you definitely applied
The system says your application does not exist
This one causes a lot of panic, but the most common reason is simply using the wrong phone number. SASSA pulls your record using the exact cellphone number you entered when you first applied. If you used a different number just now, the system finds nothing and shows this error.
Go back and try every number you might have had at the time of application. If you genuinely changed your number since then, you need to update your contact details at srd.sassa.gov.za before the status check will work correctly. Do not skip this step an outdated number blocks both status checks and payment notifications.
Issue 3: Status shows “pending” for weeks with no update
Stuck on pending when does it actually move?
A pending status means SASSA is still running your details through several government databases: the Department of Home Affairs, SARS, UIF, and others. For most applicants this takes between 7 and 21 days. If yours has been pending longer than that, there is usually a mismatch between your ID details and what one of those databases has on record.
You cannot speed this up, but you can reduce the wait next time by making sure your Home Affairs details are fully up to date before you apply. If it has been over 30 days with no movement, contact SASSA directly on 0800 60 10 11 and ask for a status update reference number.
Issue 4: Approved status but no money received
Your SASSA status check shows approved but the payment never came
This is one of the most reported issues and it has a few different causes. The most common one is a mismatch between your banking details and your ID. If the account name does not match your ID exactly as it appears on the Home Affairs system, most banks reject the payment automatically and return it to SASSA.
Check three things: first, that your bank account or cellphone wallet is still active and not dormant. Second, that the name on the account matches your ID. Third, that SASSA has your current banking details you can update them at srd.sassa.gov.za. If all three are fine and you still have nothing after five business days past your payment date, call 0800 60 10 11 and ask them to trace the specific payment.
Issue 5: Status switched from approved to declined the next month
Last month it was approved this month it is declined
SASSA reassesses every applicant every single month. Approval one month does not carry over automatically. If your status dropped to declined, SASSA found something in the current month’s verification that disqualified you often a UIF payment, a small income detected via SARS, or another social grant showing as active under your ID.
The decline notice on the status page should show a reason code. Use that code to check exactly what triggered the decline. If you believe the reason is incorrect for example, a UIF payment you received years ago, or income that no longer applies you have the right to lodge a formal appeal within 90 days at srd.sassa.gov.za/appeals. Do not ignore a decline; appeal it.
Issue 6: Identity verification failure blocking your status
Identity verification failed what this actually means
If your status check shows an identity verification failure, it means there is a discrepancy between your application details and the Department of Home Affairs database. This can happen if your ID number was captured incorrectly during application, if your Home Affairs record has an old address or name spelling, or if your ID was reported as deceased in the DHA system which does happen by mistake.
The only way to resolve an identity verification failure is to visit a SASSA office in person with your original green barcoded ID or smart ID card. Bring proof of address and your phone. A SASSA official can flag the discrepancy on the system and, where needed, escalate it to Home Affairs directly for correction. This cannot be fixed online, so do not waste time refreshing the status page hoping it changes.
Final Thoughts
Most SASSA status check problems come down to three things: outdated contact details, a banking mismatch, or a database discrepancy that needs an in-person correction. None of them are permanent. Each issue above has a direct step you can take today. If you hit a wall at any point, the SASSA toll-free number (0800 60 10 11) and the official WhatsApp line are your fastest routes to a real answer.


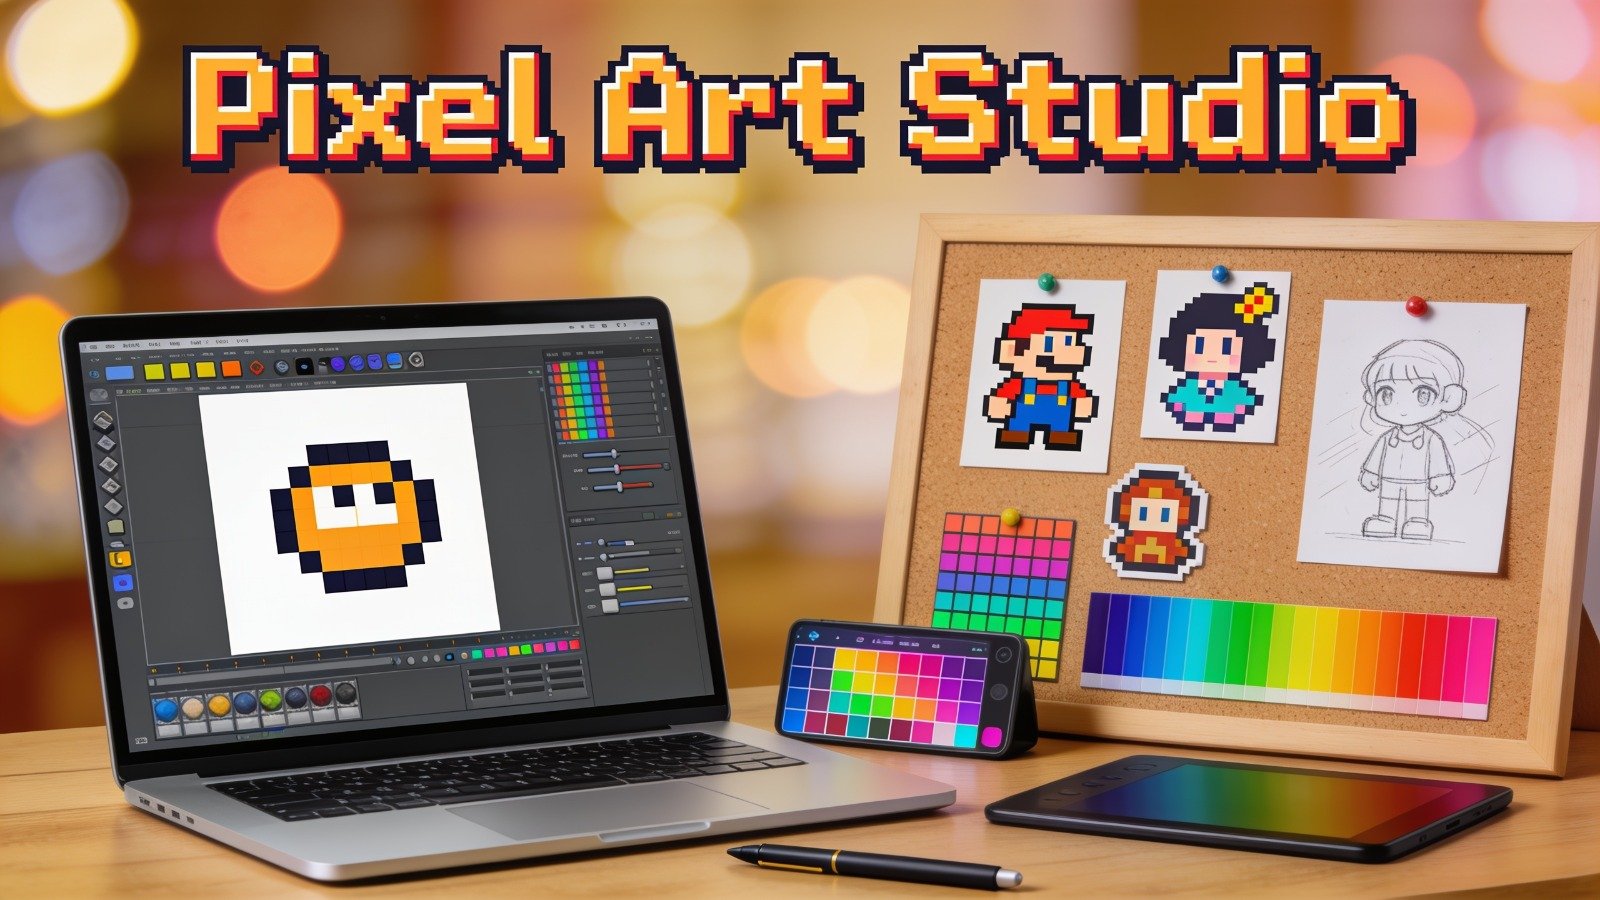
| Quick Answer: The best AI Pixel Art Generators for 2026 for creators building NFT collections is Adobe Firefly, which converts any photo or prompt into pixel-grid art and carries Adobe’s full commercial-use guarantee since Firefly trains only on licensed and public-domain content. For NFT-specific workflows that need true grid-aligned sprites at collection scale, PixelLab (from $12/month, commercial licensing included on every paid plan) and Retro Diffusion (pay-per-generation from about $0.015 per image, commercial use permitted) are purpose-built for pixel art rather than general image generation. Marketers and solo NFT creators comparing OpenAI’s image tools should note that DALL·E has been replaced inside ChatGPT by GPT Image, which still grants users commercial rights to output. |
This guide evaluates five AI Pixel Art Generators that creators can use to build NFT collections and game-ready sprites in 2026, weighing four criteria: authentic pixel-grid output versus generic ‘pixelated’ filtering, commercial use rights for resale and minting, price per generation, and collection-scale workflow support such as batch export and style consistency. Each entry is drawn from direct testing and each platform’s official documentation and terms of service rather than secondary summaries, so the licensing and pricing details reflect what each vendor currently states. This guide is for NFT creators, indie game developers, and marketers deciding which AI Pixel Art Generators to build a collection or sprite library on, not a general roundup of AI art tips. Adobe Firefly is the top recommendation here because it is the only tool in this group with full commercial indemnification built into every plan, which matters most once pixel art is minted and sold.
Generating pixel art for NFTs raises a licensing question that general AI art does not: once a piece is minted and sold, the creator needs to be confident the underlying model’s commercial use policy actually covers resale, not just personal use. OpenAI’s terms grant ownership of DALL·E and GPT Image output to the user and explicitly permit commercial use on paid plans, but that commercial use policy differs from Adobe Firefly’s stronger indemnification and from purpose-built pixel art tools like PixelLab and Retro Diffusion, which bundle commercial licensing directly into their paid tiers. A second, NFT-specific problem is technical: most general image models produce a ‘pixelated style’ image rather than true grid-aligned pixel art, which then needs manual cleanup before it is usable in a collection or a game engine.
How We Compared These AI Pixel Art Generators
| Tool Name | Free Tier | Platform | Best For | Templates / Assets | Commercial Use | Standout AI Feature |
| Adobe Firefly | Yes | Web, Windows, Mac, iOS, Android | NFT creators and studios needing full commercial indemnification on minted, resold pixel art | not publicly listed | Full commercial use with IP indemnification on paid plans; trained only on licensed and public-domain content | 25 free generative credits/month; pixel art style generation built into the same text-to-image tool as Firefly’s other styles |
| ChatGPT (GPT Image, formerly DALL·E) | Yes | Web, iOS, Android, API | Solo NFT creators who want a fast, general-purpose generator for pixel-style concept art before cleanup | not publicly listed | Commercial use explicitly permitted on Plus, Team, and Enterprise plans; free tier also permits commercial use but OpenAI reserves broader rights to use inputs/outputs for training | GPT Image 2 (released April 2026) generates images up to 4x faster than the prior model and supports precise image-to-image edits |
| PixelLab | Yes | Web, API, Aseprite plugin | NFT and indie game collections needing hundreds of style-consistent, grid-aligned sprites | not publicly listed | Commercial use included on all paid plans; free trial output is for testing only | Style-reference generation locks a consistent look across an entire collection; images up to 400×400 on the Pixel Artisan tier |
| Retro Diffusion | Yes | Web, API, Aseprite extension | Pixel-art purists producing true grid-aligned sprites at 16×16 to 384×384 for a one-time NFT drop | not publicly listed | Commercial use permitted on generated output; new accounts start with 50 free credits | Pay-per-generation pricing from about $0.015/image (RD Fast) up to $0.18/image (RD Pro, accepts up to 9 reference images) |
| Midjourney | No | Web, Discord | Creators who want high-fidelity pixel-style concept art and can budget for manual cleanup before minting | not publicly listed | Commercial use included on paid plans; Stealth Mode for private, unpublished generations available on Pro and above | Basic plan starts at $10/month for 3.3 Fast GPU hours; output is pixel-styled rather than true grid-aligned pixel art |
Adobe Firefly
Adobe Firefly turns a text prompt or an uploaded photo into pixel-grid art and is the only tool in this group that pairs pixel art generation with full commercial indemnification.
Adobe Firefly is the strongest commercial use policy among AI Pixel Art Generators because every output is trained only on licensed and public-domain content and covered by Adobe’s IP indemnification on paid plans.
Key Features
- Text-to-image and image-to-image generation with a pixel art style option, alongside Firefly’s other generative styles
- A free tier with 25 generative credits per month, watermarked results, standard resolution up to 2K on paid tiers
- Commercial use: full commercial rights with IP indemnification included on Firefly Standard, Pro, and Premium plans
- Firefly Services API for teams generating pixel art collections at scale, billed by the same credit system as the app
- Direct integration with Photoshop and Illustrator for manual cleanup of generated pixel grids before minting
Pricing: Free tier includes 25 monthly generative credits with watermarked output. Paid plans run Firefly Standard at $9.99/month, Firefly Pro at $19.99/month (4,000 credits), and Firefly Premium at $199.99/month (50,000 credits).
Platforms: Web, Windows, Mac, iOS, Android
Best For: Best for NFT creators and studios who need indemnified commercial rights on art that will be minted and resold, especially Firefly’s AI pixel art generator.
ChatGPT (GPT Image, formerly DALL·E)
OpenAI’s image generation, once branded DALL·E, now runs as GPT Image inside ChatGPT after DALL·E was officially retired from the product in March 2025 and replaced again by GPT Image 2 in April 2026.
OpenAI’s current commercial use policy grants users ownership of GPT Image and legacy DALL·E output and explicitly permits commercial use on ChatGPT Plus, Team, and Enterprise plans.
Key Features
- GPT Image 2, OpenAI’s stable release as of April 2026, generates images roughly 4x faster than the prior model and supports precise image-to-image edits
- Commercial use: explicitly permitted on Plus, Team, and Enterprise plans; the free tier also permits commercial use but OpenAI reserves broader rights to use free-tier inputs and outputs for training
- Conversational prompting inside ChatGPT, useful for quickly iterating on NFT concept art before converting it to a true pixel grid in a dedicated tool
- API access with a separate commitment from OpenAI not to use API inputs or outputs for model training, unlike the ChatGPT free tier
- No native pixel-grid enforcement, meaning output typically needs cleanup in a dedicated pixel art tool before it is usable in a collection
Pricing: Free tier available inside ChatGPT with usage limits and no guaranteed exclusion from training data. ChatGPT Plus is $20/month and includes commercial use rights without the training-data caveat that applies to some free-tier generations.
Platforms: Web, iOS, Android, API
Best For: Best for solo NFT creators who want fast, general-purpose concept art and plan to convert it to a true pixel grid in a specialized tool afterward.
PixelLab
PixelLab is a specialist AI pixel art generator built for game developers and NFT creators who need hundreds of style-consistent, grid-aligned sprites rather than one-off images.
PixelLab bundles commercial use rights into every paid plan, making it a straightforward choice for NFT collections that need to mint and resell art without a separate licensing check.
Key Features
- Text-to-sprite and reference-based generation that locks a consistent art style across an entire NFT collection or game asset library
- Two purpose-built models: Pixflux for images up to 400×400 and Bitforge for smaller, style-reference-driven generation up to 200×200
- Commercial use: included on all three paid tiers (Pixel Apprentice, Pixel Artisan, Pixel Architect); free trial output is for testing only
- Multi-directional sprite rotation (4 or 8 directional views) generated from a single reference image, useful for animated collection traits
- Aseprite plugin and MCP integration for AI coding assistants, so generated sprites drop directly into an existing production pipeline
Pricing: Free trial includes 40 fast generations plus 5 slow generations per day. Paid tiers: Pixel Apprentice at $12/month (2,000 generations), Pixel Artisan at $24/month (5,000 generations, images up to 400×400), and Pixel Architect at $50/month (10,000 generations, up to 20 concurrent jobs).
Platforms: Web, API, Aseprite plugin
Best For: Best for NFT and indie game teams generating a large, style-consistent collection rather than a handful of one-off images.
Retro Diffusion
Retro Diffusion is a pixel art model built by a working pixel artist specifically to produce true grid-aligned sprites, avoiding the soft edges and anti-aliasing that general AI models add.
Retro Diffusion produces grid-aligned pixel art at fixed resolutions from 16×16 to 384×384 with commercial use permitted on generated output, making it well suited to a one-time NFT collection drop.
Key Features
- Pay-per-generation pricing with no subscription: RD Fast costs roughly $0.015 per image, up to RD Pro at $0.18 per image
- RD Pro accepts up to 9 reference images to lock a character’s appearance across trait variations in an NFT collection
- Commercial use permitted on all generated output; new accounts receive 50 free credits to test the platform
- True pixel-grid output at fixed sizes from 16×16 through 384×384, avoiding the resampling that general models require
- A dedicated Aseprite extension (a one-time purchase starting around $65) that generates true-pixel-art assets directly inside the editor
Pricing: 50 free credits on signup, then pay-per-generation from about $0.015/image (RD Fast) to $0.18/image (RD Pro). No monthly subscription required; credits are prepaid and do not expire.
Platforms: Web, API, Aseprite extension
Best For: Best for pixel art purists who need authentic grid-aligned sprites for a single NFT drop without committing to a monthly plan.
Midjourney
Midjourney is widely used for NFT collections for its image fidelity, though its output is pixel-styled rather than the true grid-aligned pixel art that PixelLab and Retro Diffusion produce.
Midjourney includes commercial use rights on all paid plans, but its pixel art results typically need resampling or manual cleanup before they meet the strict grid alignment NFT and game engines expect.
Key Features
- Four subscription tiers billed by Fast GPU hours: Basic ($10/month, 3.3 hours), Standard ($30/month, 15 hours), Pro ($60/month, 30 hours), and Mega ($120/month, 60 hours)
- Commercial use: included on all paid plans; Stealth Mode for private, unpublished generations is available starting on the Pro plan
- Relax Mode for unlimited, queued generation on Standard plans and above once Fast GPU hours are exhausted
- High image fidelity and strong prompt adherence, useful for exploring NFT collection themes before committing to a final pixel art style
- No native pixel-grid enforcement or fixed sprite resolutions, so output generally requires cleanup in a pixel editor before minting
Pricing: No free trial. Basic is $10/month, Standard is $30/month, Pro is $60/month (adds Stealth Mode), and Mega is $120/month. Annual billing cuts each tier by 20%.
Platforms: Web, Discord
Best For: Best for creators who prioritize image fidelity for NFT concept art and are willing to clean up output into true pixel art afterward.
How to Choose the Right AI Pixel Art Generators
If commercial use rights are the deciding factor: prioritize AI Pixel Art Generators with an explicit commercial use policy attached to every paid plan, not just a general terms-of-service mention. Adobe Firefly and PixelLab both state commercial licensing directly on their pricing pages; OpenAI’s GPT Image (the tool that replaced DALL·E in ChatGPT) permits commercial use on paid plans but reserves broader training rights on the free tier.
If you need true grid-aligned pixels, not a ‘pixel style’ filter: test a generator’s raw output before committing a collection to it, since general-purpose models tend to produce soft-edged, pixelated-looking images that need manual cleanup. Retro Diffusion and PixelLab are both purpose-trained on authentic pixel art and produce grid-aligned sprites at set resolutions like 16×16 through 400×400 with little to no post-processing.
If you’re generating a large NFT collection with consistent traits: prioritize tools with reference-based generation and batch or API access so trait variations stay visually consistent across hundreds or thousands of pieces. PixelLab’s style-reference tools and Retro Diffusion’s API both support this; Adobe Firefly’s Services API covers the same need for teams already on Creative Cloud.
If budget predictability matters at collection scale: compare metering models, not just entry price. PixelLab and Adobe Firefly both meter by monthly generation or credit allotment, while Retro Diffusion bills per generation with no subscription, which can be cheaper for a one-time NFT drop but harder to budget for ongoing sprite production.
Frequently Asked Questions
What is the best AI Pixel Art Generator for NFTs in 2026?
Adobe Firefly is the best AI Pixel Art Generator for NFT creators who need commercial indemnification, starting free with 25 monthly credits and scaling to $199.99/month. For collections that need true grid-aligned sprites at volume, PixelLab (from $12/month) is purpose-built for that workflow.
Does OpenAI’s DALL·E commercial use policy cover NFT art?
DALL·E itself was retired from ChatGPT in March 2025 and replaced by GPT Image, now GPT Image 2 as of April 2026, but OpenAI’s commercial use policy carried forward: users own the output and can use it commercially on ChatGPT Plus, Team, and Enterprise plans, which start at $20/month. The free tier also permits commercial use but comes with broader training-data rights reserved by OpenAI.
Are OpenAI images commercial use rights different from Adobe Firefly’s?
Yes. OpenAI’s commercial use policy grants ownership of generated output and permits commercial use on paid plans, but it does not include the IP indemnification that comes with Adobe Firefly’s paid plans, which start at $9.99/month. For NFT art that will be resold at scale, that indemnification gap is the main practical difference.
What’s the cheapest way to generate pixel art for a one-time NFT collection?
Retro Diffusion’s pay-per-generation pricing, from about $0.015 per image on RD Fast with 50 free starter credits, is typically cheapest for a single collection drop since there’s no monthly subscription. PixelLab’s $12/month Pixel Apprentice plan is more cost-effective for ongoing sprite production across multiple collections.
Can AI-generated pixel art be used commercially without a subscription?
It depends on the platform’s commercial use policy. Retro Diffusion permits commercial use on its free 50-credit trial, while Adobe Firefly’s free tier includes a watermark that most NFT marketplaces won’t accept, and PixelLab’s free trial output is explicitly for testing only. Check the official commercial use policy for the specific plan before minting.
Conclusion
Across these five AI Pixel Art Generators, the split comes down to commercial use policy and grid fidelity: Adobe Firefly leads on indemnified commercial rights, PixelLab and Retro Diffusion produce true grid-aligned pixel art built for NFT-scale collections, and ChatGPT’s GPT Image (the tool formerly known as DALL·E) and Midjourney offer fast, general-purpose generation that typically needs cleanup before minting. Adobe Firefly remains the top recommendation among AI Pixel Art Generators for NFT creators specifically because its commercial use policy includes IP indemnification that the other tools in this group don’t fully match.
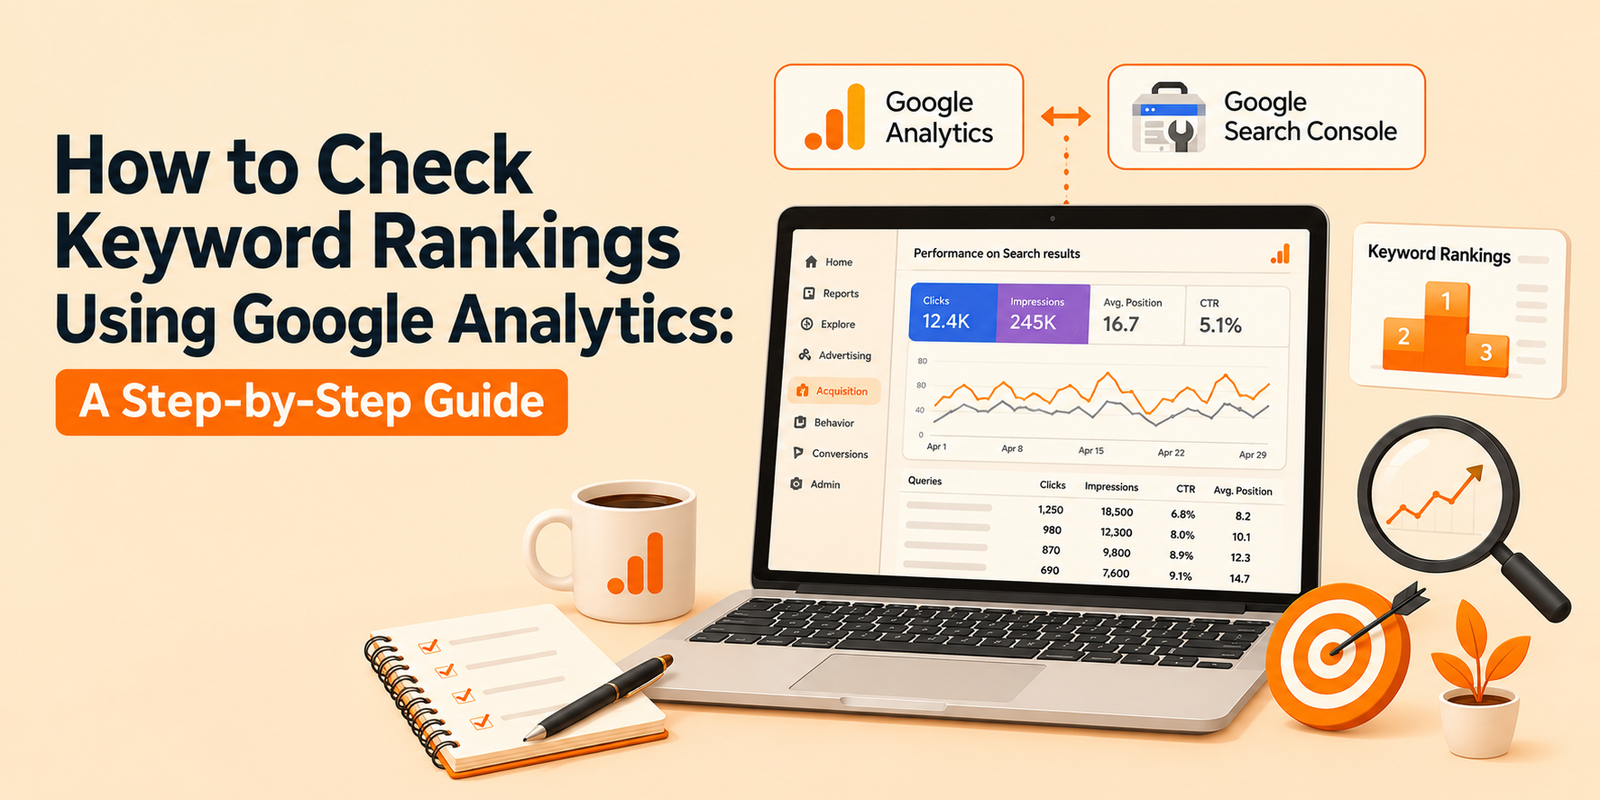
If you’re trying to figure out how to check keyword rankings in Google Analytics, here’s the honest answer first: GA4 won’t hand you a rankings report on its own. But paired with the right data source, it becomes one of the sharpest tools you have for understanding how your keywords actually perform.
Let’s break it down.
Can You Actually See Keyword Rankings in Google Analytics?
Not directly. Google Analytics tracks behavior: sessions, engagement, conversions, landing pages. It doesn’t track where you rank on a search results page.
That job belongs to Google Search Console. Once you connect the two, you get the full picture: rankings from Search Console and downstream performance from GA4.
Honestly, this combo tells you more than a standalone ranking tool ever could. You see not just where you rank, but whether that ranking actually drives revenue.
What Google Analytics Shows You Instead
GA4 gives you organic search traffic by landing page, session duration, bounce behavior, and conversion paths. That’s genuinely useful data, just not ranking data.
Here’s the thing: a page ranking #3 with terrible engagement often loses to a page ranking #7 with strong conversion rates. GA4 catches that nuance. A pure rank tracker doesn’t.
If your team needs help connecting these dots consistently, working with an agency that offers dedicated SEO Services can save you months of trial and error setting up the right reporting stack.
How to Check Keyword Ranking in Google Analytics: Step-by-Step
Here’s the actual workflow, start to finish.
Step 1: Connect Google Search Console to GA4
Go to GA4’s Admin panel, find “Product Links,” and link your Search Console property. Takes about two minutes.
Once linked, Search Console data flows into GA4’s Acquisition reports, giving you query-level insight alongside your usual metrics.
Step 2: Pull Query Data from Search Console
Inside Search Console, open the Performance report. Filter by page or query to see average position, impressions, and clicks for each keyword.
This is your actual keyword ranking in Google Analytics workflow, even though the ranking number itself lives in Search Console.
Step 3: Cross-Reference with GA4 Landing Page Reports
Match each ranking keyword to its landing page inside GA4. Check engagement rate, average session duration, and conversions for that page.
- Rising rank, falling engagement? Your content might not match search intent anymore.
- Steady rank, rising conversions? You’ve found a page worth doubling down on.
- Dropping rank, dropping traffic? Time to refresh or rebuild that page.
Quick summary: Google Analytics doesn’t track rankings on its own. Link Search Console to GA4, pull query-level position data from Search Console, then cross-reference it against GA4’s engagement and conversion metrics for the full picture.
How to Track Keyword Ranking in Google Analytics Over Time
A single snapshot doesn’t tell you much. You want trends.
Build a custom exploration in GA4 using the Search Console data source. Set your dimension to “Query” and your metrics to clicks, impressions, and average position.
Compare date ranges month over month. Watch for keywords climbing in position but stalling in clicks; that usually signals a weak title tag or meta description, not a content problem.
Sort of a hidden trick here: filter for queries with high impressions but low click-through rate. Those are often page-one rankings you’re not capitalizing on yet.
Note: Trend-tracking beats snapshot-checking every time. Set a recurring monthly review of query position, impressions, and click-through rate inside GA4’s Search Console integration to catch drift early.
Google Analytics Keyword Ranking Tool Alternatives
To be completely fair, GA4 plus Search Console has limits. Neither shows you competitor rankings or historical position changes beyond 16 months.
For deeper competitive tracking, most teams pair GA4 with a dedicated tool:
- Ahrefs: strong for competitor gap analysis and historical rank tracking.
- SEMrush: good for position tracking across large keyword sets.
- Google Search Console API: free, but it requires some technical setup to pull long-term historical data.
Believe it or not, a lot of teams overspend on rank-tracking software before they’ve even set up their free GA4-Search Console link properly. Get the free setup right first.
Important: Third-party rank trackers add competitor visibility and longer historical data, but they’re a supplement, not a replacement, for the free GA4-Search Console integration most sites already have access to.
Setting Up a Recurring Keyword Ranking Report
Manually pulling this data every month gets old fast. Save yourself the repeat work with a saved exploration.
In GA4, build an exploration using the Search Console source, add “Query” as your primary dimension, and pin it to a custom dashboard. Bookmark that view.
Now every time you check keyword ranking in Google Analytics, you’re looking at live, filtered data instead of rebuilding the report from scratch.
Pair that dashboard with a simple spreadsheet log. Drop in position, impressions, and clicks each month for your top 20 queries. Six months in, you’ll have a trend line that’s worth more than any single ranking snapshot.
Common Mistakes When Checking Keyword Rankings
- Assuming GA4 shows rankings natively. It doesn’t; you need Search Console linked.
- Ignoring branded search terms, which can inflate your sense of organic performance.
- Checking rank once and never again. Positions shift weekly, sometimes daily.
- Focusing on rank alone and skipping the engagement and conversion data GA4 provides.
- Forgetting mobile versus desktop splits, which Search Console breaks out separately.
Take my word for it: the teams that treat ranking data and behavioral data as one system, not two separate reports, catch problems faster and fix them sooner.
FAQs
1. Does Google Analytics 4 show keyword rankings directly?
No. GA4 tracks traffic and behavior, not search position. You need to link Google Search Console to see actual keyword rankings alongside your GA4 data.
2. How often should I check keyword rankings in Google Analytics?
Monthly works for most sites. Competitive or fast-moving industries benefit from a biweekly check, especially after content updates or algorithm changes.
3. Can I track keyword ranking in Google Analytics for free?
Yes. Linking Search Console to GA4 costs nothing and gives you query-level position, impressions, and click data inside your existing reports.
4. Why does my keyword rank well but get little traffic?
Low click-through rate is the usual culprit. Check your title tag and meta description; they might not be compelling enough to earn the click at that position.


Artificial intelligence is transforming the way businesses manage their finances. Accounting has traditionally involved significant amounts of manual data entry, invoice processing, transaction categorization, reconciliation, and financial reporting. While these activities remain essential, AI is making it possible to automate many repetitive processes and provide businesses with faster access to useful financial insights.
Modern accounting software ai solutions combine traditional accounting functions with intelligent automation, allowing companies to improve efficiency, reduce administrative workloads, and make more informed decisions. At the same time, digital invoicing requirements are encouraging businesses to modernize how they create, exchange, and manage financial documents.
As businesses adopt more connected financial systems, AI is becoming an important part of modern accounting and financial management.
What Is AI in Business Accounting?
AI in accounting refers to the use of artificial intelligence technologies to automate, analyze, and support financial activities. Instead of relying entirely on manual processes, AI-powered systems can analyze large amounts of financial data and assist users with repetitive tasks.
Common AI accounting capabilities include:
- Automated transaction categorization
- Invoice processing
- Bank reconciliation
- Expense management
- Payment matching
- Financial reporting
- Data extraction
- Financial analysis
These technologies are designed to support accountants and business owners rather than completely replace professional judgment.
1. Automating Repetitive Accounting Tasks
One of the biggest impacts of AI is the automation of routine accounting activities. Businesses often spend considerable time entering information and checking financial records.
AI can assist with:
- Recording transactions
- Categorizing expenses
- Processing invoices
- Matching payments
- Reconciling bank transactions
- Generating financial reports
Automating these activities can reduce administrative workloads and allow accounting teams to focus on more valuable responsibilities.
2. Smarter Invoice Processing
Invoices contain important financial information, but manually processing them can be time-consuming. Employees may need to enter invoice numbers, dates, amounts, supplier information, and tax details into accounting systems.
AI can use data extraction and recognition technologies to identify information from financial documents and organize it automatically.
An intelligent invoice workflow may:
- Extract invoice information
- Identify suppliers
- Categorize transactions
- Detect duplicate invoices
- Match invoices with payments
- Store records digitally
This can make invoice processing faster and more consistent.
3. Supporting Digital Invoicing Requirements
Governments and businesses around the world are increasingly adopting electronic invoicing systems. Digital invoicing can improve the speed and accuracy of exchanging financial information.
Businesses operating in Singapore should pay attention to current electronic invoicing requirements and network-based invoicing developments. Searches for terms such as invoicenow mandatory often reflect businesses trying to understand whether and when digital invoicing obligations apply to them.
Businesses should always check the latest official requirements that apply to their specific circumstances before making compliance decisions.
4. Improving Bank Reconciliation
Bank reconciliation is an essential accounting process that ensures financial records correspond with actual bank transactions. Manually comparing transactions can be particularly difficult for companies with high transaction volumes.
AI accounting systems can help identify matching transactions and highlight exceptions that need human review.
The process may include:
- Importing bank transactions
- Comparing transactions with accounting records
- Identifying potential matches
- Flagging unmatched entries
- Highlighting unusual transactions
This can reduce manual checking and help businesses maintain more organized financial records.
5. Better Financial Reporting
Financial reporting provides businesses with information about their performance and financial position. Traditional reporting can require accountants to gather information from multiple sources before preparing statements.
AI can streamline this process by organizing financial data and identifying relevant patterns.
Businesses can use AI-assisted systems to analyze:
- Revenue
- Expenses
- Profitability
- Cash flow
- Accounts receivable
- Accounts payable
This can help management understand financial performance more quickly.
6. AI-Powered Financial Analysis
AI is not limited to recording financial transactions. It can also analyze data and identify trends.
For example, an AI accounting system may help identify:
- Unusual changes in expenses
- Recurring spending patterns
- Delayed customer payments
- Revenue trends
- Cash-flow changes
- Potential anomalies
These insights can help business owners investigate important changes and make more informed financial decisions.
7. Improving Expense Management
Managing expenses effectively is essential for maintaining profitability. Businesses need to understand where their money is being spent and identify opportunities to reduce unnecessary costs.
AI-powered accounting systems can automatically categorize expenses and organize transactions into useful groups.
Companies can analyze expenses by:
- Department
- Supplier
- Project
- Expense category
- Time period
This can give managers a clearer picture of spending patterns and help improve budgeting.
8. Making Accounting More Efficient for Small Businesses
Small businesses often have limited accounting resources. Owners may manage finances themselves or rely on external accountants.
AI can help smaller companies automate tasks that would otherwise require significant manual effort.
Benefits may include:
- Less data entry
- Faster invoice processing
- Easier reconciliation
- More accessible financial reports
- Reduced administrative workload
Modern accounting software ai platforms can therefore provide small businesses with accounting automation without requiring large finance departments.
9. Improving Cash-Flow Management
Cash flow is one of the most important financial considerations for any business. AI can help companies monitor incoming and outgoing transactions and identify patterns in cash movement.
Businesses can use automated systems to track:
- Outstanding invoices
- Expected payments
- Recurring expenses
- Supplier obligations
- Historical cash-flow trends
Better information can help businesses plan spending and manage working capital more effectively.
AI and the Role of Accountants
AI is changing accounting jobs, but it does not necessarily eliminate the need for accountants. Instead, it can shift accountants away from repetitive data-processing tasks toward activities that require professional expertise.
Accountants can spend more time on:
- Financial planning
- Business advisory
- Tax strategy
- Budget analysis
- Risk management
- Strategic decision-making
Human oversight remains important because financial decisions can involve complex circumstances that automated systems may not fully understand.
Key Considerations When Choosing AI Accounting Software
Businesses should evaluate several factors before adopting an AI accounting platform.
1. Automation
Check which accounting tasks can be automated and whether those features match your workflow.
2. Integration
The software should ideally integrate with banking, invoicing, payment, and other business systems.
3. Security
Financial information should be protected with strong authentication, access controls, backups, and appropriate data protection measures.
4. Scalability
Choose software that can support the business as transaction volumes and financial requirements grow.
5. Compliance Support
Businesses should determine whether the platform supports relevant tax, accounting, and e-invoicing requirements.
The Future of AI in Financial Management
AI accounting technology is continuing to evolve. Future systems may provide more advanced forecasting, automated anomaly detection, financial recommendations, and predictive analysis.
The combination of AI, cloud computing, automation, and digital invoicing could create increasingly connected financial ecosystems. Businesses may be able to process transactions automatically while receiving real-time insights into financial performance.
As accounting software ai technology becomes more sophisticated, companies will increasingly use accounting platforms not just for bookkeeping but also as tools for financial planning and decision-making.
Conclusion
Artificial intelligence is changing business accounting and financial management by automating repetitive tasks, improving data processing, simplifying invoice management, supporting reconciliation, and providing deeper financial insights.
Businesses also need to stay informed about digital invoicing developments. While searches for invoicenow mandatory may raise questions about compliance obligations, businesses should review the latest official requirements applicable to their situation.
By adopting suitable accounting software ai solutions, companies can reduce administrative work, improve financial visibility, and give accounting professionals more time to focus on strategic activities. AI is therefore becoming an important technology for businesses seeking more efficient, accurate, and modern financial management.

6 Best Lodges For Sale: Find Your Perfect Retreat

Unlocking the Best Deals with Rayslocker: Your Ultimate Guide to Affordable Shopping

Maximizing Utility and Security: The Ultimate Guide to UTE Tool Boxes

How to Read a Property Report Like a Pro

What Happenes to Your Muscles After a Workout? Understanding the Recovery Process

What Hospital Grade Breast Pump Means Before You Choose

The 15 Highest-Paid Rugby Players in the World

Christopher Dare: The Untold Story of Engineer and Former Husband of Angela Rippon

How to Ensure Your Home is Valued Correctly for a Quick Sale

What Is Fanquer? The Digital Creator Platform Transforming Direct-to-Fan Engagement

Dr Jared Ross: Missouri Appeals Court Upholds Protection Order Over Graphic Torture and Murder Threats

Nancy Hallam: The Inspiring Life, Career, and Success Story Behind Ian Wright’s Wife
The 15 Highest-Paid Rugby Players in the World
Christopher Dare: The Untold Story of Engineer and Former Husband of Angela Rippon
How to Ensure Your Home is Valued Correctly for a Quick Sale
What Is Fanquer? The Digital Creator Platform Transforming Direct-to-Fan Engagement
Dr Jared Ross: Missouri Appeals Court Upholds Protection Order Over Graphic Torture and Murder Threats
Nancy Hallam: The Inspiring Life, Career, and Success Story Behind Ian Wright’s Wife
-
 Sports4 months ago
The 15 Highest-Paid Rugby Players in the World
-
Celebrity10 months ago
Christopher Dare: The Untold Story of Engineer and Former Husband of Angela Rippon
-
 Real Estate8 months ago
How to Ensure Your Home is Valued Correctly for a Quick Sale
-
 Technology4 months ago
What Is Fanquer? The Digital Creator Platform Transforming Direct-to-Fan Engagement
-
 Celebrity4 months ago
Dr Jared Ross: Missouri Appeals Court Upholds Protection Order Over Graphic Torture and Murder Threats
-
Celebrity11 months ago
Nancy Hallam: The Inspiring Life, Career, and Success Story Behind Ian Wright’s Wife
-

 Health8 months ago
Enclomimed 25 (Enclomiphene) – Effective PCT Protocol
-
 Celebrity10 months ago
Who Is Maisie Mae Roffey? The Private Life, Family Story, and Quiet Success of Julie Walters’ Daughter