
Home Improvement
How Often Should You Schedule a Leather Sofa Cleaning Service?

Key Takeaways
- Leather sofas should generally be professionally cleaned every 6 to 12 months.
- Homes with children, pets, or heavy usage may require more frequent cleaning.
- Regular maintenance helps prevent cracking, staining, and premature wear.
- Professional cleaning services can also complement other home care solutions, such as rug cleaning in Singapore.
Introduction
A leather sofa often serves as the centrepiece of a living room. It adds elegance, comfort, and a sense of luxury that few other furnishings can match. Yet many homeowners focus on cleaning floors, curtains, and carpets while overlooking their leather furniture. Over time, dust, body oils, spills, and humidity can gradually affect the condition of the material.
So, how often should a leather sofa be professionally cleaned? The answer depends on several factors, including usage, household conditions, and the type of leather. Regular professional care helps maintain both appearance and durability, ensuring that a valuable investment continues to look its best for years.
Why Regular Leather Sofa Cleaning Matters
Leather is known for its strength, but that does not mean it is maintenance-free. Unlike fabric upholstery, leather absorbs body oils and collects fine dust particles that can settle into its surface. Singapore’s warm and humid climate can make this process even more noticeable.
When dirt and oils accumulate, the leather may begin to lose its natural sheen. Small cracks can develop, and stains may become more difficult to remove. It is a bit like neglecting a car’s paintwork. The damage may not appear overnight, but it builds gradually.
A professional leather sofa cleaning service removes embedded dirt while applying suitable conditioning treatments. This helps preserve the material’s softness and reduces the risk of premature ageing.
How Often Should Professional Cleaning Be Scheduled?
For most households, a leather sofa cleaning service should be scheduled every six to twelve months. This timeframe allows professionals to remove contaminants before they cause lasting damage.
However, certain situations may require more frequent attention:
- Homes with young children often experience accidental spills and food stains.
- Pet owners may notice increased dirt, fur, and scratches on furniture surfaces.
- Large families typically place greater daily stress on seating areas.
- Properties that receive frequent guests may also benefit from additional cleaning sessions.
In these cases, professional cleaning every four to six months may be a sensible choice.
Between professional visits, simple maintenance can make a significant difference. Wiping the sofa with a soft cloth and cleaning spills quickly helps reduce long-term wear. Even so, routine household cleaning cannot replace the deeper care provided by a professional leather sofa cleaning service.
Signs Your Sofa May Need Cleaning Sooner
Sometimes the calendar is not the best indicator. The condition of the sofa itself can reveal when professional attention is needed.
One common sign is a dull or uneven appearance. Leather naturally develops a rich finish, but accumulated dirt can make it look tired and lifeless. Another warning sign is a sticky or greasy feel, often caused by body oils collecting on frequently used areas.
Unpleasant odours may also develop over time, particularly if spills have seeped into the material. Small cracks or dry patches can indicate that the leather requires conditioning as well as cleaning.
Interestingly, many homeowners who arrange rug cleaning in Singapore at regular intervals overlook similar care for their sofas. Yet both furnishings face daily exposure to dust, dirt, and environmental pollutants. Treating them as part of the same home maintenance routine can help create a cleaner and healthier indoor environment.
A Complete Approach to Home Furnishing Care
Furniture and floor coverings work together to shape the comfort of a home. While a sofa may draw attention, rugs quietly collect dust, allergens, and debris every day. This is why many households combine leather care with rug cleaning as part of a broader cleaning schedule.
Professional cleaning specialists use suitable methods and products for different materials. Leather receives careful cleaning and conditioning, while rugs undergo treatments designed to remove deeply embedded dirt without damaging fibres.
Scheduling both services at similar intervals can simplify home maintenance and help preserve the appearance of valuable furnishings. It also reduces the likelihood of allergens accumulating indoors, which many families appreciate.
Another benefit is consistency. Just as routine servicing helps a vehicle perform reliably, regular care helps household furnishings maintain their quality and comfort over time. Many homeowners who invest in rug cleaning find that extending the same attention to leather furniture delivers equally worthwhile results.
Conclusion
Most leather sofas benefit from professional cleaning every six to twelve months, although high-traffic households may require more frequent care. Regular cleaning removes dirt, restores appearance, and helps prevent issues such as cracking, staining, and dryness.
When combined with other household maintenance services, including rug cleaning in Singapore, professional leather care contributes to a cleaner and more comfortable living space. Consistent attention today can help extend the life of valuable furnishings and preserve their appearance for years to come.
For professional leather furniture care and specialised cleaning solutions, contact Clean Care today.









When it comes to maintaining a home, plumbing is a critical component that requires professional expertise. Sydney homeowners should exercise caution and due diligence when selecting a plumber to ensure quality service and avoid costly repairs. A common point of reference for many residents is the reputable plumber Bondi, known for reliable and efficient plumbing solutions. This article outlines five essential questions every Sydney homeowner should ask before hiring a plumber.
1. Are you licensed and insured?
Professional plumbing services in Sydney must be licensed and insured to meet regulatory requirements. Asking about the plumber’s license verifies their qualification to perform plumbing work legally and safely. Insurance protects homeowners from liability in case of accidents or damage during the job. Confirming these credentials is critical to ensuring the plumber adheres to industry standards and provides dependable services.
2. What experience do you have in handling plumbing issues?
Experience is a key factor in assessing a plumber’s capability to manage various plumbing problems efficiently. Homeowners should inquire about the plumber’s years in the trade and specific experience with issues prevalent in Sydney residences. An experienced plumber in Sydney will possess practical knowledge of local plumbing systems and be better equipped to diagnose and resolve problems quickly.
3. Can you provide references or reviews from former clients?
References and reviews offer insights into the plumber’s reliability, professionalism, and quality of work. Homeowners should request contact information of previous clients or check online platforms for customer feedback. Positive reviews and satisfied clients can be indicative of trustworthy service providers, reducing the risk of unsatisfactory outcomes.
4. What is included in your service guarantee or warranty?
A reputable plumber should provide a clear guarantee or warranty covering their workmanship and the materials used. Understanding the terms of the guarantee helps homeowners know what recourse they have if issues arise after the service. This assurance contributes to peace of mind and safeguards the homeowner’s investment in plumbing repairs or installations.
5. How do you estimate and charge for your services?
Transparency in pricing is essential to avoid unexpected expenses. Homeowners should ask how the plumber calculates costs, whether it is a fixed rate, hourly charge, or based on parts and materials used. A detailed written estimate prior to work commencement ensures clarity and helps homeowners budget accordingly.
Additional considerations
Beyond these five questions, Sydney homeowners should also assess the plumber’s availability, response times, and emergency services. Reliable communication and prompt responses are crucial, especially in urgent situations such as leaks or blockages that could cause property damage.
Choosing a local plumber familiar with Sydney’s plumbing infrastructure, such as a plumber Bondi, can provide advantages including quicker service and local knowledge. Evaluating the plumber’s tools and technology used may also indicate their commitment to efficient and modern service delivery.
Conclusion
Hiring the right plumber requires careful vetting through targeted questions that address licensing, experience, client satisfaction, guarantees, and pricing. Informed decision making ensures Sydney homeowners receive quality plumbing services that are reliable, transparent, and professionally executed. When selecting a plumber, it is advisable to consider established professionals like a plumber in Sydney who can meet these criteria and provide satisfactory outcomes for all residential plumbing needs.
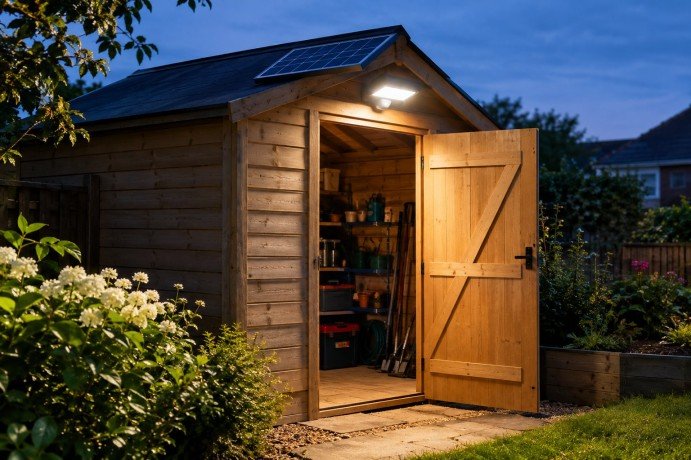
Garden sheds serve various purposes, from storing tools to acting as quiet retreats for hobbies. Ensuring these spaces are adequately lit is essential for safety, convenience, and efficiency, particularly during evening hours. One effective and environmentally friendly solution is the use of a solar shed light. This technology offers multiple advantages, combining practicality with sustainability for garden illumination needs.
Understanding Solar Shed Lights
Solar shed lights are lighting fixtures powered entirely by solar energy. They feature solar panels that convert sunlight into electricity, which is stored in rechargeable batteries. This stored energy is then used to power LED lights, providing illumination during dark hours. These lights require no external electrical connections, making them ideal for garden sheds that might not have convenient access to mains power.
Benefits of Solar Shed Lighting
Energy Efficiency and Environmental Benefits
One major advantage of solar shed lights is their energy efficiency. By harnessing the sun’s energy, they reduce reliance on conventional electricity, lowering energy bills and reducing a carbon footprint. This clean energy usage aligns with broader goals of sustainability and environmental stewardship.
Cost-Effectiveness
Solar shed lights eliminate the need for wiring and complex electrical installations. Once installed, there are no ongoing electricity costs. Additionally, maintenance requirements are minimal, primarily consisting of occasional cleaning of the solar panels to ensure optimal performance.
Ease of Installation
Without the requirement for electrical wiring, solar shed lights are straightforward to install. This makes them accessible for DIY enthusiasts and reduces labour costs if professional installation is needed. The flexibility of placement allows users to position lights optimally without the constraints of electrical access.
Enhanced Safety
Well-lit garden sheds reduce the risk of accidents by improving visibility. Solar shed lights provide reliable illumination, deterring intruders and improving security in outdoor spaces. Their automatic operation, often triggered by sensors or timers, ensures spaces are illuminated when needed without manual intervention.
Key Features of Solar Shed Lights
Battery Capacity and Charging
Effective solar shed lights incorporate batteries capable of storing sufficient energy to illuminate spaces for extended periods, even during overcast days. High-quality batteries ensure consistent performance throughout the year, contributing to reliability.
Durability and Weather Resistance
Since garden sheds are exposed to varying weather conditions, solar shed lights feature robust construction materials. Waterproof and dustproof ratings, typically denoted as IP ratings, indicate resilience against environmental challenges, ensuring longevity.
Lighting Technology
LED lights are predominantly used in solar shed lighting due to their high luminous efficacy, longer lifespan, and energy-saving qualities. They provide bright illumination while conserving power, making them suitable for sustained use.
Automated Operation
Many solar shed lights include built-in sensors that detect ambient light or motion. This automation allows the lights to switch on at dusk or upon detecting movement, enhancing convenience and security without manual switching.
Considerations When Selecting Solar Shed Lights
Size of the Shed and Lighting Needs
Determining the size of the garden shed and intended use helps in selecting the appropriate brightness and number of light fixtures. A larger shed or one used for detailed tasks may require more powerful or multiple lights.
Solar Panel Placement
Effective solar energy capture necessitates an unobstructed location for the solar panels, ideally exposed to direct sunlight for several hours daily. Users should consider the orientation and shading of their garden sheds to maximise solar input.
Battery Life and Warranty
Inspecting battery specifications and warranty terms assures users of the product’s quality and support. Reliable batteries contribute to the system’s overall usability and reduce replacement frequency.
Applications Beyond the Garden Shed
While primarily designed for garden sheds, solar shed lights are versatile and can be used in other outdoor structures such as garages, barns, or patios. Their cordless functionality and resilience make them adaptable to various lighting scenarios.
Complementing Garden Aesthetics
Some solar shed lights offer design features that blend with garden aesthetics, including various colours and shapes. This allows integration without compromising visual appeal.
Supporting Outdoor Activities
Illuminated sheds extend usability into the evening, supporting gardening activities, DIY projects, or social gatherings. Solar shed lighting enhances the functional value of garden spaces.
Maintenance Tips for Solar Shed Lights
Maintaining optimal performance involves periodic cleaning of solar panels to remove dirt and debris that could hinder sunlight absorption. Checking for physical damage and ensuring that sensors and batteries function correctly improves longevity.
Seasonal Adjustments
Due to changing sun angles and weather patterns, adjusting the solar panel orientation seasonally can enhance energy collection. Users should monitor the lighting performance regularly and adjust as necessary.
Conclusion
Solar shed lights represent an efficient, eco-friendly, and cost-effective solution for illuminating garden sheds. Their ease of installation, minimal maintenance, and automatic operation make them an excellent choice for enhancing safety and usability of outdoor spaces. As sustainable living gains priority, integrating such solar lighting solutions aligns with modern environmental and practical demands.

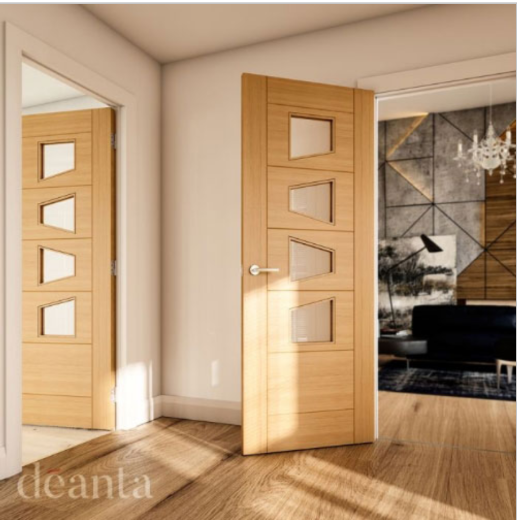
Choosing interior doors for an entire home involves more than finding a style you like. Each room has its own purpose, so privacy, natural light, sound control, space, and overall design can all affect the right choice. At the same time, the doors need to work together so the home feels connected rather than made up of unrelated spaces.
Oakwood Doors’ experience across traditional and contemporary interiors highlights why these details matter. A solid design can create a sense of privacy in a bedroom, while glazing can help natural light move between adjoining living spaces.
The best choice therefore depends on where the door is going and what you need from it. Here’s Oakwood Doors’ guide to choosing interior doors for different rooms, with practical points to consider before making your selection.
1. Prioritize Privacy in Bedroom and Bathroom Doors
Privacy is usually a priority when choosing interior doors for bedrooms and bathrooms. Solid doors provide more visual isolation, whereas panel designs can add personality without making the room feel integrated with the surrounding spaces.
Sound control may also be a factor, especially when talking of bedrooms along corridors or common areas. A solid-core structure usually offers better sound insulation compared to hollow-core products, so the structure should be given as much consideration as the appearance.
The style can then be aligned to the room. Classic interiors can be either a molded or a panel design, and a smooth door can be used to accompany a more modern interior. The approach to traditional and modern door styles by Oakwood Doors demonstrates how, with the same focus, such as privacy, there can be space to make various design decisions.
2. Pick Glazed Designs to Bring Light into Living and Dining Rooms
The connection between adjacent spaces is usually stronger in living and dining areas. You can use glass on each door to allow light to flow through the rooms, while still giving each area its own border that helps the home feel open.
Glass type contributes to the look and privacy. Glazing in a straight line brings more visual connection, whereas obscure or decorative glass blurs the image and adds more detail.
Think about the wider room before choosing the glazing style. Furniture, flooring, wall colors, and surrounding trim can all influence whether a simple glass design or a more decorative door feels right. Oakwood Doors’ selection of glazed styles reflects how glazing can become both a practical feature and part of the room’s overall design.
3. Coordinate Kitchen and Hallway Doors with Wider Interior
Kitchens and hallways often connect several rooms, so their doors can have a noticeable effect on the flow of the home. A finish that relates to nearby flooring, woodwork, walls, or furniture can make these connecting areas feel more cohesive.
Color gives you plenty of scope to create that relationship. Natural oak and blonde oak can bring warmth, while walnut adds deeper wood tones. Gray, black, ivory, and white can create different effects depending on the surrounding interior.
You can also create consistency without using exactly the same door design everywhere. Repeating a finish, panel detail, or general style across selected rooms can tie the home together while allowing each space to retain its own character. This balance is useful when choosing doors for areas that sit between several rooms.
4. Consider Sound Control for Home Office Doors
A home office needs enough separation to support focused work, particularly when it sits close to busy parts of the house. Solid construction can provide greater sound control, while a full door also creates a clear boundary between the workspace and surrounding rooms.
The appearance should suit the way the office is designed. Clean lines and simple furniture may work well with a flush door, whereas a panel style can complement a more traditional workspace. Glazing is another option when some visual connection with the rest of the home is useful.
Oakwood Doors’ mix of contemporary and traditional styles demonstrates why function and appearance can be considered together. Start with the level of privacy and sound control you need, then choose a design that fits naturally with the furniture and finishes already in the room.
5. Choose Flexible Formats for Open and Multi-Use Spaces
Some areas need greater flexibility because their purpose can change throughout the day. A wider opening between a kitchen and dining area, for example, may need to feel open at one time and more defined at another.
Bifold, French, and double doors each approach this requirement differently. Bifold doors can work well where efficient use of space matters, while double doors create a broad opening between adjoining rooms. French doors can bring a more traditional character while maintaining a visual connection between the spaces.
Before settling on a format, consider how much room the door needs to open and how furniture sits around the opening. Oakwood Doors’ focus on different door formats reinforces the importance of matching the opening mechanism and proportions to the way you use the space.
6. Check Size, Finish, and Construction Before Choosing
Once the room’s main requirements are clear, practical details become the next consideration. A door needs to suit the existing opening, and standard UK dimensions provide a useful starting point. Selected ranges also come in metric sizes, while bespoke options can accommodate specific dimensions and design requirements.
Finish affects both the installation process and the final appearance. Primed doors provide a surface ready for a final coat of paint, prefinished doors arrive with their finish already applied, and unfinished timber gives you greater freedom to choose a stain or paint.
Construction is equally important. Solid-core, semi-solid, and molded doors differ in weight, sound control, durability, and appearance, so the right option depends on the room and how the door is expected to perform.
Oakwood Doors also considers practical details such as doors suitable for trimming up to 32mm, although the permitted amount should always be checked for the specific model. Where fire performance is required, FD30 and FD60 ratings provide 30- and 60-minute fire resistance respectively, making the required specification an important part of the selection process.
Bottom Line
Choosing interior doors for every room starts with understanding what each space needs. Bedrooms and bathrooms often benefit from privacy, while glazed designs can bring natural light into living areas. Home offices may need greater sound control, and larger spaces can benefit from flexible door formats. From there, consider the finish, size, and construction so each door suits its surroundings.
Oakwood Doors brings these factors together, helping you look beyond appearance alone. By considering each room’s purpose alongside style, glazing, finish, size, and construction, you can create a consistent look while giving every space a door suited to its needs.

Account Safety 101: How to Vet Any Instagram Growth Service

What Makes Underground Streetwear Hit? Breaking Down the MF DOOM Shirt and Parke Hoodie Hype

Unlocking Peak Performance with AMD Ryzen X3D: A Gamer’s Ultimate Guide

5 questions every Sydney homeowner should ask before hiring a plumber

Transforming Business Efficiency with Modern Workplace Solutions

Empowering Success: Comprehensive NDIS Student Support Services

The 15 Highest-Paid Rugby Players in the World

Christopher Dare: The Untold Story of Engineer and Former Husband of Angela Rippon

How to Ensure Your Home is Valued Correctly for a Quick Sale

What Is Fanquer? The Digital Creator Platform Transforming Direct-to-Fan Engagement

Dr Jared Ross: Missouri Appeals Court Upholds Protection Order Over Graphic Torture and Murder Threats

Nancy Hallam: The Inspiring Life, Career, and Success Story Behind Ian Wright’s Wife
The 15 Highest-Paid Rugby Players in the World
Christopher Dare: The Untold Story of Engineer and Former Husband of Angela Rippon
How to Ensure Your Home is Valued Correctly for a Quick Sale
What Is Fanquer? The Digital Creator Platform Transforming Direct-to-Fan Engagement
Dr Jared Ross: Missouri Appeals Court Upholds Protection Order Over Graphic Torture and Murder Threats
Nancy Hallam: The Inspiring Life, Career, and Success Story Behind Ian Wright’s Wife
-
 Sports5 months ago
The 15 Highest-Paid Rugby Players in the World
-
Celebrity10 months ago
Christopher Dare: The Untold Story of Engineer and Former Husband of Angela Rippon
-
 Real Estate8 months ago
How to Ensure Your Home is Valued Correctly for a Quick Sale
-
 Technology4 months ago
What Is Fanquer? The Digital Creator Platform Transforming Direct-to-Fan Engagement
-
 Celebrity4 months ago
Dr Jared Ross: Missouri Appeals Court Upholds Protection Order Over Graphic Torture and Murder Threats
-
Celebrity11 months ago
Nancy Hallam: The Inspiring Life, Career, and Success Story Behind Ian Wright’s Wife
-

 Health9 months ago
Enclomimed 25 (Enclomiphene) – Effective PCT Protocol
-
 Celebrity11 months ago
Who Is Maisie Mae Roffey? The Private Life, Family Story, and Quiet Success of Julie Walters’ Daughter