
Blog
FeetFinder Fees, Pricing and Subscription Cost Explained


One of the most common questions from people considering selling on FeetFinder is about the cost. How much does it cost to join? What percentage does FeetFinder take? Is it worth it?
This article gives you a complete, transparent breakdown of every cost associated with selling on FeetFinder — with honest analysis of whether the fees are justified and how they compare to alternatives.
The FeetFinder Fee Structure at a Glance
FeetFinder charges sellers in two ways:
- Monthly subscription fee: A fixed cost to access the seller marketplace
- Commission on sales: A percentage taken from each transaction
There are no hidden fees, no listing fees, no withdrawal fees (beyond standard payment processor charges), and no costs for uploading content.
Seller Subscription Plans
Basic Plan: $4.99/month
The Basic plan gives you full access to the FeetFinder seller marketplace to sell feet pics. This includes:
- Your seller profile and bio
- Unlimited content uploads (photos and videos)
- Album creation and pricing tools
- Direct messaging with buyers
- Custom content request functionality
- Access to FeetFinder’s buyer marketplace and search discovery
The Basic plan is more than sufficient for new sellers and for those building toward their first consistent sales.
Premium Plan: $14.99/month
The Premium plan includes everything in Basic, plus:
- Enhanced profile visibility in search results
- Priority placement in FeetFinder’s marketplace browse features
- Access to promotional and featured seller tools
- Increased exposure to new buyers browsing the platform
The Premium plan is worth the upgrade once you are generating at least $100–$150/month in sales. At that level, the additional visibility more than pays for itself in incremental revenue.
Commission Rate: 20%
FeetFinder takes 20% of every sale. You keep 80%. Here is what that looks like in practice:
- $10 sale: you keep $8
- $25 album: you keep $20
- $75 custom request: you keep $60
- $200 exclusive package: you keep $160
- $1,000 monthly revenue: you keep $800
The 20% commission is applied to all sales — photos, video clips, custom content, and subscription payments from buyers.
Is the 20% Commission Fair?
Yes — and here is why. The commission does not just cover FeetFinder’s operational costs. It pays for:
- Buyer acquisition: FeetFinder markets the platform and brings buyers to you. Without this, you would need to find every customer yourself.
- Payment processing: Secure transaction processing, fraud prevention, and chargeback protection are included in the commission.
- Platform maintenance: The technology, servers, and features that make your selling experience possible are funded by the commission.
- Age verification system: The verification infrastructure that keeps the platform safe and legal is an ongoing cost covered by commission revenue.
- Support and dispute resolution: FeetFinder’s support team is available to resolve issues on your behalf.
For context, OnlyFans takes 20%, Patreon takes 8–12% plus payment fees, and most managed content marketplaces take 20–30%. FeetFinder’s rate is industry-standard and arguably the most justified given the value it delivers specifically for this niche.
How Does the Subscription Fee Compare?
At $4.99/month, FeetFinder’s basic subscription is extremely accessible. Consider the math:
- A single $10 photo sale covers the subscription cost and generates a $3 profit
- Most new sellers recover the subscription fee in their first week of selling
- The annual cost of the Basic plan is $59.88 — less than most people spend on coffee in a month
The subscription exists not as a barrier, but as a quality filter. It ensures buyers are interacting with committed sellers who have invested in the platform — creating a better overall marketplace experience.
Are There Any Hidden Fees?
No. FeetFinder does not charge:
- Listing fees per photo or album
- Withdrawal fees (though payment processors may charge their own standard fees)
- Setup or registration fees beyond the subscription
- Fees for messaging buyers or accepting custom requests
The cost structure is transparent and exactly as described: subscription plus 20% commission. That is it.
Buyer Fees
Buyers create accounts and browse for free. They only pay when purchasing content. There are no subscription fees for buyers — they pay the seller’s listed price for each purchase.
How FeetFinder’s Fees Compare to Free Platforms
The most common objection to FeetFinder’s fees is the existence of “free” alternatives. But the comparison is misleading:
- Reddit (free): No payment infrastructure, high scam risk, no buyer verification, no content protection. The “free” cost comes with expensive trade-offs in time, safety, and earnings.
- Instagram/Twitter (free): No payment system, no buyer traffic for this niche, high ban risk. Requires enormous marketing effort to generate any sales.
- Direct messaging (free): Maximum risk. Payment fraud is common, content theft is unprotected, and there is no dispute resolution.
When you account for the time spent managing buyers manually, the risk of scams, and the low conversion rates of free platforms, FeetFinder’s fees are a highly efficient investment in a faster, safer, more profitable selling experience.
How to Cancel Your FeetFinder Subscription
If you decide FeetFinder is not the right fit, you can cancel your subscription through your account settings. Your profile remains active until the end of your billing period. Content you have uploaded remains on the platform, but buyers will not be able to make new purchases after your subscription lapses.
Frequently Asked Questions About FeetFinder Pricing
Is there a free trial on FeetFinder?
FeetFinder occasionally runs promotional offers. Check the platform directly for current deals. Even at full price, $4.99/month is a minimal investment relative to the earning potential.
What payment methods does FeetFinder accept from sellers?
FeetFinder accepts major credit and debit cards for subscription payment. Check the platform’s current payment options, as these may be updated periodically.
How and when do sellers get paid?
Sellers receive their earnings (minus the 20% commission) through FeetFinder’s payout system. There is a minimum withdrawal threshold. Check the platform’s help center for current payout schedules and methods.
Is the Premium plan worth it?
For sellers generating $150+/month, yes. The enhanced visibility features reliably generate enough additional sales to more than offset the $10/month premium over the Basic plan.
The Bottom Line on FeetFinder Costs
FeetFinder’s fee structure is transparent, fair, and well-justified. The $4.99 Basic subscription and 20% commission provide access to the largest dedicated buyer base in this niche, a fully managed and safe payment system, seller anonymity tools, and professional-grade support.
No other platform delivers this combination of value for this cost. If you are ready to start earning, the investment in a FeetFinder subscription is one of the easiest decisions you will make.


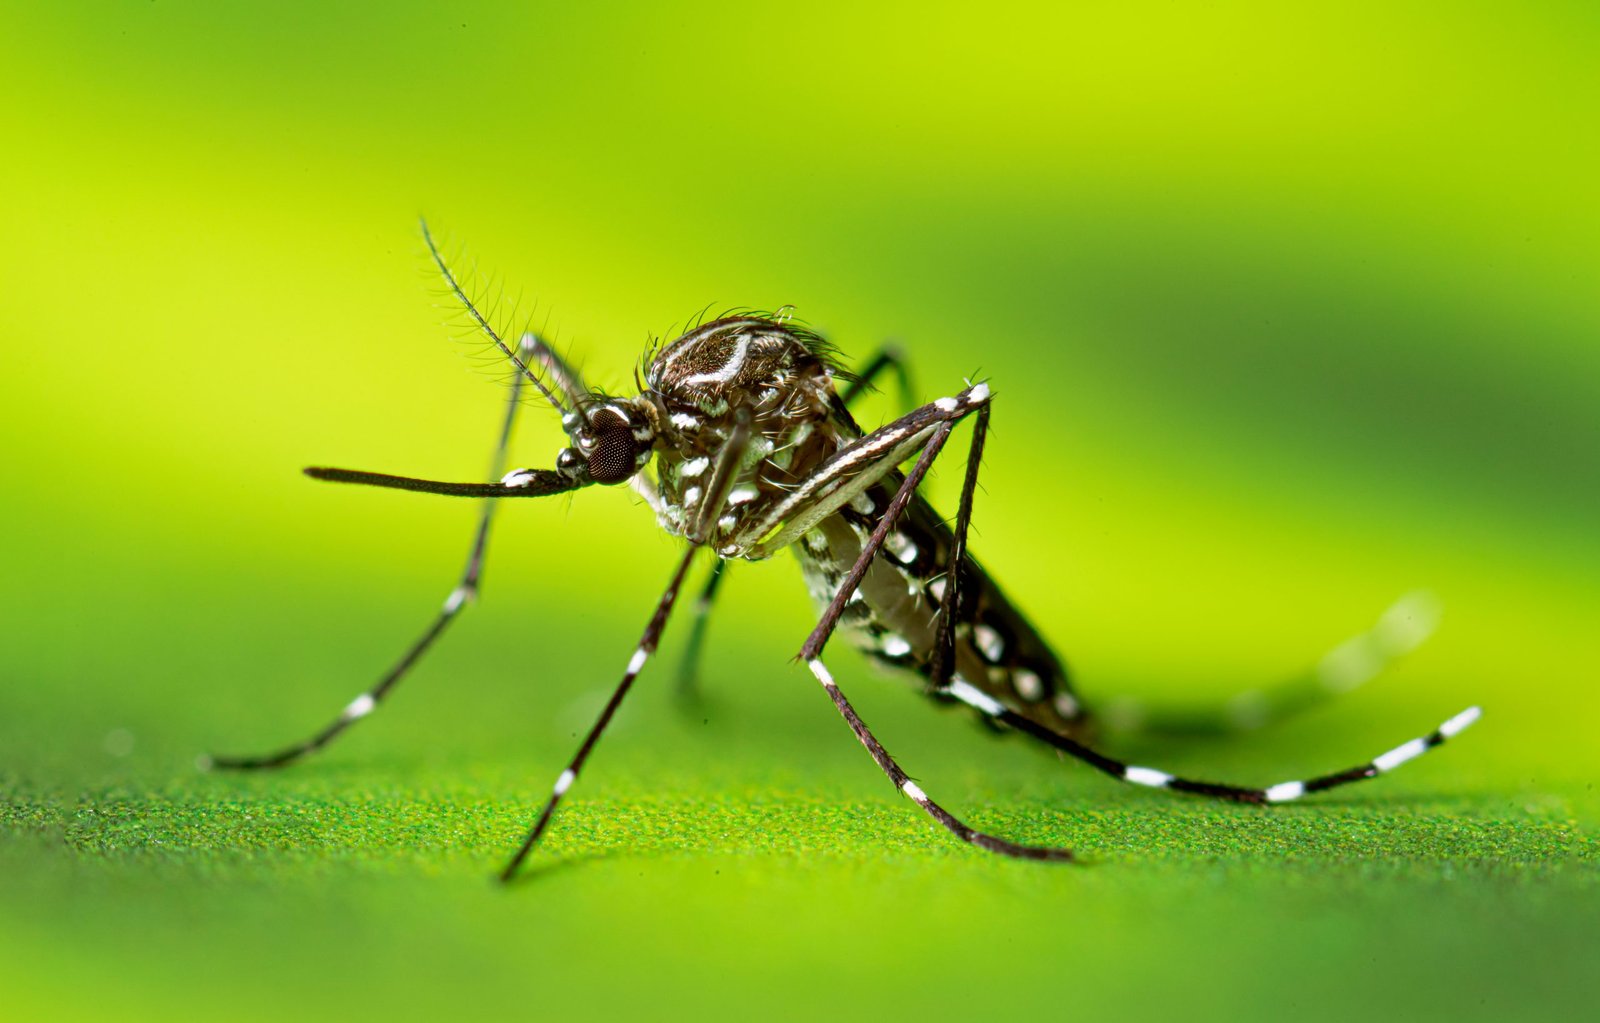
Mosquitoes are small insects that can create significant problems for homeowners, businesses, and anyone who spends time outdoors. Their bites can cause itching, redness, swelling, and irritation, while certain species can transmit diseases. Because mosquitoes can reproduce quickly under favorable conditions, a small population can become a much larger nuisance when suitable breeding areas are available. Learning how these insects live, where they reproduce, and what attracts them is an important part of developing an effective prevention strategy.
Mosquitoes are attracted to several signals that help them locate potential hosts. Carbon dioxide from breathing, body heat, moisture, and certain odors can all play a role. While some species are more active during dawn and dusk, others may seek hosts during daylight. Their behavior can also change according to temperature, humidity, rainfall, and surrounding environmental conditions.
Effective mosquito management generally requires more than treating adult insects. Eliminating or reducing breeding sites, managing standing water, maintaining outdoor spaces, improving barriers around buildings, and using appropriate personal protection can all contribute to better results. When populations remain difficult to manage, professional pest management may provide additional options based on the conditions present on the property.
Understanding the Mosquito Life Cycle
Mosquitoes have a life cycle that includes four main stages: egg, larva, pupa, and adult. The first three stages generally depend on water, making standing water one of the most important factors in mosquito prevention. Depending on the species, females may deposit eggs directly on water, near water, or in locations that are likely to become flooded.
After hatching, larvae remain in water and develop through several stages before becoming pupae. The pupal stage allows the insect to undergo transformation before emerging as an adult. Under suitable environmental conditions, this development can happen relatively quickly.
The life cycle explains why eliminating breeding water can be so valuable. Treating adult insects may provide temporary relief, but if larvae continue developing nearby, new adults can replace the insects that have been removed.
Identifying Common Breeding Sites
Mosquito breeding areas are not always large ponds or wetlands. Small amounts of stagnant water can sometimes be enough to support development. Common examples include buckets, plant saucers, discarded containers, clogged gutters, children’s toys, wheelbarrows, outdoor furniture, and uncovered storage containers.
Natural features can also hold water. Tree holes, low areas in soil, drainage depressions, and dense vegetation may create favorable conditions depending on the species.
A routine property inspection can help identify these areas. Containers that are not necessary should be emptied, covered, or stored so they cannot collect rainwater. Objects that repeatedly collect water may need to be repositioned or removed.
Regular inspection is especially useful after rainfall because new breeding sites can appear quickly.
Why Standing Water Is Important
Standing water provides the environment required for many mosquito species to complete their early development. Water does not necessarily need to remain for weeks to become relevant, because certain species can develop rapidly when temperature and other conditions are favorable.
Property owners should pay attention to places where water remains after rain, irrigation, or cleaning. Poor drainage around buildings can create recurring problems, while blocked gutters can retain water above or near the structure.
Addressing these sources can have a long-term impact because it targets mosquitoes before they become flying adults.
Drainage improvements may be necessary when water repeatedly accumulates in the same areas. Correcting the underlying cause is generally more sustainable than repeatedly treating the resulting mosquito population.
Protecting Indoor Spaces
Although mosquitoes are often associated with outdoor areas, they can enter buildings through open doors, windows, damaged screens, vents, and other openings. Keeping screens in good condition can help reduce indoor exposure.
Doors should close properly, and gaps around frames should be evaluated where appropriate. Air conditioning can also reduce exposure by allowing windows and doors to remain closed.
Indoor standing water should also be considered. While most household water sources are not breeding sites, neglected containers or drainage areas may occasionally provide suitable conditions.
Regular inspection of indoor and outdoor areas provides a more complete prevention strategy.
Managing Outdoor Areas
Outdoor spaces can become more comfortable when conditions that support mosquito activity are reduced. Grass, shrubs, weeds, and dense vegetation can provide shaded resting locations for adult mosquitoes.
Routine landscaping can improve airflow and reduce excessive vegetation around patios, entrances, recreational spaces, and other frequently used areas. However, vegetation management should be combined with standing-water reduction because landscaping alone will not eliminate breeding sites.
Outdoor furniture and equipment should also be inspected after rain. Covers, containers, and other objects may collect water in places that are easily overlooked.
A clean and well-maintained outdoor environment can make mosquito management easier.
Personal Protection Measures
People can reduce their exposure to mosquito bites through practical personal measures. Long sleeves and long trousers can reduce the amount of exposed skin, while appropriately used insect repellents can provide additional protection.
Repellents vary in their active ingredients and effectiveness. Users should always follow product directions and use products only as recommended.
Outdoor activities can sometimes be scheduled around periods of lower mosquito activity, although this varies by species and environmental conditions.
Using screened porches, tents, or other physical barriers can also reduce contact with mosquitoes when spending extended periods outdoors.
The Role of Gutters and Drainage
Gutters can become an unexpected source of mosquito breeding when leaves, dirt, and other debris prevent water from flowing freely. Water trapped inside a gutter can remain undisturbed long enough to support mosquito development.
Regular gutter cleaning can help maintain proper water flow. Downspouts should also direct water away from areas where it can accumulate.
If the same section of a property repeatedly holds water, the issue may involve grading, drainage design, damaged gutters, or another structural condition.Addressing these problems can provide benefits beyond mosquito prevention by reducing the risk of moisture-related property damage.
Managing Decorative Water Features
Ponds, fountains, birdbaths, and other decorative water features require appropriate maintenance. If water becomes stagnant, these features may become attractive breeding areas.
Water circulation can help in some designs, while frequent cleaning and water replacement may be appropriate for smaller features.
Birdbaths should be maintained regularly, and unnecessary standing water should be eliminated whenever possible.Property owners should consider each feature’s design and maintenance requirements rather than assuming that all water features present the same level of risk.
Mosquitoes and Outdoor Recreation
Mosquito activity can interfere with outdoor dining, gardening, sports, family gatherings, and recreational activities. Managing breeding sites around patios, decks, yards, and entertainment areas can improve comfort.
Fans can sometimes be useful around outdoor seating because moving air can make it harder for mosquitoes to fly and remain near people. Screens and other physical barriers can provide additional protection.
Lighting can also influence insect activity. While lighting is not a direct solution to mosquito problems, thoughtful placement and maintenance can help create a more comfortable outdoor environment.The most effective strategy usually combines environmental management with personal protection.
Mosquitoes and Public Health
Certain mosquito species can transmit pathogens that cause diseases in people and animals. The risks vary depending on the species present, environmental conditions, and whether particular pathogens are circulating.
This means mosquito prevention can have importance beyond reducing bites and nuisance. Removing breeding areas and reducing exposure can contribute to broader efforts to limit contact with disease-carrying insects.
Anyone who experiences symptoms after mosquito exposure should seek appropriate medical advice. Current health guidance should be followed when mosquito-borne disease risks are relevant.
It is important not to assume that every mosquito bite leads to illness. However, reducing unnecessary exposure remains a sensible preventive measure.
Protecting Children and Pets
Children may spend significant amounts of time outdoors, making practical mosquito prevention particularly useful for families. Clothing, screened areas, and appropriately selected repellents can reduce exposure.
Repellent products should be used on children only according to their labels and age-related instructions. Care should also be taken to avoid unnecessary application to sensitive areas.
Pets can also be exposed to mosquitoes. Some mosquito-borne illnesses can affect animals, so pet owners should discuss appropriate preventive measures with a veterinarian.Environmental management around the home provides an additional layer of protection for people and animals.
Professional Mosquito Management
When mosquito populations remain high despite routine prevention, professional pest management can help identify the reasons for continued activity. A professional inspection can locate breeding areas, evaluate vegetation and drainage, and determine where treatment may be appropriate.
Treatment approaches can target adult mosquitoes, larvae, or specific areas where populations are developing. The appropriate method depends on the property’s conditions and the species involved.
Professionals can also recommend environmental changes that reduce the need for repeated treatment.A combination of source reduction, monitoring, and targeted control can often provide a more practical long-term strategy than repeated broad applications.
Choosing Appropriate Treatment Methods
Different mosquito treatments are designed for different purposes. Some target adult insects, while others focus on larvae or breeding areas. Selecting the appropriate method requires consideration of where mosquitoes are developing and how they are using the property.
Chemical treatments should be used according to product labels and applicable safety requirements. Applying more product than recommended does not necessarily improve control and can increase unnecessary exposure.
Professional pest management providers can determine whether treatment is necessary and which approach is suitable.The objective should be to achieve meaningful control while minimizing unnecessary treatment.
Integrated Pest Management
Integrated pest management combines environmental prevention, monitoring, physical barriers, personal protection, and targeted treatment. This approach recognizes that mosquitoes are influenced by multiple factors and that no single action is likely to eliminate every insect.
For example, a property owner may remove standing water, clean gutters, maintain landscaping, repair screens, use personal protection, and arrange targeted treatment if activity remains high.
Regular monitoring allows changes to be made as conditions evolve. This is especially important after rainfall, when new breeding sites may develop.
Integrated management can provide a more sustainable strategy than relying entirely on chemical applications.
Managing Mosquitoes After Rain
Rain can dramatically change mosquito breeding conditions. Water may collect in containers, drainage depressions, gutters, tarps, toys, and other objects.
Inspecting the property after significant rainfall can help identify these temporary water sources. Removing the water before larvae have time to develop can interrupt the life cycle.
Areas that repeatedly flood or retain water may require permanent drainage improvements.Post-rain inspections are particularly useful because breeding conditions can change rapidly.
Seasonal Prevention
Mosquito populations often change throughout the year based on temperature, rainfall, humidity, and other environmental factors. Prevention efforts may therefore need to be adjusted seasonally.
Before periods of increased mosquito activity, property owners can inspect drainage systems, clean gutters, remove unnecessary containers, repair screens, and manage vegetation.
During periods of increased rainfall, inspections may need to occur more frequently.Maintaining a routine rather than waiting until populations become severe can make prevention more manageable.
Maintaining Water Sources
Not all water sources can or should be removed. Some properties may have necessary water storage, pools, ponds, or other features.
In these cases, appropriate maintenance becomes important. Containers should be covered where practical, pools should be maintained according to their requirements, and decorative features should be managed to prevent stagnant conditions.
Water management should be based on the purpose of the water source and the specific environmental conditions.The objective is to prevent unnecessary stagnant water while maintaining essential property features.
Monitoring Outdoor Activity
Monitoring can help property owners determine whether prevention measures are working. Changes in mosquito activity can be observed around patios, entrances, gardens, and other frequently used areas.
If activity remains high, the property should be reassessed for hidden breeding sites. A single overlooked container or drainage problem can sometimes support continued development.Professional monitoring can provide additional information when the source is difficult to identify.
Tracking conditions over time can also help determine when preventive measures should be increased.
When Professional Assistance Is Appropriate
Professional services may be appropriate when mosquito populations remain persistent, outdoor areas are difficult to manage, or breeding sites cannot be identified.
A professional can inspect the property and recommend a combination of source reduction and treatment. This can be particularly useful for large outdoor areas where mosquito habitats may be difficult to locate.
Property owners should ask about the treatment process, products used, preparation requirements, safety precautions, and recommended follow-up.Understanding the service in advance helps ensure realistic expectations.
Building a Long-Term Prevention Plan
Long-term mosquito management depends on making prevention part of routine property maintenance. Containers should be checked regularly, gutters should remain clear, drainage should function properly, and vegetation should be managed.
Outdoor areas should also be inspected after rainfall. Small changes, such as emptying a forgotten container or correcting a blocked drain, can eliminate potential breeding opportunities.
Indoor barriers should be maintained as well. Damaged screens and door gaps should be repaired to reduce opportunities for mosquitoes to enter.A consistent prevention routine can reduce the need for more intensive interventions.
Conclusion
Mosquito management is most effective when it addresses the conditions that allow populations to develop. Standing water, clogged gutters, poor drainage, dense vegetation, and unprotected openings can all contribute to increased mosquito activity.
Personal protection can reduce bites, while screens and other physical barriers can help limit indoor exposure. Proper maintenance of water features and outdoor spaces can further reduce breeding opportunities.
Professional mosquitoes management may be valuable when populations remain persistent or when breeding areas are difficult to identify. A qualified professional can inspect the property, determine contributing factors, and recommend suitable treatment and prevention measures.
The most practical approach combines several strategies. Removing standing water, maintaining drainage, managing landscaping, protecting indoor spaces, monitoring conditions, and using targeted treatments when appropriate can work together to reduce mosquito activity.
With consistent attention and appropriate preventive measures, property owners can make their homes and outdoor spaces more comfortable while reducing unnecessary exposure to mosquitoes and the problems they may create.

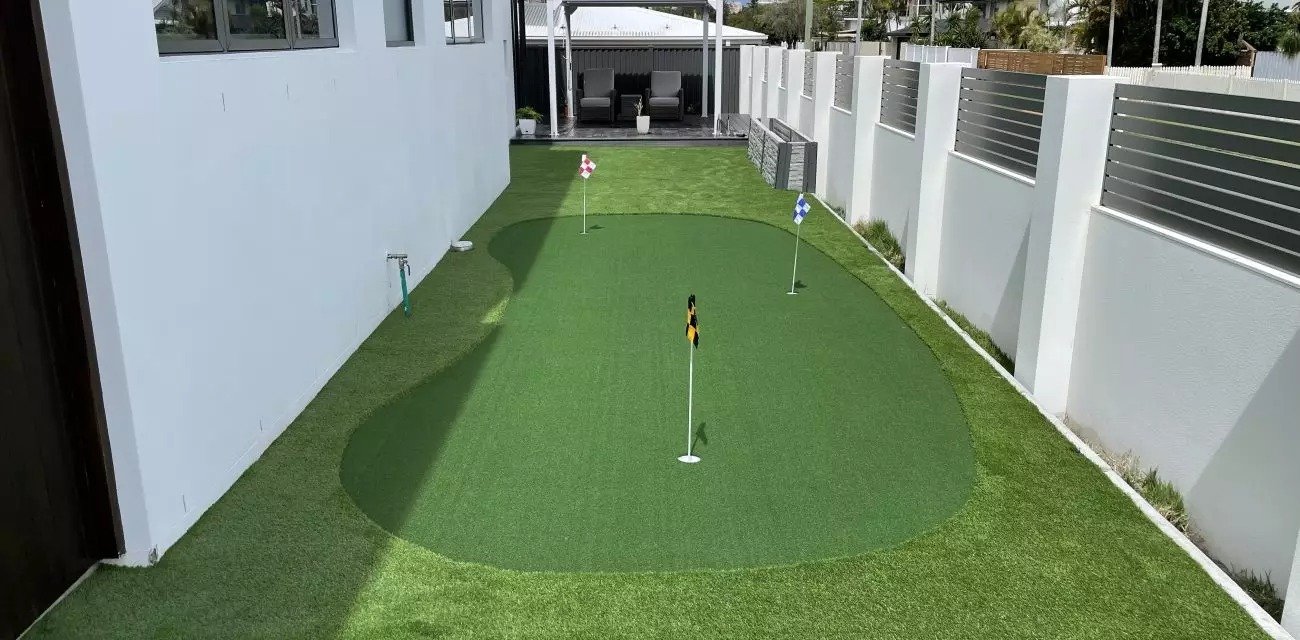
Sporting facilities across Brisbane are continually seeking solutions to improve the quality, durability, and maintenance efficiency of their grounds. One innovative option that has gained considerable attention is synthetic grass. Especially in a city like Brisbane, where weather conditions can be unpredictable and demanding on natural turf, synthetic grass offers substantial benefits.
Among the popular choices is artificial grass sports surfaces provided by specialists such as Luxe Turf. These surfaces are designed to meet the rigorous demands of various sporting activities, ensuring performance and durability year-round.
Durability and Longevity
A primary advantage of synthetic grass in sporting facilities is its remarkable durability. Unlike natural grass, which can wear out quickly under heavy foot traffic, sports synthetic turf maintains its integrity over time. It does not develop bare patches or become muddy in wet conditions, which is particularly advantageous for facilities in Brisbane, where rainfall can be variable but intense.
The robust construction of synthetic grass ensures that the playing surface retains uniformity, providing a consistent experience for athletes and minimising injuries related to uneven ground.
Low Maintenance Requirements
Natural turf requires significant upkeep including watering, mowing, fertilising, and pest management. These maintenance activities can be both costly and labour-intensive. In contrast, synthetic grass offers a low-maintenance alternative that reduces both time and budget expenditures for sporting facilities.
Facilities equipped with sports synthetic turf enjoy reduced operational costs because they eliminate the need for seasonal lawn treatment and irrigation systems. This sustainability aspect is increasingly important for responsible facility management.
Enhanced Playability
Sporting performance heavily depends on the quality of the playing surface. Synthetic turf provides a flawless, smooth surface that improves ball roll consistency, player footing, and overall game quality. Unlike natural grass, it remains playable irrespective of weather conditions, which is vital for scheduling in competitive sports.
Moreover, artificial surfaces retain their aesthetics through various seasons, ensuring that facilities always present a professional appearance for events and players alike.
Environmental Considerations
The environmental impact of maintaining natural grass is significant due to water consumption, pesticide use, and carbon emissions from maintenance equipment. Synthetic grass addresses many of these environmental concerns by reducing water usage substantially and eliminating the need for chemical treatments.
By choosing fake grass options, Brisbane sporting facilities contribute to water conservation efforts and lessen their ecological footprint, aligning with sustainability targets and community expectations.
Versatility Across Sports
Synthetic grass is highly adaptable and can be tailored to suit a wide range of sports, including football, rugby, netball, and tennis. The ability to customise fibre length, density, and cushioning ensures that the turf meets the specific requirements of each sport, enhancing safety and performance.
This versatility allows multi-use sporting facilities in Brisbane to maximise utility and efficiency by installing a synthetic playing surface that supports numerous activities.
Weather Resistance Adapted to Brisbane’s Climate
Brisbane experiences a subtropical climate characterised by hot summers and occasional heavy rains. Natural grass often struggles under these conditions, suffering from heat stress and waterlogging. Synthetic grass, however, withstands harsh sun and rain without deterioration.
Its superior drainage systems facilitate quick water runoff, reducing game cancellations and surface damage. Consequently, synthetic turf proves to be a reliable option for sporting venues seeking to minimise weather-related interruptions.
Cost Efficiency Over Time
While the initial installation cost of synthetic grass might be higher compared to natural turf, the long-term savings are significant. Reduced maintenance costs, fewer cancellations due to weather, and the extended lifespan of the synthetic surface ensure a favourable return on investment for sporting facilities.
Luxe Turf offers solutions that balance upfront expenditure with durability, creating value for Brisbane sports centres over many years.
Supporting Community and Elite Sports
Investment in high-quality playing surfaces contributes to the development of local sports by providing athletes at all levels with consistent and safe environments. Synthetic grass supports both amateur and professional pathways, encouraging participation and excellence in sport.
Brisbane’s sporting facilities that have embraced synthetic grass help foster community engagement and attract higher-profile competitions due to the reliable surface quality.
Safety Considerations with Synthetic Turf
Modern synthetic grass installations incorporate shock-absorbing underlays and non-abrasive fibres which reduce the risk of injuries. These safety features are critical in contact sports and high-impact activities prevalent in Brisbane’s sporting landscape.
Such innovations ensure that athletes can perform with confidence and facility managers can comply with safety regulations and standards.
Conclusion
In summary, synthetic grass is a highly effective solution for sporting facilities in Brisbane seeking durable, low-maintenance, and versatile playing surfaces. Its resilience to weather conditions, environmental benefits, and performance enhancements make it a superior choice over traditional natural turf.
Clients looking for premium artificial conditions can explore the range of artificial grass sports products offered by Luxe Turf, ensuring their facilities meet the highest standards demanded by modern sports.


Deciding to move your parent into professional care is not an easy decision, and many people have to make a series of small decisions until they get to that point. This may include having a discussion with your parent, evaluating their needs, visiting a care home, arranging a trial stay, and finally making the move. This guide can help you through all of these steps.
Start talking before you think you need to
The discussion regarding aged care needs to be initiated well before anyone experiences a crisis. Unfortunately, many families are prompted to have this conversation only after a loved one suffers a fall, is hospitalized, or receives a shocking diagnosis. At that point, fear and urgency often overshadow the opportunity to make thoughtful choices.
It is advisable to express your feelings first, rather than highlighting the limitations of your parent. For instance, saying “I’m concerned about your safety at night” is much more effective than “you can’t continue living like this”. The latter will only make your parent feel defensive. The former will invite them to share their thoughts about your concern.
It is also important to listen more and let them do the talking. Ask them about their fears, what they fear the most about leaving their home, and what they imagine life in a care facility would be like. Listening to these concerns will help you make the decisions that follow. Avoid taking piles of brochures of different care facilities during the first visit because that may come across as an ambush no matter how well-intended you are. There is no hurry, and it is important to take things slow.
This generation needs to have this conversation sooner than the previous one. Projections by the Australian Government Intergenerational Report 2023 suggest that there will be about three times the number of people aged 85 and over in a few decades’ time, growing from around half a million to approximately 1.5 million.
Understand the assessment before you look at a single facility
Before you even start researching residential care homes, you should get your loved one’s eligibility for government-subsidised residential care established. This is usually done through an ACAT or ACAS assessment, arranged through the My Aged Care portal. It’s an in-home visit where an assessor talks to your parent about their health, mobility, cognition, and support needs, and determines what level of care they’re eligible for. Lodge the enquiry, book the assessment, and treat the wait time as planning time rather than dead time.
Get the money straight early, because confusion here causes real damage
Almost every family stumbles over aged care costs at least once, because the fee structure has three separate layers that get talked about as if they’re one thing. There’s the daily care fee. It’s subsidised by government but topped up by a means-tested care fee which is based on income and assets. Then there’s the accommodation payment, which can be paid as a Refundable Accommodation Deposit (lump sum returned when the resident leaves or passes away) or as a Daily Accommodation Payment (the daily-rate equivalent for those who can’t or don’t want to pay the lump sum), and on top of both of those are extra service fees or premium amenity charges, which may cover anything from meals to room size to additional lifestyle programs.
Get those three layers separated on paper before you have to start comparing facilities. A place that looks cheaper on care fees might carry a much higher RAD, and a place with a modest RAD might be charging through the nose for extra services. Comparing total cost without breaking it into those three lines is how families end up with budget surprises six months in.
Let respite care do the heavy lifting
If what you’re facing is a parent who’s anxious or spooked, don’t push them straight into a permanent move. Respite care – a short stay, typically two to four weeks – will give them a proper test drive. They try the meals, meet the staff, sit through the activities and rhythms, and essentially get a sense of whether they could grow old there without making a major commitment.
This is important because so much of the fear around aged care is about the unknown. A respite stay turns theory into practice. Some residents come home and practically move their things in straight away. Others decide it’s not for them, and that’s useful too – it rules out a bad fit before it becomes a bad decision.
Compare facilities on data, not brochures
Marketing material often inspires a feeling of luxury. But this is not a holiday and upmarket furnishings are not what will make a difference to your parent day in, day out. The Aged Care Quality and Safety Commission publishes audit findings for every residential facility, including compliance history and any sanctions. The STAR Rating system, introduced in 2023, gives a simple 1-to-5 benchmark across categories like residents’ experience, staffing, and quality measures – a quick way to compare facilities you’ve never set foot in.
Dig into registered nursing presence and care minutes per resident per day too. A facility can look impressive on a tour and still fall short on the legislated minimum staffing a resident is entitled to. If your parent is living with cognitive decline, check specifically what memory support units and dementia care programs look like day to day, not just whether a facility says it offers them. If end-of-life needs are on the horizon, ask directly about palliative care capability.
Quality care is important to get your family member through the door of an aged care facility, but it’s not the only thing to consider when making a decision. Room size, natural light, garden access, dining quality, and the feel of daily social life also play an important role in the overall well-being of your loved one. Once you’ve shortlisted facilities on care metrics, it’s entirely reasonable to also look at higher-tier choices such as luxury aged care in Sydney, where hotel-style amenities and higher staffing ratios might justify a meaningful difference in cost. Dignity and daily quality of life are legitimate factors in a decision this significant, not add-ons to consider after the “real” decision is made.
Sort the legal paperwork before it’s urgent
If your parent has lost the capacity to make decisions, you’ll need an Enduring Power of Attorney or guardianship arrangement before you can sign admissions paperwork on their behalf. Get this sorted early – it’s much easier to do when everyone’s calm than to try to organize in a hurry in a crisis.
An advance care directive is also a good idea. This documents your parent’s wishes around resuscitation, hospital transfers, and end-of-life care, and should be sent directly to the facility your parent is moving to once they’ve been accepted. Staff can’t respect wishes they’re unaware of.
Plan the move like a project, because it is one
One of the toughest things about preparing for senior living is upending a lifetime into one room. It deserves a proper plan rather than a frantic weekend.
Set a realistic timeline for downsizing and sort belongings into clear categories: coming with them, going to family, donated, sold. Label clothing before it arrives at the facility – uniform laundry systems lose unmarked items fast. Arrange furniture delivery ahead of move-in day so the room feels finished when your parent walks in, not half-built. Bring a handful of genuinely familiar objects – photos, a favourite chair, a quilt – and set them up before your parent arrives rather than after. Walking into a room that already has pieces of home in it changes the whole first impression.
Expect conflict, and don’t pretend it won’t happen
Siblings will always fight. One wants to do it faster, the other says it’s too soon, the third silently resents the division of labor. It’s helpful to everyone if you can name that dynamic early rather than letting it fester. Share whatever information you can get from doctors, care managers, or other families who’ve made the same move – everyone is always anxious and having the same data often pacifies things. Share finances in the same spirit of openness and agree in advance on how decisions will be made if there’s a split vote.
Your parent may express anger or sadness that reads as rejection of the whole family, even when the move is clearly the right call. That’s a normal grief response, not a verdict on your decision. Where possible, let them keep the final say on choices that are theirs to make – which facility, which room, what comes with them. Autonomy preserved in small things makes the big change easier to accept.
Give the first month room to be hard
Adjusting to the new living environment is not something that happens all at once, so be prepared for this period to last for some weeks. Your parent might feel a bit low for the first two weeks or so, regardless of the quality of the home you’ve chosen. This is a common settling-in reaction and should pass.
Try to establish a routine for your visits fairly early on if you can. Some residents settle most easily when they are given space to adapt to a new environment and have time and room to build up different relationships and different routines. For others, regular visits from a familiar face are the best way to help them feel at home as quickly as possible.
Be guided by what you believe your parent wants and needs. Also, don’t rush off after lunch. Your parent may feel particularly lonely after a visit and the extra time you spend in the home afterwards can help them to settle better. Try forming a good relationship with the care staff as early as you can. Learn and use their names. Ask them how the week has been for your parent each time you visit.
Make sure you know how and to whom to complain if you need to. Your parent probably won’t have the eloquence or the confidence to moan when their own dinner arrives late and cold for the fourth time in a week.
There’s no version of this process that’s entirely smooth. But a family that starts the conversation early, understands the money, checks the data, and treats the move itself as a plan rather than a scramble gives their parent the best possible shot at a good life in a new place.

Why Your Headphones Pick Up the Whole Office on Calls

Transform Your Skin with RF Microneedling: Discover the Benefits at Elite Body Contouring

Revolutionizing Precision: The Advantages of Fiber Optic Laser Cutting with Macro Weld

Stunning Spring Carnival Dresses to Elevate Your Style This Season

Top Cricket Equipment Essentials Every School Should Have

Innovative Architects in Sydney: Designing Your Dream Space with Shore Architects

How to Ensure Your Home is Valued Correctly for a Quick Sale

Christopher Dare: The Untold Story of Engineer and Former Husband of Angela Rippon

The 15 Highest-Paid Rugby Players in the World

What Is Fanquer? The Digital Creator Platform Transforming Direct-to-Fan Engagement

Dr Jared Ross: Missouri Appeals Court Upholds Protection Order Over Graphic Torture and Murder Threats

Nancy Hallam: The Inspiring Life, Career, and Success Story Behind Ian Wright’s Wife
How to Ensure Your Home is Valued Correctly for a Quick Sale
Christopher Dare: The Untold Story of Engineer and Former Husband of Angela Rippon
The 15 Highest-Paid Rugby Players in the World
What Is Fanquer? The Digital Creator Platform Transforming Direct-to-Fan Engagement
Dr Jared Ross: Missouri Appeals Court Upholds Protection Order Over Graphic Torture and Murder Threats
Nancy Hallam: The Inspiring Life, Career, and Success Story Behind Ian Wright’s Wife
-
 Real Estate9 months ago
How to Ensure Your Home is Valued Correctly for a Quick Sale
-
Celebrity11 months ago
Christopher Dare: The Untold Story of Engineer and Former Husband of Angela Rippon
-
 Sports5 months ago
The 15 Highest-Paid Rugby Players in the World
-
 Technology5 months ago
What Is Fanquer? The Digital Creator Platform Transforming Direct-to-Fan Engagement
-
 Celebrity5 months ago
Dr Jared Ross: Missouri Appeals Court Upholds Protection Order Over Graphic Torture and Murder Threats
-
Celebrity12 months ago
Nancy Hallam: The Inspiring Life, Career, and Success Story Behind Ian Wright’s Wife
-

 Celebrity8 months ago
Who Is Azriel Crews? Inside the Life and Career of Terry Crews’ Daughter
-
 Celebrity11 months ago
Who Is Maisie Mae Roffey? The Private Life, Family Story, and Quiet Success of Julie Walters’ Daughter