
Ai & Tools
White Screen Real User Experience and Insights 2026

When I first came across a white screen tool, I didn’t think much of it. A blank white screen? That sounded almost too basic to be useful.
But after actually using it in different situations, my perspective changed. What started as a quick test turned into something I now use regularly. Not because it’s flashy or advanced, but because it solves small, real problems in a very simple way.
In this review, I’ll walk you through my personal experience, what I liked, what could be better, and whether it’s worth your time.
What Is a White Screen Tool?
At its core, a white screen tool is exactly what it claims to be: a full-screen display of pure white color (#FFFFFF), usually accessible through a browser.
No buttons. No distractions. Just a clean, bright screen.
From a technical standpoint, it’s built using lightweight web technologies like HTML, CSS, and simple rendering logic. But as a user, you don’t really think about that. You just click, and it works.
First Impressions
The first thing I noticed was how fast it loaded. No sign-ups. No ads popping everywhere. No confusing interface. Within seconds, my entire screen turned white. That simplicity is actually one of its biggest strengths.
Why I Started Using a White Screen Tool
Let me share the exact moment I found it useful.
Checking a Screen Issue
I had a tiny spot on my laptop screen. At first, I thought it was dust. I cleaned it. Still there. That’s when I tried a white screen. The spot stood out clearly against the bright background, and I realized it was a dead pixel. Not great news, but at least I knew what I was dealing with. That’s when I understood the real value of this tool.
Where the White Screen Tool Actually Helps
Over time, I found myself using it in more ways than I expected.
Dead Pixel and Display Testing
This is probably the most common use, and for good reason. A white screen makes it incredibly easy to spot:
- Dead pixels
- Stuck pixels
- Uneven brightness
- Screen discoloration
If you’ve ever bought a new monitor or smartphone, this tool is a quick way to check display quality.
Cleaning My Screen Properly
I didn’t expect this one to matter so much, but it really does. When your screen is white:
- Dust becomes obvious
- Fingerprints stand out
- Smudges are easier to remove
It turns cleaning from a guessing game into something precise.
Using It as a Light Source
One evening, during a power outage, I needed some light, not a lot, just enough to see. I opened the white screen tool on my laptop. And surprisingly, it worked.
It’s not a replacement for a flashlight, but as a soft light source, it’s quite effective. I’ve even used it during late-night video calls to brighten my face slightly.
Focus and Minimal Workspace
Sometimes, I just need a break from clutter. Opening a white screen gives me a clean visual reset. No tabs, no notifications, no distractions. It’s a small trick, but it helps me refocus, especially during writing sessions.
What I Like Most About the White Screen Tool
Let’s break it down clearly.
Effortless to Use
You don’t need instructions. Anyone can use it instantly.
Lightweight and Fast
No loading delays. No heavy features.
Multi-Purpose Utility
Testing, cleaning, and lighting it covers more ground than you’d expect.
Works Everywhere
Laptop, mobile, tablet, anything with a screen.
What Could Be Better
No tool is perfect, and this one has its limitations.
Brightness Can Be Harsh
A pure white screen at full brightness can feel intense, especially in a dark room. I learned to lower the brightness quickly, but beginners might find it uncomfortable at first.
Very Basic Functionality
If you’re expecting customization, you won’t find much. It does one thing and only one thing. That said, I personally think that’s part of its charm.
Why “White Screen” Is Gaining Popularity
From an SEO and search intent perspective, this tool sits at an interesting intersection. People searching for a white screen tool often have different needs:
- Screen testing and diagnostics
- Display calibration
- Cleaning assistance
- Temporary lighting solutions
This aligns with semantic SEO principles, where one keyword connects to multiple user intents. It’s not just a “tool”, it’s a solution to small but frequent problems.
Understanding User Intent Behind the Tool
If we look at it through an NLP (Natural Language Processing) lens, queries related to this topic often include terms like:
- “blank screen”
- “screen test”
- “dead pixel check”
- “full white display”
- “screen cleaner background”
These variations reflect how users naturally search for solutions. A good white screen tool addresses all of these intents without needing multiple features.
Is It Safe to Use?
Yes, generally speaking, it’s completely safe. But based on my experience, here are a few practical tips:
Adjust Brightness
Don’t use full brightness unless needed.
Limit Continuous Use
Avoid staring at the screen for too long.
Use in Moderation
It’s a tool, not something you keep open all day.
Who Should Use a White Screen Tool?
From my perspective, it’s useful for:
- Every day, users check screen issues
- Students and remote workers
- Designers and photographers
- Anyone cleaning their screen regularly
It’s not targeted at one specific group; it’s universal.
Is the White Screen Tool Worth It?
In my experience, yes! It absolutely is.
Not because it’s advanced or feature-rich, but because it’s simple and reliable. It does one thing. And it does it well. If you ever need to:
- Check your screen
- Clean it properly
- Add a bit of light
- Clear visual distractions
Then a white screen tool is worth keeping in your digital toolkit.
Closing Thoughts
Sometimes, the most useful tools are the ones we overlook. A white screen tool won’t impress you with features or design. But once you start using it, you’ll find yourself coming back to it more often than expected. And honestly, that’s the kind of tool I trust the most.
- Reference: https://www.whitescreen.online/
- Reference: https://whitescreen.one/




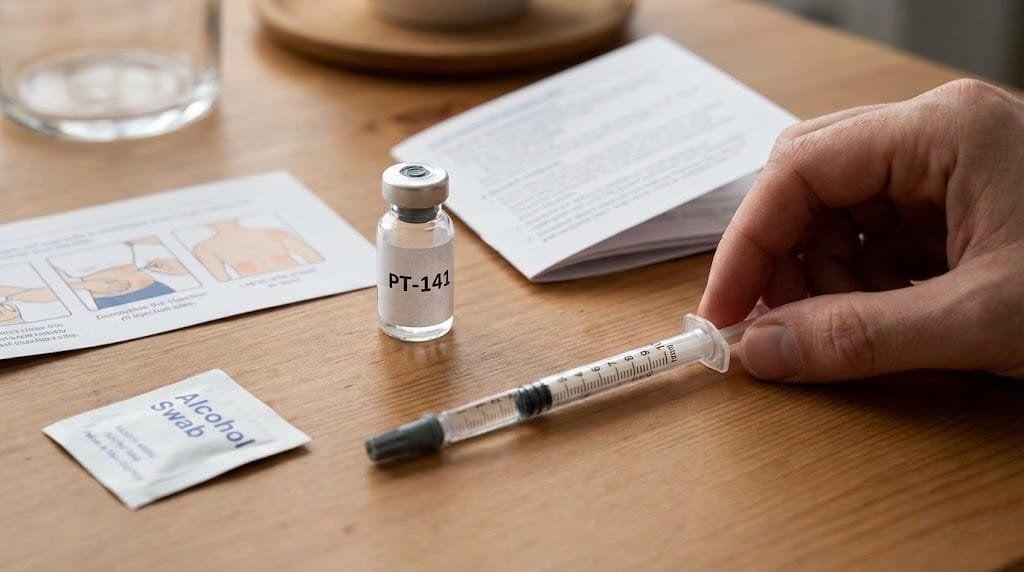
Working with PT-141 in the lab is easier when preparation happens before any vial is opened. A short checklist covering scope and paperwork, along with storage and documentation, helps prevent avoidable mix-ups at the bench. It also helps keep data defensible without making daily work harder.
Confirm authorized scope and assay fit
We work with PT-141 strictly as a lab reagent. It is not a medicine and it’s not for human use. That research-use-only status guides every step that follows. Before ordering, confirm that the proposed work falls within the study’s authorized scope and any applicable institutional approvals. If the material or planned experiment is not covered, pause and obtain clarification through the appropriate review process.
PT-141, also known as bremelanotide, is an alpha-MSH analog studied for activity at melanocortin receptors. The team needs to understand why the material is in the assay and which readouts will answer the study’s question. Write a one-line purpose for the material and match it to a validated method with proper controls.
Review supplier and lot documentation
Sourcing premium research peptides starts with a careful review of the paperwork. Ask for the lot-specific Certificate of Analysis and product datasheet before you approve receipt, and set acceptance criteria tied to your assay.
Check that lot number, identity, quantity, and appearance description match what you ordered. If anything is missing or unclear, hold the material in quarantine and contact the supplier through your normal procurement channel. Don’t rely on appearance alone to judge identity or purity.
We keep our own acceptance log for each delivery. It records date received, supplier name, catalog detail, and storage location. Having that information together makes audits far less painful.
Inspect receipt and plan storage from data
Don’t assume a clean-looking cake means the material meets spec. Visual checks can’t confirm identity or purity and they aren’t a substitute for supplier assays.
When the package arrives, inspect the outer pack and vial for damage before you sign off, then compare the label detail against your purchase order. A procurement review can include supplier pages for research peptide products as a starting point for reviewing formats and requesting lot-specific documentation. Complete receiving paperwork through approved channels. Keep the material sealed until inspection is logged.
Don’t discard the packing slip.
Note color, texture, seal integrity, and pack condition in your receiving notes and photograph the vial if your SOP allows it. File those notes with the lot packet even if everything looks normal. Those details belong in the record, not just in someone’s memory.
Prepare people, work area, and instruments
Read the Safety Data Sheet before handling PT-141 powder. Complete the risk assessment required by your local SOP and confirm controls for dust and waste. Wear the PPE your procedure calls for and change it if it becomes soiled. Confirm only trained staff will handle the material. Keep training records current so there’s no question about who is cleared for peptide work.
Clean and clear the work area before you bring vials to the bench. Check that balances, pipettes, plate readers, and analytical instruments are calibrated and ready, and confirm your assay method lists an appropriate solvent and controls.
We don’t choose a diluent by habit. Use only the solvent specified in your validated method, and check compatibility with your assay matrix and storage plan. Prepare fresh controls alongside test solutions so you can interpret the results.
Label, store, and run a final check
Create traceable labels before you open or aliquot anything. Include material name, lot number, prep date, and preparer initials on each vial. Match that detail in your lab notebook or electronic system so any vial can be traced back to its lot paperwork.
Lyophilized PT-141 needs a documented storage plan based on material-specific information and the approved procedure. Review supplier guidance for compatibility with that plan, and keep monitoring logs for the storage equipment used. Don’t move material between units without recording it. If temperature data show an excursion, quarantine the lot and follow your deviation process.
Plan waste handling at the same time as prep. Collect peptide waste, used tips, wipes, and gloves in the containers your SOP designates and arrange pickup on schedule. Close the record with a second-person check and signoff that the bench is clean and logs are complete.
Take five minutes for a readiness review before any test solution is made. Confirm scope approval, lot acceptance, SDS review, and label stock are all in place. Check that storage logs show no gaps and that instruments passed daily checks. If one item is missing, hold prep until it’s resolved. That pause costs less than repeating an assay.
This review is an opportunity to catch a mismatched lot number, a missing control reagent or an incomplete record before preparation begins. Resolve the issue and note the correction in the log. A clear stop-and-correct process also helps new team members know when to ask for assistance.
Once everything checks out, record signoff with date and initials from preparer and reviewer. File COA, datasheet, receiving notes, and storage logs together so the packet is complete. Good files let any teammate reconstruct what was done months later.
Careful preparation is worth the time when working with PT-141. When scope, paperwork, labeling, and storage line up, bench work stays calm and data stay defensible. Keep the checklist posted where prep happens and use it each time.

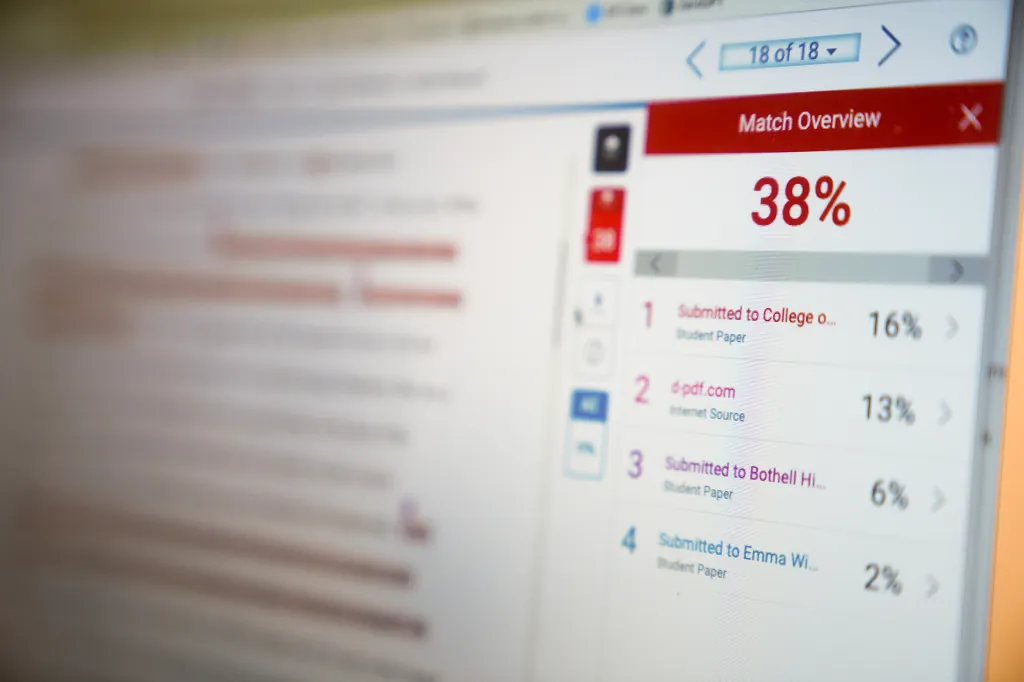
Students often check their assignments before submission. A Turnitin Report can help you identify matching text and review possible similarities. However, a similarity percentage does not automatically determine whether your work contains plagiarism.
You need to understand what the report shows before making changes. A careful review can help you identify copied wording, missing citations, common phrases, and correctly referenced material.
So, how should you read your results?
What Is a Turnitin Report?
A Turnitin Report provides information about text similarities found during a document check. The system compares submitted content against sources available to it.
The report can highlight sections that resemble existing material. It may also show sources associated with particular matches.
You should review the highlighted sections instead of focusing only on the overall percentage. A similarity result needs context before you decide what action to take.
What Does the Similarity Score Mean?
The similarity score represents the amount of text that matches or resembles material identified by the system.
A higher percentage does not automatically mean plagiarism. A lower percentage does not automatically prove that every part of your work is original.
For example, properly quoted material can create a match. Common terminology can also appear in multiple documents.
Therefore, you should use the Turnitin Report as a review tool rather than treating the percentage as a final judgment.
Why Can Properly Cited Text Appear in the Report?
Academic writing often includes quotations and references. Those passages may match existing sources even when you have cited them correctly.
You should check the highlighted text and its surrounding citation. If you used a direct quotation, quotation marks and proper attribution should normally make the source clear.
Paraphrased content can also create similarities. You should make sure your paraphrasing uses your own wording and that you provide appropriate attribution.
A match does not always indicate improper copying.
How Should You Review Highlighted Matches?
You should examine each highlighted section individually. Start by checking the source connected to the match.
Next, compare the source wording with your own text. Ask yourself why the system identified the passage.
You may find a direct quotation, a common phrase, a properly cited source, or wording that needs revision.
You should then decide what action is appropriate. Some matches may require no change. Others may need better citation or more original phrasing.
Can a High Similarity Score Be Acceptable?
A high score can sometimes result from legitimate content. Assignments that require specific terminology, references, quotations, or templates may naturally contain matching text.
However, a high score can also indicate that your writing relies heavily on existing material.
You should therefore avoid judging your work based only on a number. The details inside the Turnitin Report matter more than the percentage alone.
Your institution may also have its own academic integrity requirements.
What Does a Low Similarity Score Mean?
A low score generally means that the system identified fewer matching passages. However, it does not automatically guarantee that your work is free from plagiarism.
A source may not be included in the system’s available comparison material. Your writing could also contain unattributed ideas without using identical wording.
You should still review your citations and references carefully.
A low similarity result should encourage careful checking rather than complete confidence.
How Can You Reduce Unnecessary Similarity?
You should focus on writing ideas in your own words. Start by understanding the source material before creating your explanation.
You can then paraphrase the information using your own sentence structure and vocabulary. You should still provide a citation when the idea comes from another source.
Direct quotations should remain clearly marked and properly attributed.
You should also avoid copying sentence structures too closely. Changing a few individual words may not create genuine paraphrasing.
Can References Affect Your Similarity Score?
Reference sections can sometimes contain text that appears in other academic documents. Titles, publication names, author names, and citation formats may also create matches.
You should review how your institution handles references when interpreting your score.
Some checking systems provide options that exclude certain types of content from specific views. However, you should not assume that every setting changes the official academic assessment.
Always follow the requirements provided by your instructor or institution.
Should You Worry About Every Highlight?
You do not need to change every highlighted phrase automatically. Some matches are unavoidable or completely legitimate.
You should first identify the type of match. Then, determine whether the wording requires action.
A common phrase may not need rewriting. A copied paragraph without proper attribution requires much more attention.
The Turnitin Report becomes more useful when you evaluate each match based on its context.
Can AI-Generated Content Affect Your Review?
AI-generated writing creates another issue for students and writers. Similarity checking and AI detection are different processes.
A similarity checker looks for matching or similar text. An AI detector attempts to identify patterns associated with AI-generated writing.
You should not assume that a similarity score tells you whether AI was used. The two checks address different questions.
If your institution has rules about AI-assisted writing, you should follow those rules separately.
What Should You Do Before Submission?
You should complete a final review before submitting your assignment.
First, check your citations. Next, review direct quotations and paraphrased material. Then, inspect any unusual similarities shown in the report.
You should also verify your references and make sure every borrowed idea has appropriate attribution.
Finally, read your work without focusing only on the score. Clear arguments, accurate information, and proper academic practices should remain your main priorities.
Final Thoughts:
A Turnitin Report can help you identify similarities in your writing, but the percentage alone does not tell the full story.
You should examine individual matches and understand why they were identified. Proper quotations, references, common phrases, and legitimate terminology can all affect the result.
You can use the report as part of a careful editing process. Review your sources, improve citations, paraphrase responsibly, and follow your institution’s academic integrity rules.
A thoughtful review will help you understand your similarity results instead of simply trying to achieve a particular percentage.
AI writing can make content creation faster. You can create drafts, outlines, emails, and articles within minutes. However, generated text can sometimes feel repetitive or too predictable.
Readers may notice similar sentence structures, generic expressions, or an overly formal tone. You can Humanize AI text to make it clearer, more natural, and better suited to your audience.
However, good humanization requires more than replacing a few words. You need to consider sentence flow, tone, vocabulary, context, and overall readability.
Why Does AI Text Sometimes Sound Unnatural?
AI systems generate text by recognizing language patterns. As a result, some outputs can follow similar structures.
You may see repeated transitions or sentences with nearly identical rhythms. The content may also explain simple ideas with unnecessary detail.
You can Humanize AI writing by identifying those patterns and changing them. You should focus on the way ideas connect rather than editing individual words alone.
A natural piece of content should feel clear and purposeful from beginning to end.
How Can You Humanize AI Text?
You can start with a careful review of the original content. Read the entire draft before making changes.
Next, identify sentences that sound repetitive or generic. You can rewrite them using simpler and more direct language.
You can also Humanize AI with an AI humanizer when you want automated assistance. Such a tool can help adjust sentence structures and wording.
However, you should review the output afterward. Automated rewriting may not understand every detail of your topic or audience.
Can Sentence Length Make Writing More Natural?
Sentence length can affect the rhythm of your content. A paragraph that contains only long sentences may feel difficult to read.
You can Humanize AI content by mixing short and longer sentences. Short sentences can emphasize important points. Longer sentences can provide context when necessary.
You should also avoid creating a fixed pattern. Natural writing usually has some variation in sentence length and structure.
Read your paragraphs aloud when possible. Hearing the text can help you identify awkward rhythm.
How Does Word Choice Affect the Result?
Word choice has a major effect on tone. AI-generated text can sometimes use formal vocabulary when simple words would communicate the same idea.
You can Humanize AI by replacing unnecessary complexity with clearer language. Your word choices should match the readers you want to reach.
A technical article may need specialized terminology. A beginner-focused article may need simpler explanations.
You should avoid changing important technical terms simply to make the writing sound different. Accuracy should always remain important.
Can You Make AI Writing More Personal?
Personal details can make content feel more authentic. You can add examples, observations, and explanations that reflect your own perspective.
You can Humanize AI text by adding relevant experiences or specific examples. Such details can make general information easier to understand.
However, you should avoid adding personal information that does not support the topic.
Your goal should be useful personalization. Every added detail should have a clear purpose.
How Can You Improve Paragraph Flow?
Good paragraphs usually focus on one main idea. AI-generated content can sometimes combine several points without a clear connection.
You can Humanize AI writing by reviewing each paragraph separately. Ask yourself what the main point is and whether every sentence supports it.
You can then remove unnecessary sentences or move information to a more suitable section.
Transitions should also feel natural. You do not need a transition phrase at the beginning of every paragraph.
Can a Humanizer Preserve the Original Meaning?
Meaning should remain a priority during any rewrite. A natural-sounding sentence is not useful if it changes the original message.
You should compare the rewritten version with your source content. Check facts, names, numbers, instructions, and important terminology.
You can Humanize AI text while keeping the central message intact. However, manual review remains necessary.
You should also verify factual claims before publishing. Better wording cannot correct inaccurate information.
How Should You Adapt the Tone?
Different content needs different tones. A professional email should sound different from a lifestyle article.
You can Humanize AI content by choosing a tone that matches the purpose of your writing.
You may need a direct style for business communication. You may prefer a conversational style for a blog.
The important point is consistency. The tone should remain appropriate throughout the entire piece.
Can Humanization Remove Repetitive Phrases?
Repetition can make generated content feel mechanical. You may notice the same word or phrase appearing several times in nearby sentences.
You can Humanize AI writing by combining repeated ideas or replacing unnecessary wording.
However, you should keep important terms when they help readers understand the subject. Removing every repeated keyword can also make content less clear.
Good editing removes unnecessary repetition without damaging meaning.
Should You Use AI Detection Tools?
Some writers check their content with AI detection tools after rewriting. These tools can provide additional information, but their results should not be treated as absolute proof.
AI detectors can make mistakes. Human-written content can sometimes receive an AI-related score.
You should therefore focus on originality, accuracy, and writing quality. You should also follow the rules that apply to your school, workplace, or publication.
What Should You Do After Humanizing AI Text?
A final review can improve the quality of your content. You should first check whether the main message remains accurate.
Next, review grammar, sentence flow, vocabulary, and paragraph structure.
You should also remove any wording that does not sound natural to you. Add your own examples where they provide useful context.
Finally, read the complete article from start to finish. A full review can help you notice problems that individual sentence edits may miss.
Final Thoughts:
You can Humanize AI text by improving sentence structure, vocabulary, tone, paragraph flow, and overall readability. However, effective humanization requires more than automated rewriting.
You should use AI tools as editing support rather than as a complete replacement for human judgment. Review the final content carefully and make changes that fit your audience.
Natural writing should feel clear and purposeful. When you combine automated assistance with thoughtful editing, you can turn an AI-generated draft into content that feels more personal and easier to read.

Diamond Tennis Bracelets as Christmas Gifts: A Complete Buying Guide

Building a Cat Enrichment Routine That Fits Your Home

Why Your Headphones Pick Up the Whole Office on Calls

Transform Your Skin with RF Microneedling: Discover the Benefits at Elite Body Contouring

Revolutionizing Precision: The Advantages of Fiber Optic Laser Cutting with Macro Weld

Stunning Spring Carnival Dresses to Elevate Your Style This Season

How to Ensure Your Home is Valued Correctly for a Quick Sale

Christopher Dare: The Untold Story of Engineer and Former Husband of Angela Rippon

The 15 Highest-Paid Rugby Players in the World

What Is Fanquer? The Digital Creator Platform Transforming Direct-to-Fan Engagement

Dr Jared Ross: Missouri Appeals Court Upholds Protection Order Over Graphic Torture and Murder Threats

Nancy Hallam: The Inspiring Life, Career, and Success Story Behind Ian Wright’s Wife
How to Ensure Your Home is Valued Correctly for a Quick Sale
Christopher Dare: The Untold Story of Engineer and Former Husband of Angela Rippon
The 15 Highest-Paid Rugby Players in the World
What Is Fanquer? The Digital Creator Platform Transforming Direct-to-Fan Engagement
Dr Jared Ross: Missouri Appeals Court Upholds Protection Order Over Graphic Torture and Murder Threats
Nancy Hallam: The Inspiring Life, Career, and Success Story Behind Ian Wright’s Wife
-
 Real Estate9 months ago
How to Ensure Your Home is Valued Correctly for a Quick Sale
-
Celebrity11 months ago
Christopher Dare: The Untold Story of Engineer and Former Husband of Angela Rippon
-
 Sports5 months ago
The 15 Highest-Paid Rugby Players in the World
-
 Technology5 months ago
What Is Fanquer? The Digital Creator Platform Transforming Direct-to-Fan Engagement
-
 Celebrity5 months ago
Dr Jared Ross: Missouri Appeals Court Upholds Protection Order Over Graphic Torture and Murder Threats
-
Celebrity12 months ago
Nancy Hallam: The Inspiring Life, Career, and Success Story Behind Ian Wright’s Wife
-

 Celebrity8 months ago
Who Is Azriel Crews? Inside the Life and Career of Terry Crews’ Daughter
-
 Celebrity11 months ago
Who Is Maisie Mae Roffey? The Private Life, Family Story, and Quiet Success of Julie Walters’ Daughter