Entertainment
Mumbai Like a Local: A Neighbourhood Guide for Cafés, Art, Coastal Walks and Day Trips

Mumbai can feel like a city that refuses to pause. It is loud, fast, and forever in motion, the kind of place where you can leave your hotel for a coffee and somehow end up at a gallery opening, a street snack stall, and the sea all before sunset. The trick is not trying to “do Mumbai” in one heroic sweep. The trick is picking neighbourhoods that match your mood and letting the city reveal itself in layers.
If you have just landed after sorting your tickets to India, Mumbai is also a surprisingly good first stop because it is built for short bursts. You can do a slow morning in a café, a cultural afternoon, and a coastal sunset without long transfers, as long as you base yourself well and stick to one pocket at a time.
This guide is neighbourhood-led and experience-heavy. Think cafés you will actually want to sit in, art you can reach without a full-day mission, coastal walks for when you need air, and day trips that feel like a reset rather than another exhausting itinerary.
How to use this guide without burning out
Mumbai rewards pace. Plan one main neighbourhood a day. Do one anchor activity, one food moment, and one walk. The city is not designed for constant cross-town commuting, and traffic can turn a “quick hop” into an hour of staring at a flyover.
A practical rhythm that works
Morning is for cafés and quieter streets. Afternoon is for galleries and museums. Late afternoon and evening are for the sea, markets, and food.
Now, the neighbourhoods.
South Mumbai, the classic city with the best walking
If you like heritage streets, bookstores, old cafés, and the feeling that you can walk from one scene to another, start here. South Mumbai is compact by Mumbai standards, and it gives you a strong sense of place quickly.
Colaba, Kala Ghoda, and Fort
This is where modern Mumbai culture and old architecture overlap. Kala Ghoda is the art pocket. Fort has the office bustle and the bookshops. Colaba carries the energy, especially later in the day.
What to do
Spend time in the galleries around Kala Ghoda. Even if you are not an art person, this area is easy to enjoy because you are never far from a coffee, a shaded street, or an interesting shopfront. Pair it with a slow wander through Fort’s lanes. If you want a classic moment, pass by the Gateway of India, but treat it as a quick look rather than your whole plan.
Café style
South Mumbai cafés can be old-school or sharply modern depending on the street. The best approach is to pick one you want to actually sit in, then build your walk around it rather than trying to hit five.
Local-feeling add on
End your day with a sea-facing walk at Marine Drive. Go close to sunset when the city light softens and people come out just to sit. It is not a “thing to do” so much as a Mumbai habit you can borrow for an evening.
Marine Drive to Chowpatty, for air and evening energy
This strip is Mumbai’s reset button. It is where you go when the city feels too intense. It is also where you can join the city’s evening rhythm without needing to plan anything.
What to do
Walk Marine Drive at golden hour. If you want something more lively, drift towards Chowpatty for snacks and people-watching. Keep your expectations realistic. It is busy, it is a bit chaotic, and that is part of the point.
How to make it feel local
Do not rush. Buy something small. Sit. Watch families, couples, cricket games on the sand, and the constant movement of the promenade. Mumbai is a city that performs, and the coastline is one of its stages.
Bandra, the modern Mumbai most travellers want
Bandra is where Mumbai feels young, creative, and slightly restless in a fun way. It is full of cafés, design shops, street art, and places that turn into evening hangouts without warning.
Bandra West
This is the version people picture when they say “Mumbai like a local”. It is walkable in pockets, especially around the village lanes and the café clusters.
What to do
Start with a café morning and do it properly. Then go looking for street art, independent shops, and small galleries. Later, head towards Bandstand for a coastal walk. The sea here has a different feel than Marine Drive. It is less postcard, more “everyday escape”.
Coastal walk
Bandstand is ideal for a late afternoon stroll. You will see joggers, families, and groups hanging out on the edges of the promenade. It feels lived in.
Food mood
Bandra is a great place for a modern dinner. If you want a night that feels current without being a club night, this is where you do it.
Juhu, for beach time that is more “stroll” than “swim”
Juhu is not a tropical beach day. Think of it as a long urban beach where you walk, snack, and watch the city unwind.
What to do
Go in the evening. Walk the sand, then eat something casual nearby. Juhu’s charm is the mix of sea air and city noise. It is a good night if you want something easy.
Tip that saves you effort
If you are expecting quiet, you will be disappointed. If you treat it as a social coastline, it is perfect.
Lower Parel and Worli, for galleries and a sharper city edge
This is the part of Mumbai that feels like it is constantly upgrading. Old mill areas turned into modern neighbourhoods, with galleries, newer cafés, and plenty of energy.
Worli Sea Face
Worli has one of the best sea-facing stretches in the city for a brisk walk when you want something less touristy than Marine Drive, but still very Mumbai.
What to do
Pair a gallery or museum visit with a Worli walk. Then find a café where you can sit and cool down. This is a great area for a “modern Mumbai” day that still ends with the ocean.
Art and culture, without making it a formal day
Mumbai’s art scene can be accessible if you keep it light. You do not need to block out a full day and march through museums. Pick one strong cultural stop, then let the rest of the day be streets, cafés, and sea.
Neighbourhood combinations that work
Kala Ghoda plus Marine Drive is a classic pairing.
Bandra cafés plus Bandstand is the easiest “good day” in the city.
Lower Parel galleries plus Worli Sea Face gives you a modern edge.
Day trips that actually feel like a break
Mumbai day trips work best when they change the scenery. Not “more city”, but a shift in pace and texture.
Elephanta Caves
A strong option if you want history and you like the idea of taking a boat. Do it early to avoid heat and crowds. It is a half-day trip that feels like you left Mumbai without losing the entire day.
Alibaug
If you want sea air and a quieter coastal feel, Alibaug is the popular reset. It is not “secret” and it will not feel empty, but it does feel like a step away from the city’s intensity. Start early, keep expectations calm, and treat it as a change of pace rather than a perfect beach fantasy.
Sanjay Gandhi National Park
This is the most surprising day trip because it is green and genuinely feels like you are not in a megacity. If you want nature without leaving Mumbai properly, this is the move.
A very workable 3 day Mumbai plan
Day 1: South Mumbai
Kala Ghoda and Fort in the morning, café break, Marine Drive at sunset.
Day 2: Bandra
Café morning, street art and shops, Bandstand walk, modern dinner.
Day 3: Choose your reset
Elephanta for culture, Alibaug for a change of coast, or the National Park for green space.
This is enough to feel Mumbai without feeling crushed by it.
A few practical habits that make Mumbai easier
Use ride-hailing apps when you need them, but try to cluster your day so you are not constantly in a car.
Carry water, especially if you are walking coastal stretches.
Dress for heat and humidity, and do not underestimate how tiring that can be.
Plan your biggest walk in the late afternoon, not at midday.
Let one evening be unplanned. Pick a neighbourhood, pick a place to eat, and see where the night goes.
Mumbai, lived rather than completed
Mumbai is not a city you “finish”. It is a city you sample, then you come back with better instincts. If you keep your days neighbourhood-led, you will spend less time in traffic and more time in the moments that make the city feel real. The café where you sit longer than planned. The gallery you step into on a whim. The coastal walk where the whole city seems to exhale at once.
That is Mumbai like a local. Not secret spots or rigid lists. Just good pacing, good pockets, and enough openness for the city to surprise you.
Entertainment
Breast Augmentation in Turkey: Personalized Breast Enhancement With Natural-Looking Results

Choosing breast augmentation in turkey has become an increasingly preferred option for patients who want to improve breast volume, correct asymmetry, or restore fullness lost after pregnancy, weight change, or aging. Turkey’s combination of experienced plastic surgeons, modern medical facilities, and individualized surgical planning makes it a strong destination for patients seeking refined, balanced, and natural-looking breast enhancement.
Choosing breast augmentation in turkey has become an increasingly preferred option for patients who want to improve breast volume, correct asymmetry, or restore fullness lost after pregnancy, weight change, or aging. Turkey’s combination of experienced plastic surgeons, modern medical facilities, and individualized surgical planning makes it a strong destination for patients seeking refined, balanced, and natural-looking breast enhancement.
What Is Breast Augmentation?
The main goals of breast augmentation include:
- Enhancing breast volume
- Improving breast symmetry
- Restoring fullness after pregnancy or weight loss
- Creating better body balance
- Supporting a more confident appearance
A successful result depends on choosing the right implant type, size, profile, and placement according to the patient’s anatomy.
Why Patients Consider Breast Augmentation in Turkey
Turkey has built a strong reputation in aesthetic surgery by offering advanced medical care with accessible treatment planning. International patients often choose Turkey because of:
- Plastic surgeons experienced in breast aesthetics
- Modern hospitals and surgical technology
- Personalized consultation processes
- International patient coordination
- Competitive treatment costs
However, cost should never be the only deciding factor. Surgeon experience, hospital safety standards, implant quality, and postoperative follow-up are essential for a safe and satisfying outcome.
Implant Options in Breast Augmentation
The implant selection process is one of the most important parts of breast augmentation planning.
Silicone Implants
Silicone implants are widely preferred because they provide a soft, natural feel and realistic breast contour. They are available in different sizes, shapes, and projections.
Saline Implants
Saline implants are filled with sterile saltwater. They may require smaller incisions and allow adjustable volume, although they can feel firmer than silicone implants.
Round and Anatomical Implants
Round implants create fuller upper breast volume, while anatomical implants offer a more gradual slope. The right choice depends on chest structure, skin quality, and desired appearance.
Implant Placement Techniques
Implants can be positioned in different anatomical planes.
Submuscular Placement
The implant is placed under the chest muscle. This option may provide a softer transition, especially for patients with limited natural breast tissue.
Subglandular Placement
The implant is placed above the muscle and under the breast tissue. It may offer a shorter recovery period and can be suitable for patients with enough tissue coverage.
Dual Plane Technique
This technique combines advantages of both approaches and is often used to create a natural lower breast shape with balanced upper coverage.
Who Is a Suitable Candidate?
Breast augmentation may be suitable for patients who:
- Are in good general health
- Have completed physical development
- Want increased breast volume or improved symmetry
- Have realistic expectations
- Are not pregnant or breastfeeding
- Understand recovery and long-term implant follow-up
A detailed consultation helps determine whether the procedure is appropriate and which surgical plan best matches the patient’s goals.
The Surgical Process
Breast augmentation is usually performed under general anesthesia. The procedure generally takes 1 to 2 hours, depending on technique and implant placement.
The process includes:
- Preoperative measurements and planning
- Implant size and profile selection
- Incision placement
- Implant pocket creation
- Implant insertion and symmetry control
- Closure and dressing
Incisions may be placed under the breast fold, around the areola, or in the armpit, depending on the surgical plan.
Recovery After Breast Augmentation
Recovery is gradual and requires attention to postoperative instructions.
First Week
Patients may experience swelling, tightness, and mild discomfort. A supportive surgical bra is usually recommended.
Weeks 2–4
Most patients return to light daily activities. Heavy lifting and intense exercise should be avoided.
After 6 Weeks
Physical activity can usually increase, and implants begin to settle into a more natural position. Final results typically become clearer within a few months.
Long-Term Results
Breast augmentation results can be long-lasting, but implants are not lifetime devices. Regular follow-up is important to monitor implant condition and breast tissue changes over time.
Patients often report:
- Improved body proportion
- Better clothing fit
- Enhanced breast shape
- Increased confidence
- More balanced silhouette
Maintaining stable weight and following medical recommendations helps preserve results.
Safety and Risk Considerations
As with any surgical procedure, breast augmentation has potential risks such as swelling, infection, capsular contracture, implant displacement, rupture, or temporary sensation changes. These risks can be reduced through careful planning, high-quality implants, experienced surgical technique, and accredited medical conditions.
Patients should receive transparent information about implant options, incision choices, recovery expectations, and possible complications before surgery.
Choosing the Right Surgeon
The quality of breast augmentation depends on more than implant size. A skilled surgeon evaluates chest width, breast tissue thickness, skin elasticity, nipple position, lifestyle, and long-term aesthetic goals.
The best outcomes are usually achieved when the procedure is planned around natural anatomy rather than standardized implant sizes. This individualized approach helps create results that look proportional, elegant, and sustainable.
A Balanced Approach to Breast Enhancement
Breast augmentation in Turkey can be a strong option for patients seeking natural-looking enhancement, improved symmetry, and carefully planned surgical care. With the right medical team, the procedure can deliver refined results that complement the patient’s body structure.
For patients researching implant choices, surgical techniques, and professional treatment planning, detailed resources are available at https://muratdiyarbakirlioglu.com/en/. Reviewing reliable medical guidance supports safer decision-making and helps patients approach breast augmentation with clear expectations and long-term confidence.

Koora Live has become a familiar name among football fans who want fast access to live matches, daily schedules, instant scores, and tournament updates. The platform is commonly searched by viewers who follow European leagues, Arab football, and international competitions from one place. Its popularity comes from convenience, mobile-friendly access, and real-time match information, but users should also understand the legal, safety, and digital rights issues connected with free streaming platforms.
Quick Facts
| Category | Details |
|---|---|
| Name | Koora Live |
| Type | Football live streaming and live score platform |
| Main Focus | Daily football matches, live scores, match updates, and tournament coverage |
| Primary Audience | Football fans, especially Arabic-speaking and international viewers |
| Content Style | Match schedules, scoreboards, streaming links, and football updates |
| Popular Competitions Covered | UEFA Champions League, English Premier League, Spanish La Liga |
| Regional Competitions | Saudi Pro League, Egyptian Premier League, UAE Pro League |
| Access Method | Web domains, mobile browsers, Android apps, and iOS guides |
| Account Requirement | Often promoted as no registration required |
| Subscription Model | Commonly promoted as free access |
| Device Support | Smartphones, tablets, laptops, and desktop computers |
| Main Appeal | Fast football access without complex signups |
| Common Search Intent | Live football today, match streaming, scores, and fixtures |
| Legal Status | Depends on broadcast rights and regional digital restrictions |
| Safety Concerns | Pop-up ads, fake apps, unstable domains, privacy risks |
| Better Legal Options | Licensed sports broadcasters and official league services |
| User Experience Strength | Speed, simplicity, and broad match discovery |
| User Experience Weakness | Unstable access, possible interruptions, and rights issues |
| Best Use Case | Checking match schedules, score updates, and football news direction |
| Recommended Approach | Use legal platforms for official match broadcasts |
What Is Koora Live?
Koora Live is best understood as a football-centered digital platform that attracts users looking for daily match streaming, live scores, and quick tournament updates. Instead of operating like a traditional sports broadcaster, it usually works through web portals, changing domains, and mobile access points that organize football matches by time, league, and event. This format makes it easy for fans to find what is happening today without searching across many separate websites.
The platform’s main appeal comes from speed and simplicity. Many football fans do not want long registration forms, complicated subscription menus, or scattered match schedules. They want a page that shows today’s games, kickoff times, score movement, and available viewing options. That direct experience explains why the name continues to appear in search queries connected with football live streaming and match-day coverage.
At the same time, users should treat the service with caution. Free live sports streaming often enters a complicated area involving broadcast rights, regional restrictions, and digital safety. A platform may be popular among fans, but popularity does not always mean official authorization. This is why responsible football viewers should understand both the convenience and the risks before relying on any free streaming source.
How Koora Live Became Popular Among Football Fans?
Koora Live gained attention because football is a global, time-sensitive sport. A fan may want to follow a Champions League match at night, a Premier League fixture on the weekend, or a Saudi Pro League game during a busy day. When a platform places all these updates in one simple interface, users naturally return because it saves time and reduces confusion.
Its popularity also reflects the habits of modern football audiences. Many fans no longer watch every match on a television screen. They check scores on a phone, follow highlights during work breaks, and switch between games on match days. Mobile-first behavior has changed how football content gets consumed, and platforms built around quick access often benefit from that shift.
Another reason for growth comes from language and regional relevance. Arabic-speaking football fans often search for services that display familiar competition names, regional leagues, and match information in a format that feels local. When global tournaments and Arab football appear together, the platform becomes more useful to a wider group of viewers.
The name also spreads through search behavior. Fans often type quick phrases such as live football today, live match now, or Arabic football streaming. When a platform repeatedly appears around those search patterns, it builds recognition. That recognition can turn into habit, especially during major tournaments and high-demand match nights.
Main Features That Shape the User Experience
Koora Live is commonly associated with several features that make it attractive to football fans. The first major feature is daily match organization. Users often look for a simple list of games happening today, including kickoff times, teams, and competitions. That match-day structure helps viewers find relevant events without scrolling through unrelated sports content.
The second feature is real-time score tracking. Football changes quickly, and fans want instant updates when a goal, red card, penalty, or halftime result happens. A platform that combines score movement with match schedules creates a more complete experience for users who cannot watch every minute.
The third feature is broad football coverage. The platform is known for covering major European competitions while also including regional leagues. This combination matters because many fans follow both international clubs and local teams. A person may support a Premier League club but still want updates from the Egyptian Premier League or UAE Pro League.
Another important feature is multi-device access. Football fans use different screens depending on where they are. A student may check a match on a phone, a worker may follow scores on a laptop, and a family may look for a stream on a desktop computer. A platform that loads across devices naturally fits these viewing habits.
Broad Tournament Coverage and Match Access
One of the biggest reasons users search for Koora Live is its connection with major football tournaments. Fans often look for coverage of the UEFA Champions League, English Premier League, Spanish La Liga, and other high-profile competitions. These tournaments attract millions of viewers because they include famous clubs, elite players, and dramatic match schedules.
The UEFA Champions League remains especially important because it brings together top European clubs in high-stakes fixtures. When fans search for match coverage, they often want quick information about kickoff times, team lineups, scores, and viewing availability. A platform that organizes these matches in one place can capture strong search demand during tournament nights.
The English Premier League also drives regular traffic because it runs across a long season and has a global fan base. Clubs such as Manchester United, Liverpool, Arsenal, Chelsea, Manchester City, and Tottenham attract viewers from many countries. Match weekends create predictable spikes in search activity as fans look for live updates and access points.
Spanish La Liga adds another major layer of interest. Teams such as Real Madrid, Barcelona, and Atlético Madrid keep international audiences engaged. When a football platform includes European leagues alongside tournament fixtures, it becomes more valuable for fans who follow multiple competitions in the same week.
Regional Football Coverage for Arab Audiences
Koora Live also attracts attention because it highlights regional football that matters to Arab audiences. Competitions such as the Saudi Pro League, Egyptian Premier League, and UAE Pro League have strong local followings and growing international interest. Fans want fast updates for these competitions just as much as they want information about European football.
The Saudi Pro League has gained wider visibility due to major player signings, increased investment, and stronger international coverage. Fans now search more often for Saudi fixtures, club news, and live match information. A platform that includes these games benefits from this rising demand.
The Egyptian Premier League remains one of the most historic and passionate competitions in the Arab football world. Clubs with large fan bases create strong match-day interest, especially during derby games and title races. Live score updates, match schedules, and viewing information help supporters stay connected even when they cannot watch on television.
The UAE Pro League also plays a key role for regional football followers. While it may not receive the same global attention as some European leagues, it remains important to viewers who follow Gulf football. By grouping these competitions with international tournaments, the platform provides a broader football experience.
Real Time Scores, Updates, and Match Schedules
Real-time match updates are central to the value of Koora Live. Many users do not visit football platforms only to watch full matches. They also want to know who is playing, when the match starts, what the current score is, and whether a major incident has changed the game. This makes live score functionality an essential part of the user journey.
A strong match schedule helps users plan their viewing. Football fans often follow several teams across different leagues, and match times can overlap. A clear schedule lets them decide which game to watch live, which one to follow through scores, and which one to check later.
Instant updates also help fans stay engaged during busy days. Someone may not have time to watch a full match but still wants to know when their team scores. Real-time scoreboards keep that connection alive and make the platform useful even when streaming is not the main goal.
Tournament updates add another layer of value. During Champions League nights, league title races, cup finals, and international competitions, users want quick context. A good football platform does not only show scores; it helps users understand what those scores mean for standings, qualification, and upcoming fixtures.
Multi Device Viewing and Mobile App Experience
Modern football viewing is no longer limited to living rooms and television subscriptions. Fans follow games from buses, offices, cafés, schools, and public spaces. This shift makes mobile optimization one of the most important parts of any football streaming or score platform.
Koora Live is often searched by users who want a fast mobile experience. They expect pages to load quickly, match lists to appear clearly, and updates to work without complicated navigation. A mobile-friendly interface can make the difference between a useful match-day tool and a frustrating website.
Tablets and laptops also matter because many users prefer larger screens for match tracking. A tablet gives a better view of schedules, while a laptop allows fans to keep a match page open while working or browsing. Desktop access still matters for users who want a more stable viewing setup.
Mobile app searches show another side of user behavior. Some fans prefer an installed app because it feels more direct than typing a domain into a browser. However, users should remain careful with unofficial apps, duplicate names, and suspicious downloads. Fake football apps can create privacy and security problems.
Access Through Web Domains and Mobile Applications
Koora Live is often associated with multiple access routes because streaming-related platforms can shift between domains. This usually happens because of rights complaints, regional blocking, or technical changes. As a result, users may search for different portals, mirror pages, or app versions when one access point becomes unavailable.
Some users look for regional variants such as football portals, best-version pages, or live soccer hubs that carry similar branding. These portals typically focus on match schedules, scoreboards, and broadcast listings. The experience may vary from one version to another, which can make consistency a challenge.
Mobile applications add another access layer. Android users may search app stores or third-party references, while iOS users may look for guide-style apps or live soccer information tools. This app-based behavior shows that fans want convenience, but it also raises safety concerns when app authenticity remains unclear.
The safest approach is to avoid downloading unknown files from untrusted sources. Users should check app permissions, developer information, reviews, and update history before installing anything. A football app should not need unnecessary access to personal files, contacts, or sensitive device features.
Why Users Search for Free Football Streaming Platforms?
The demand for free football streaming comes from several practical reasons. Official sports subscriptions can be expensive, and different leagues often sit behind different broadcasters. A fan may need one service for the Premier League, another for the Champions League, and another for regional competitions. This fragmented market pushes many users to search for easier options.
Geographic restrictions also create frustration. Some matches may not be available in a viewer’s country, or the legal broadcaster may not offer a flexible digital package. When fans feel locked out of a match, they often search for alternatives that appear faster and simpler.
Another reason involves casual viewing. Not every fan wants to pay for a full monthly subscription just to watch one match. During cup finals, derbies, and international tournaments, casual viewers may search for free access because they only care about a single event.
However, free access can come with hidden costs. Unofficial streaming pages may expose users to aggressive ads, misleading buttons, unsafe redirects, and low-quality video. What looks free at first may create risks for privacy, device security, and viewing reliability.
Legal and Digital Rights Considerations
Legal issues play an important role in the conversation around Koora Live. Football broadcasting depends on paid rights agreements between leagues, clubs, broadcasters, and digital platforms. These agreements decide who can legally show a match in each region. When a site streams or organizes access to matches without permission, it may create copyright concerns.
Viewers should understand that digital rights vary by country. A match available on one service in one region may belong to another broadcaster elsewhere. This is why access can change based on location, and why some domains face restrictions or takedown activity.
The issue is not only legal for platforms. Users may also face poor reliability when they depend on unstable sources. A stream can stop during an important moment, links can disappear before kickoff, and pop-ups can interrupt the experience. Licensed services usually offer better stability because they operate within official rights agreements.
Responsible football fans should separate match information from unauthorized broadcasting. Checking schedules, scores, and football news is different from relying on illegal streams. For full-match viewing, official services remain the safer and more sustainable choice.
Safer Legal Alternatives for Football Coverage
Fans who want high-quality football coverage should consider licensed broadcasters and official sports platforms. Services such as DAZN Football, beIN Sports, SSC, and regional rights holders often provide legal access depending on the viewer’s country. These platforms usually deliver better video quality, stronger stability, and clearer customer support.
Official league apps and club platforms can also help. While they may not always show live full matches, they often provide highlights, interviews, lineups, fixtures, standings, and post-match analysis. This type of content gives fans a legal way to stay updated without depending on risky sources.
Live score apps are another useful option. Many trusted sports apps provide real-time scores, statistics, team news, and match alerts. For users who mainly want updates rather than full video, these apps may offer a safer and faster experience.
Regional television packages can also be worth checking. Some broadcasters sell football bundles focused on specific competitions. A fan who follows one league closely may find better value in a targeted legal package than in searching for unstable free streams every week.
Strengths, Limitations, and User Experience
Koora Live has clear strengths from a user perspective. It matches the way many football fans search online: fast, direct, and focused on today’s matches. It also organizes football content in a way that feels convenient for users who follow several leagues at once.
Its no-registration appeal also explains part of its popularity. Many people dislike creating accounts for every digital service. When a platform promises direct match access without subscription steps, users see it as simple and time-saving.
However, limitations remain serious. Domain changes can confuse users, and unofficial access points can create security risks. Streaming quality may vary, and links may not stay active during high-demand matches. Viewers may also face excessive advertising, misleading download buttons, and privacy concerns.
The best way to understand the platform is to view it as part of a larger football search habit. Fans want live access, but they also need safety, legality, and reliability. A balanced user experience should include quick football information while encouraging official viewing options whenever possible.
Future of Online Football Streaming Platforms
The future of football streaming will likely become more mobile, personalized, and rights-driven. Fans want flexible access, but leagues and broadcasters want stronger control over digital distribution. This tension will continue shaping the online football viewing market.
Official platforms may become more competitive by offering cheaper match passes, better mobile apps, and flexible tournament packages. If legal services become easier and more affordable, fewer users may feel pushed toward unofficial sources.
Technology will also improve the live football experience. Real-time statistics, multi-camera viewing, short highlights, personalized alerts, and AI-based match summaries may become standard features. Fans will expect more than a basic stream; they will want context, speed, and control.
Koora Live reflects the current demand for instant football access, but the long-term future belongs to platforms that combine convenience with legal security. Users want fast updates and easy viewing, but they also need stable service, safe browsing, and trustworthy content.
Final Thoughts
Koora Live remains a widely searched football platform because it fits a simple need: fans want quick access to daily matches, instant scores, and tournament updates. Its appeal comes from convenience, broad football coverage, mobile access, and the promise of no-subscription viewing. For many users, it works as a starting point for checking what is happening across global and regional football.
Still, viewers should approach free streaming platforms with care. Broadcast rights, domain changes, app safety, and privacy risks can affect the experience. A platform may be useful for discovering match schedules and score updates, but official broadcasters remain the safer choice for full live match coverage.
The smartest football fans use a balanced approach. They follow schedules, scores, and updates through convenient tools, but they choose licensed options when they want reliable, high-quality live broadcasts. In that sense, Koora Live is part of a larger digital football culture built around speed, access, and match-day demand.
FAQs
What is Koora Live used for?
Koora Live is mainly used by football fans who want live match schedules, instant scores, tournament updates, and quick access to football coverage. Many users search for it during major fixtures because they want one place to check matches happening today.
Does Koora Live require a subscription?
The Koora Live is often promoted as free and commonly associated with no-registration access. However, users should remember that free streaming platforms may raise legal, safety, and reliability concerns, especially when live sports rights belong to official broadcasters.
Which football competitions are commonly associated with Koora Live?
It is commonly connected with major competitions such as the UEFA Champions League, English Premier League, Spanish La Liga, Saudi Pro League, Egyptian Premier League, and UAE Pro League. Coverage may vary depending on the access point users find.
Is Koora Live legal to use?
The legal status depends on broadcast rights, location, and how match content is provided. Watching football through licensed broadcasters is the safest option because official services have legal permission to show matches in specific regions.
What are safer alternatives to Koora Live?
Safer alternatives include official sports broadcasters, regional rights holders, legal streaming services, club apps, league platforms, and trusted live score apps. These options usually offer better security, stable access, and a more reliable football viewing experience.

Living in a modern home often means working with a smaller footprint. While this encourages a more minimalist lifestyle, it can also present challenges when it comes to storage. If your space feels more cramped than cozy, you’re in the right place. This guide offers practical, stylish ideas to help you reclaim your space and create a home that is both functional and beautiful.
We’ll explore seven clever strategies to maximize every square foot of your home. From multipurpose furniture to smart vertical storage, these tips will help you declutter your living areas and design a more organized, spacious-feeling environment.
Go Vertical with Your Storage
When floor space is limited, the only way to go is up. Vertical storage is a game-changer for small homes, allowing you to store more without adding bulk.
- Wall-Mounted Shelves: Floating shelves are perfect for displaying books, plants, and decor without taking up any floor space. Install them in your living room, bedroom, or even above doorways to draw the eye upward and make rooms feel taller.
- Tall, Slim Bookcases: Instead of wide, short bookcases, opt for tall, narrow units. They provide ample storage while occupying minimal square footage. You can use them for more than just books; they’re great for storing baskets, photos, and other essentials.
Invest in Multipurpose Furniture
In a small home, every piece of furniture should work hard. Multipurpose furniture is designed to serve more than one function, saving you space and money.
- Sofa Beds: A comfortable sofa bed is essential for homes without a dedicated guest room. Modern designs are a far cry from the lumpy, uncomfortable versions of the past, offering both style and a good night’s sleep for your visitors.
- Storage Ottomans: An ottoman can be a footrest, extra seating, and a coffee table. Choose one with hidden storage to tuck away blankets, magazines, or remote controls, keeping your living room tidy.
- Expandable Dining Tables: If you love to host but don’t have space for a large dining table, an expandable one is the perfect solution. It can remain small for daily use and extend to accommodate guests when you’re entertaining.
Utilize Under-Bed and Under-Stair Space
The areas under your bed and stairs are often overlooked, but they offer valuable storage potential.
- Under-Bed Storage: Look for bed frames with built-in drawers or use low-profile storage containers on wheels to slide under your existing bed. This is an ideal spot for storing out-of-season clothing, extra bedding, and shoes.
- Under-Stair Solutions: The awkward space under a staircase can be transformed into a highly functional area. Consider installing built-in shelves, a small home office nook, or even a pull-out pantry.
Declutter and Organize Your Closets
An organized closet can hold significantly more than a chaotic one. Taking the time to declutter and install a proper organization system will make a huge difference. Start by sorting through your clothes and donating anything you no longer wear. Then, implement a system that works for you. Consider investing in high-quality closet systems in Park City to tailor storage to your specific needs, incorporating features like double-hanging rods, adjustable shelves, and drawers.
Choose Light Colors and Mirrors
Visual tricks can make a small space feel much larger than it is. A light color palette—think whites, creams, and soft grays—reflects natural light and creates an open, airy feeling. Painting your walls and ceiling the same light color can make the room feel even more expansive.
Mirrors are another powerful tool. A large mirror can double the visual space of a room by reflecting light and the view. Place a mirror opposite a window to maximize natural light or at the end of a hallway to create an illusion of depth.
Embrace Smart Kitchen Organization
The kitchen is often the heart of the home, but it can also be the most cluttered. Smart organization can transform it into an efficient and enjoyable space.
- Use Drawer Dividers: Keep your utensils, cutlery, and gadgets organized with drawer dividers.
- Install a Pot Rack: Free up cabinet space by hanging your pots and pans from a ceiling-mounted or wall-mounted rack.
- Magnetic Spice Racks: Attach a magnetic spice rack to the side of your refrigerator or a wall to keep your spices accessible but out of the way.
Opt for Floating Desks and Nightstands
Traditional desks and nightstands can be bulky. Wall-mounted, or “floating,” versions provide the surface area you need without the heavy footprint. A floating desk can create a functional home office in a small corner, while floating nightstands free up floor space in the bedroom, making it easier to clean and creating a more minimalist look.
Create a More Spacious Home
Maximizing space in a modern home is all about smart choices and creative thinking. By using vertical storage, investing in multipurpose furniture, and organizing forgotten spaces, you can create a home that feels open, organized, and perfectly suited to your lifestyle. Start with one or two of these ideas and see how much of a difference they can make.

10 Common Pre-Med Mistakes That Can Weaken a Medical School Application
REVOLUTION BY CLICK LTD – TOP SBLC/BG PROVIDERS

How to Use AI Video for E-Commerce Product Pages and Ads

Práctica de Yoga Estilismo Laboral: How to Bring Yoga Comfort Into Your Workday Style

Repmold: A Complete Guide to the Molding Machine, Uses, Process, and Benefits

Babybelletjer: What It Means, Taste, Wax Wrapper, Flavors, And Snack Ideas

The 15 Highest-Paid Rugby Players in the World
Nancy Hallam: The Inspiring Life, Career, and Success Story Behind Ian Wright’s Wife
Draven Duncan: Tim Duncan’s Rising Star Son and His Inspiring Basketball Journey
Who Is Maisie Mae Roffey? The Private Life, Family Story, and Quiet Success of Julie Walters’ Daughter
Johnny Carell: Inside the Life, Family, and Rising Success of Steve Carell’s Son
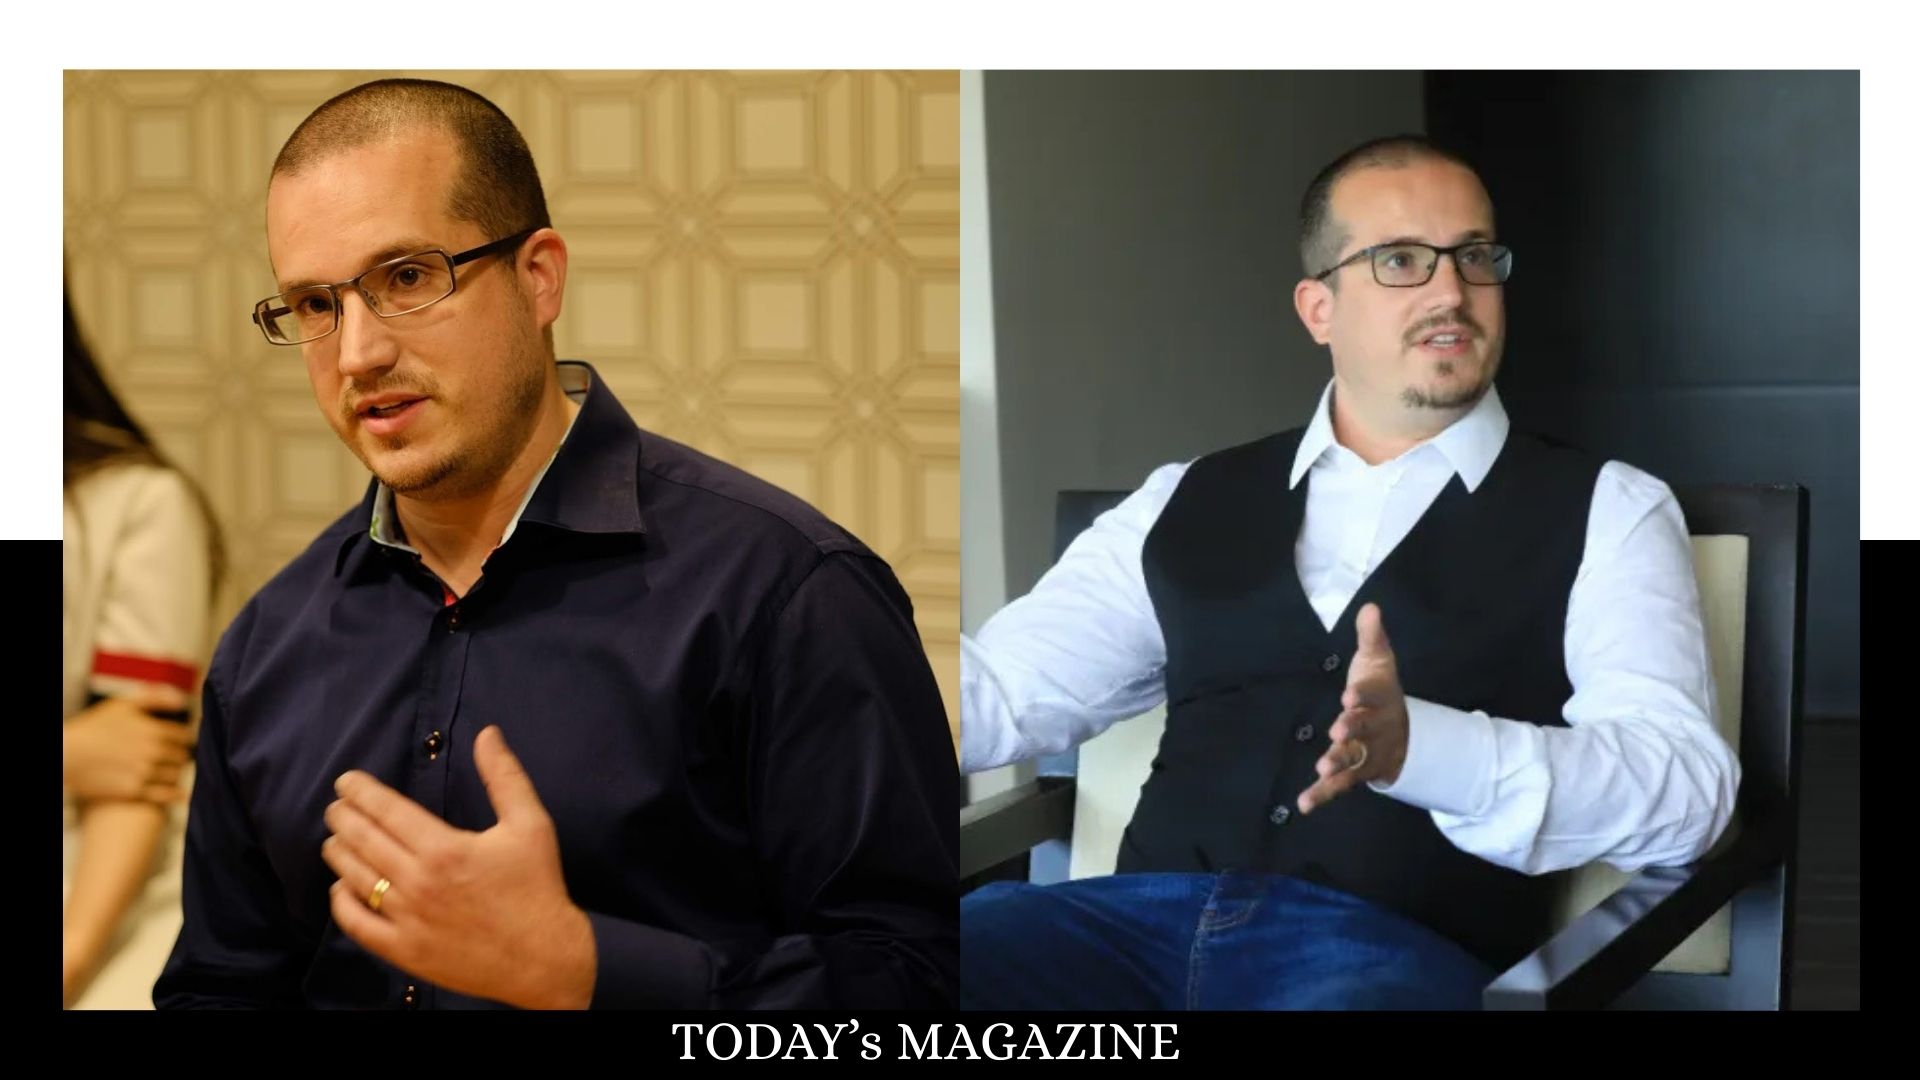
Simon Dixon Biography: Lifestyle, Net Worth, Family, Career and Success Story
The 15 Highest-Paid Rugby Players in the World
Nancy Hallam: The Inspiring Life, Career, and Success Story Behind Ian Wright’s Wife
Draven Duncan: Tim Duncan’s Rising Star Son and His Inspiring Basketball Journey
Who Is Maisie Mae Roffey? The Private Life, Family Story, and Quiet Success of Julie Walters’ Daughter
Johnny Carell: Inside the Life, Family, and Rising Success of Steve Carell’s Son
Simon Dixon Biography: Lifestyle, Net Worth, Family, Career and Success Story
-
 Sports1 month ago
The 15 Highest-Paid Rugby Players in the World
-
 Celebrity8 months ago
Nancy Hallam: The Inspiring Life, Career, and Success Story Behind Ian Wright’s Wife
-
 Celebrity6 months ago
Draven Duncan: Tim Duncan’s Rising Star Son and His Inspiring Basketball Journey
-
 Celebrity7 months ago
Who Is Maisie Mae Roffey? The Private Life, Family Story, and Quiet Success of Julie Walters’ Daughter
-
 Celebrity8 months ago
Johnny Carell: Inside the Life, Family, and Rising Success of Steve Carell’s Son
-
 Business7 months ago
Simon Dixon Biography: Lifestyle, Net Worth, Family, Career and Success Story
-

 Celebrity5 months ago
Who Is Linda Susan Agar? The Private Life, Legacy, and Story of Shirley Temple’s Eldest Daughter
-

 Celebrity5 months ago
Who Is Mark Gero? Inside the Life, Art, and Quiet Legacy of an American Creative