
Ai & Tools
I Tried Seedance to Create Videos — Here’s What Actually Happened

There’s a certain kind of frustration that comes with having a creative vision and no practical way to bring it to life. As someone who makes content regularly — product demos, short social clips, the occasional explainer — that gap between idea and execution has always been expensive to close. Hiring a video editor, paying for stock footage, spending hours in Premiere just to cut a 30-second clip. It adds up fast.
So when Seedance started showing up in my feeds, with people generating surprisingly cinematic videos from a single image or a few lines of text, it was hard not to be curious.
Here’s an honest look at the experience, what works, and who it’s actually for.
What Is Seedance, Exactly?
Seedance is a free AI video generator that gives you access to some of the most powerful video models available right now — all in one place. Rather than bouncing between six different tools to test Sora, Veo, Kling, and others,Seedance free video generator pulls them together under a single interface.
The platform is built around two primary workflows: text-to-video (you describe a scene and it generates it) and image-to-video (you upload a photo and it brings it to life). There’s also a reference-to-video option that gives you more precise control by letting you feed the model visual examples of what you want.
What’s worth noting is that Seedance operates on a free tier with no watermarks and no credit card required. That alone makes it unusual in this space, where most tools gate the good stuff behind a paywall immediately.
The Seedance 2.0 Model: Where Things Get Interesting
The most capable option on the platform is Seedance 2.0, ByteDance’s latest video generation model. It’s built on what they call a “unified multimodal audio-video joint generation architecture” — which sounds technical, but practically means you can feed it text, images, video clips, and audio all at once, and it understands how to use each one.
The real standout feature is how it handles motion stability. Earlier AI video tools struggled with what people in the space call “temporal drift” — characters whose faces subtly shift between frames, hands that blur or reshape unnaturally, physics that just feel wrong. Seedance 2.0 addresses this directly. The model tracks fine-grained physical details across frames: clothing folds, light reflections on surfaces, the subtle dynamics of hair movement. It’s not perfect, but it’s noticeably better than what was possible even a year ago.
A few things worth calling out specifically:
Multi-shot generation. Rather than outputting a single continuous clip, Seedance 2.0 can generate videos with multiple distinct shots that hold narrative and visual continuity. For anything resembling a short film, ad, or explainer, this matters enormously. You’re not just getting a looping aesthetic clip — you’re getting something that can tell a story.
Character consistency. This was personally the most impressive part. Upload a reference image of a character or subject, and the model keeps faces, clothing, and visual style consistent throughout. That’s a capability that used to require significant manual work in post-production.
Native audio generation. The model generates sound effects and ambient audio alongside the video in a single pass — not as an afterthought. For music-synced content or anything where audio timing matters, there’s also a beat sync feature that aligns visual cuts to an uploaded track.
Multimodal input flexibility. A single generation can take up to 9 images, 3 video clips, and 3 audio files as inputs. You can use them as references for style, motion, character, camera movement — and just describe in natural language what role you want each one to play.
How the Workflow Actually Feels
The onboarding is genuinely low-friction. There’s no tutorial you have to sit through, no configuration required. Pick a model, type a prompt or upload an image, and generate.
The text-to-video results impressed more than expected on a first attempt. Describing a product being assembled on a clean studio surface with dynamic lighting — the kind of shot that would normally require a cinematographer — produced something usable in under five minutes. Not broadcast-ready, but absolutely good enough for a social post or a deck.
The image-to-video feature is where things get more personal. Uploading a still photograph and watching it gain motion — a landscape where clouds start drifting, a portrait where the subject slowly turns — creates an effect that feels genuinely magical the first time. It’s become a go-to for turning static product photography into short video ads without a full shoot.
The reference-to-video workflow takes a little more experimentation. The model is good at extracting camera movement styles or motion rhythms from reference clips, but the more specific the instruction in the prompt, the better the result. Vague prompts produce vague output — that hasn’t changed in AI tools generally.
Generation times vary, typically landing between 3 and 5 minutes depending on complexity. There’s a queue system, so peak hours can add wait time. The free tier is functional but slower; credits can extend access and reduce wait times.
What It’s Best For
After spending time with the platform, a few use cases stand out as genuinely strong fits:
Social media content. The turnaround speed and quality are well-suited to the pace of short-form platforms. Being able to reference a trending video template and recreate it with different branding is a real workflow advantage.
Product videos and ad prototypes. Generating multiple variations of a product demo — different camera angles, different motion styles — without a production team changes the economics of ad testing significantly.
Educational content. Animated explainers and visual demonstrations of abstract concepts are where text-to-video really shines. Describing a physical process and watching the model render it accurately saves hours of illustration work.
Storytelling and short film pre-visualization. The multi-shot capability and character consistency make Seedance 2.0 worth serious consideration for pre-viz work — storyboarding sequences, testing camera choreography, or prototyping a visual style before committing to a full production.
A Few Honest Caveats
The technology has real limits. Complex scenes with many interacting subjects still produce occasional physics glitches. Very specific facial resemblances to real people aren’t supported (the platform blocks this by design). And while the audio generation is impressive for ambient sound, dialogue with accurate lip sync is still a work in progress across the industry.
The free tier is also genuinely free, but sustained heavy use will push you toward credits or a paid plan. That’s reasonable given what the tool delivers.
The Bigger Picture
What’s changed in the last year isn’t just the quality of AI video generation — it’s the accessibility. Tools that required expensive hardware, specialized knowledge, or professional studio setups are now browser-based and free to try. Seedance represents that shift as clearly as anything currently available.
Whether you’re a solo creator who needs to ship content faster, a small business that can’t afford a full production team, or someone who just wants to experiment — the entry point has never been lower. Spending a few hours testing the platform costs nothing, and the results speak for themselves.



Students often check their assignments before submission. A Turnitin Report can help you identify matching text and review possible similarities. However, a similarity percentage does not automatically determine whether your work contains plagiarism.
You need to understand what the report shows before making changes. A careful review can help you identify copied wording, missing citations, common phrases, and correctly referenced material.
So, how should you read your results?
What Is a Turnitin Report?
A Turnitin Report provides information about text similarities found during a document check. The system compares submitted content against sources available to it.
The report can highlight sections that resemble existing material. It may also show sources associated with particular matches.
You should review the highlighted sections instead of focusing only on the overall percentage. A similarity result needs context before you decide what action to take.
What Does the Similarity Score Mean?
The similarity score represents the amount of text that matches or resembles material identified by the system.
A higher percentage does not automatically mean plagiarism. A lower percentage does not automatically prove that every part of your work is original.
For example, properly quoted material can create a match. Common terminology can also appear in multiple documents.
Therefore, you should use the Turnitin Report as a review tool rather than treating the percentage as a final judgment.
Why Can Properly Cited Text Appear in the Report?
Academic writing often includes quotations and references. Those passages may match existing sources even when you have cited them correctly.
You should check the highlighted text and its surrounding citation. If you used a direct quotation, quotation marks and proper attribution should normally make the source clear.
Paraphrased content can also create similarities. You should make sure your paraphrasing uses your own wording and that you provide appropriate attribution.
A match does not always indicate improper copying.
How Should You Review Highlighted Matches?
You should examine each highlighted section individually. Start by checking the source connected to the match.
Next, compare the source wording with your own text. Ask yourself why the system identified the passage.
You may find a direct quotation, a common phrase, a properly cited source, or wording that needs revision.
You should then decide what action is appropriate. Some matches may require no change. Others may need better citation or more original phrasing.
Can a High Similarity Score Be Acceptable?
A high score can sometimes result from legitimate content. Assignments that require specific terminology, references, quotations, or templates may naturally contain matching text.
However, a high score can also indicate that your writing relies heavily on existing material.
You should therefore avoid judging your work based only on a number. The details inside the Turnitin Report matter more than the percentage alone.
Your institution may also have its own academic integrity requirements.
What Does a Low Similarity Score Mean?
A low score generally means that the system identified fewer matching passages. However, it does not automatically guarantee that your work is free from plagiarism.
A source may not be included in the system’s available comparison material. Your writing could also contain unattributed ideas without using identical wording.
You should still review your citations and references carefully.
A low similarity result should encourage careful checking rather than complete confidence.
How Can You Reduce Unnecessary Similarity?
You should focus on writing ideas in your own words. Start by understanding the source material before creating your explanation.
You can then paraphrase the information using your own sentence structure and vocabulary. You should still provide a citation when the idea comes from another source.
Direct quotations should remain clearly marked and properly attributed.
You should also avoid copying sentence structures too closely. Changing a few individual words may not create genuine paraphrasing.
Can References Affect Your Similarity Score?
Reference sections can sometimes contain text that appears in other academic documents. Titles, publication names, author names, and citation formats may also create matches.
You should review how your institution handles references when interpreting your score.
Some checking systems provide options that exclude certain types of content from specific views. However, you should not assume that every setting changes the official academic assessment.
Always follow the requirements provided by your instructor or institution.
Should You Worry About Every Highlight?
You do not need to change every highlighted phrase automatically. Some matches are unavoidable or completely legitimate.
You should first identify the type of match. Then, determine whether the wording requires action.
A common phrase may not need rewriting. A copied paragraph without proper attribution requires much more attention.
The Turnitin Report becomes more useful when you evaluate each match based on its context.
Can AI-Generated Content Affect Your Review?
AI-generated writing creates another issue for students and writers. Similarity checking and AI detection are different processes.
A similarity checker looks for matching or similar text. An AI detector attempts to identify patterns associated with AI-generated writing.
You should not assume that a similarity score tells you whether AI was used. The two checks address different questions.
If your institution has rules about AI-assisted writing, you should follow those rules separately.
What Should You Do Before Submission?
You should complete a final review before submitting your assignment.
First, check your citations. Next, review direct quotations and paraphrased material. Then, inspect any unusual similarities shown in the report.
You should also verify your references and make sure every borrowed idea has appropriate attribution.
Finally, read your work without focusing only on the score. Clear arguments, accurate information, and proper academic practices should remain your main priorities.
Final Thoughts:
A Turnitin Report can help you identify similarities in your writing, but the percentage alone does not tell the full story.
You should examine individual matches and understand why they were identified. Proper quotations, references, common phrases, and legitimate terminology can all affect the result.
You can use the report as part of a careful editing process. Review your sources, improve citations, paraphrase responsibly, and follow your institution’s academic integrity rules.
A thoughtful review will help you understand your similarity results instead of simply trying to achieve a particular percentage.
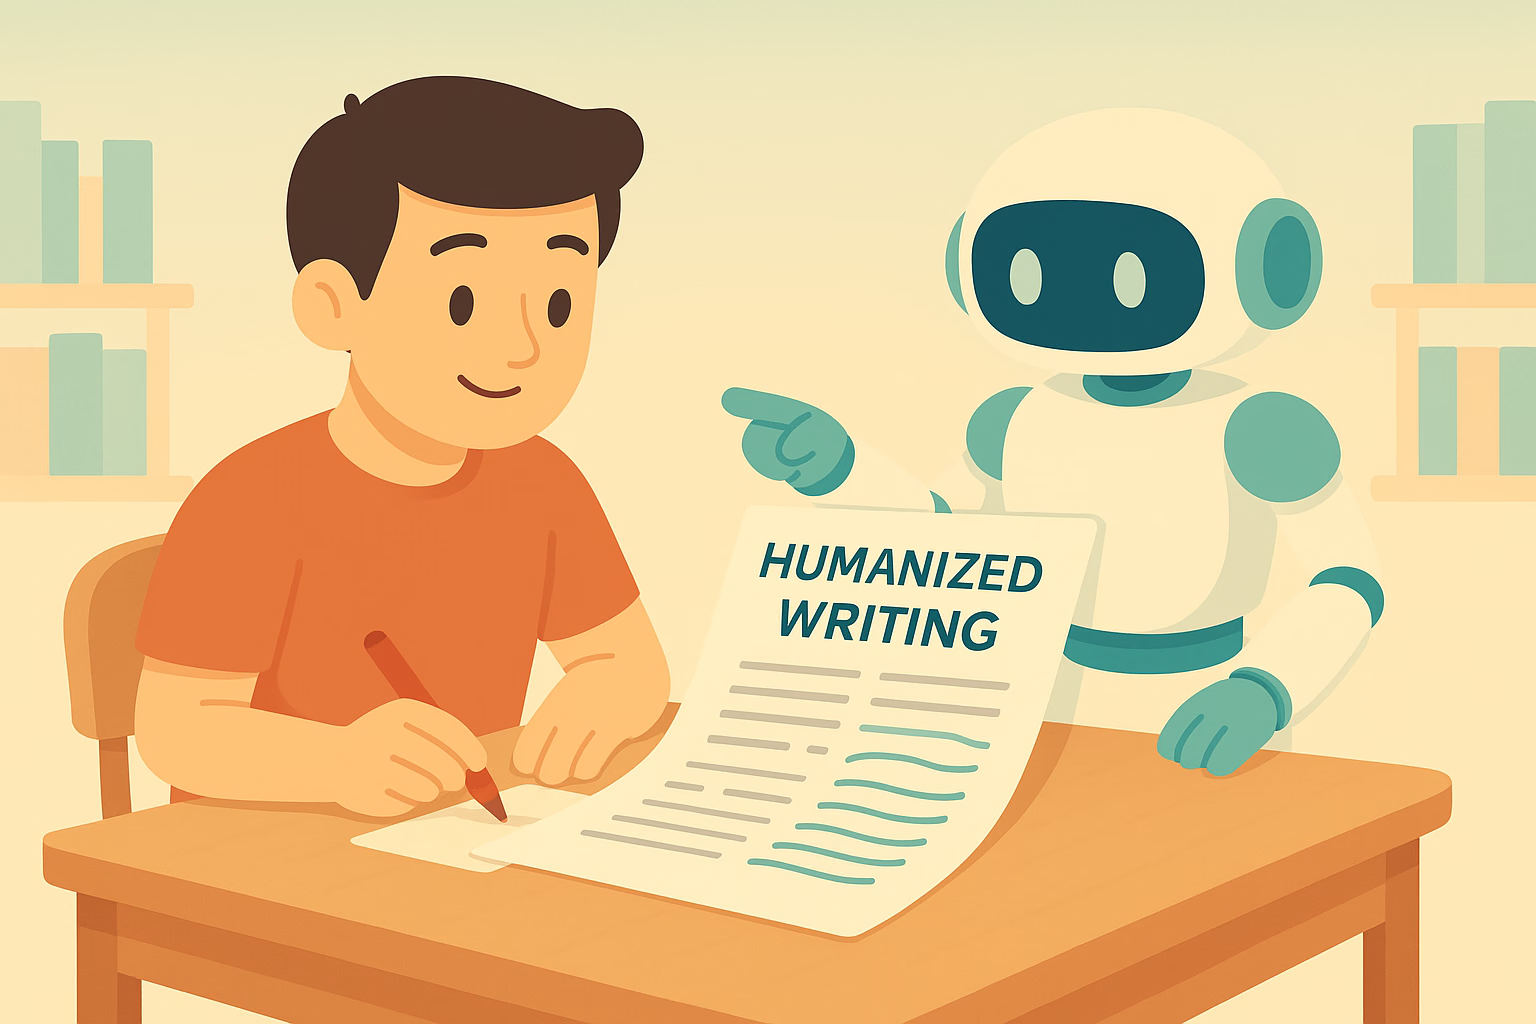
AI writing can make content creation faster. You can create drafts, outlines, emails, and articles within minutes. However, generated text can sometimes feel repetitive or too predictable.
Readers may notice similar sentence structures, generic expressions, or an overly formal tone. You can Humanize AI text to make it clearer, more natural, and better suited to your audience.
However, good humanization requires more than replacing a few words. You need to consider sentence flow, tone, vocabulary, context, and overall readability.
Why Does AI Text Sometimes Sound Unnatural?
AI systems generate text by recognizing language patterns. As a result, some outputs can follow similar structures.
You may see repeated transitions or sentences with nearly identical rhythms. The content may also explain simple ideas with unnecessary detail.
You can Humanize AI writing by identifying those patterns and changing them. You should focus on the way ideas connect rather than editing individual words alone.
A natural piece of content should feel clear and purposeful from beginning to end.
How Can You Humanize AI Text?
You can start with a careful review of the original content. Read the entire draft before making changes.
Next, identify sentences that sound repetitive or generic. You can rewrite them using simpler and more direct language.
You can also Humanize AI with an AI humanizer when you want automated assistance. Such a tool can help adjust sentence structures and wording.
However, you should review the output afterward. Automated rewriting may not understand every detail of your topic or audience.
Can Sentence Length Make Writing More Natural?
Sentence length can affect the rhythm of your content. A paragraph that contains only long sentences may feel difficult to read.
You can Humanize AI content by mixing short and longer sentences. Short sentences can emphasize important points. Longer sentences can provide context when necessary.
You should also avoid creating a fixed pattern. Natural writing usually has some variation in sentence length and structure.
Read your paragraphs aloud when possible. Hearing the text can help you identify awkward rhythm.
How Does Word Choice Affect the Result?
Word choice has a major effect on tone. AI-generated text can sometimes use formal vocabulary when simple words would communicate the same idea.
You can Humanize AI by replacing unnecessary complexity with clearer language. Your word choices should match the readers you want to reach.
A technical article may need specialized terminology. A beginner-focused article may need simpler explanations.
You should avoid changing important technical terms simply to make the writing sound different. Accuracy should always remain important.
Can You Make AI Writing More Personal?
Personal details can make content feel more authentic. You can add examples, observations, and explanations that reflect your own perspective.
You can Humanize AI text by adding relevant experiences or specific examples. Such details can make general information easier to understand.
However, you should avoid adding personal information that does not support the topic.
Your goal should be useful personalization. Every added detail should have a clear purpose.
How Can You Improve Paragraph Flow?
Good paragraphs usually focus on one main idea. AI-generated content can sometimes combine several points without a clear connection.
You can Humanize AI writing by reviewing each paragraph separately. Ask yourself what the main point is and whether every sentence supports it.
You can then remove unnecessary sentences or move information to a more suitable section.
Transitions should also feel natural. You do not need a transition phrase at the beginning of every paragraph.
Can a Humanizer Preserve the Original Meaning?
Meaning should remain a priority during any rewrite. A natural-sounding sentence is not useful if it changes the original message.
You should compare the rewritten version with your source content. Check facts, names, numbers, instructions, and important terminology.
You can Humanize AI text while keeping the central message intact. However, manual review remains necessary.
You should also verify factual claims before publishing. Better wording cannot correct inaccurate information.
How Should You Adapt the Tone?
Different content needs different tones. A professional email should sound different from a lifestyle article.
You can Humanize AI content by choosing a tone that matches the purpose of your writing.
You may need a direct style for business communication. You may prefer a conversational style for a blog.
The important point is consistency. The tone should remain appropriate throughout the entire piece.
Can Humanization Remove Repetitive Phrases?
Repetition can make generated content feel mechanical. You may notice the same word or phrase appearing several times in nearby sentences.
You can Humanize AI writing by combining repeated ideas or replacing unnecessary wording.
However, you should keep important terms when they help readers understand the subject. Removing every repeated keyword can also make content less clear.
Good editing removes unnecessary repetition without damaging meaning.
Should You Use AI Detection Tools?
Some writers check their content with AI detection tools after rewriting. These tools can provide additional information, but their results should not be treated as absolute proof.
AI detectors can make mistakes. Human-written content can sometimes receive an AI-related score.
You should therefore focus on originality, accuracy, and writing quality. You should also follow the rules that apply to your school, workplace, or publication.
What Should You Do After Humanizing AI Text?
A final review can improve the quality of your content. You should first check whether the main message remains accurate.
Next, review grammar, sentence flow, vocabulary, and paragraph structure.
You should also remove any wording that does not sound natural to you. Add your own examples where they provide useful context.
Finally, read the complete article from start to finish. A full review can help you notice problems that individual sentence edits may miss.
Final Thoughts:
You can Humanize AI text by improving sentence structure, vocabulary, tone, paragraph flow, and overall readability. However, effective humanization requires more than automated rewriting.
You should use AI tools as editing support rather than as a complete replacement for human judgment. Review the final content carefully and make changes that fit your audience.
Natural writing should feel clear and purposeful. When you combine automated assistance with thoughtful editing, you can turn an AI-generated draft into content that feels more personal and easier to read.

AI writing tools can help you create content quickly. You can generate articles, emails, reports, and other drafts within minutes. However, AI-generated text can sometimes sound repetitive or predictable.
You may notice similar sentence structures, generic phrases, or an overly polished tone. Those patterns can affect readability and make the content feel less personal.
Ryne AI provides tools that can help you revise AI-generated content. But how effective is it when you want to Humanize AI without losing the original meaning?
Why Do People Want to Humanize AI Content?
AI-generated content often follows predictable patterns. The writing may use similar transitions and sentence structures across different topics.
You can Humanize AI content to make the wording more natural. You can also adjust the tone so it better matches your audience.
However, rewriting should not focus only on changing individual words. You should improve the complete flow of the content.
A natural article should communicate ideas clearly. It should also sound appropriate for the person or organization publishing it.
How Does Ryne AI Approach AI Humanization?
Ryne AI provides AI-powered writing tools that can help rewrite and improve generated text. Its humanizer focuses on changing the structure and wording of AI content.
You can use the platform to Humanize AI while keeping the central message of your original draft.
You should still review the rewritten version. Automated tools can change wording in ways that may not fit the context.
Therefore, you should treat the humanizer as an editing assistant rather than a replacement for your own review.
Can Ryne AI Change Sentence Structure?
Sentence structure can strongly affect how natural content feels. Repeated structures can make even useful information sound mechanical.
Ryne AI can rewrite sentences and vary the way ideas are presented. You can use those changes to Humanize AI content and create a more varied reading experience.
You should check the final paragraph as a whole. A collection of individually correct sentences may still sound unnatural when they appear together.
Manual editing can help you make the final flow more consistent.
Can You Preserve the Original Meaning?
Meaning is one of the most important factors during rewriting. A humanized version should still communicate the same information.
You can Humanize AI content without changing the central idea. However, you should compare the original and rewritten versions after processing.
You should pay special attention to facts, figures, names, technical terms, and instructions. Small changes can sometimes affect their meaning.
A careful review can help you identify and correct those issues.
Does Tone Affect the Final Result?
Tone should match the purpose of your content. A formal report needs different language from a casual blog post.
You can Humanize AI writing by adjusting the tone according to your audience. A professional audience may prefer direct and concise wording. General readers may respond better to simple and conversational language.
You should decide on your preferred tone before editing. Then, check the final draft to make sure it remains consistent.
Can Ryne AI Help With Different Content Types?
AI-generated content appears in many formats. You may create blog articles, emails, product descriptions, reports, or social media posts.
Each format has different requirements. A marketing article may need engaging language. A business email may need short and direct sentences.
You can use Ryne AI to Humanize AI content across different writing tasks. However, you should adjust the final version based on the format and audience.
Good editing requires context. The same writing style will not work equally well for every document.
How Important Is Vocabulary?
Vocabulary affects both tone and readability. AI-generated content can sometimes use formal or complicated words when simpler choices would work better.
You can Humanize AI by replacing unnecessary complexity with clear language. You should choose words that your readers can understand easily.
However, you should not remove technical terms when they are necessary. A professional audience may need specific terminology to understand the subject accurately.
The goal should be appropriate vocabulary rather than simple vocabulary in every situation.
Can Humanization Remove Repetition?
Repetition can make AI-generated content feel less natural. The same words or ideas may appear several times within a short section.
You can Humanize AI by identifying repeated wording and restructuring the affected sentences.
However, you should not remove useful repetition. Some important terms need to appear multiple times so readers understand the topic.
You should focus on unnecessary repetition instead.
Should You Rely on AI Detection Scores?
Some people use AI detectors after rewriting content. However, you should understand their limitations.
An AI detection score does not provide absolute proof about how a piece of content was created. Detection systems can produce incorrect results.
You should focus on content quality, accuracy, originality, and compliance with relevant rules.
You can Humanize AI to improve readability and style. You should not rely on a detector score as the only measure of content quality.
What Should You Check After Using Ryne AI?
You should review every important part of the final draft. Start by comparing the rewritten text with the original.
Next, check the facts. Then, review sentence flow, tone, vocabulary, and paragraph structure.
You should also look for phrases that do not sound natural to you. Replace them with wording that better reflects your preferred style.
Finally, read the entire article without stopping after every sentence. A complete reading can reveal issues that individual edits may miss.
Is Ryne AI Suitable for Your Workflow?
Your needs should determine whether a humanizer fits your workflow. You may want to revise occasional AI drafts. You may also need regular assistance with larger content projects.
Ryne AI can provide a range of writing tools alongside its humanization features.
If you want to Humanize AI, you can test the platform with your own content and review the results.
Your experience can depend on the original quality of the text, your selected settings, and the amount of manual editing you perform afterward.
Final Thoughts:
Ryne AI provides tools that can help you revise AI-generated content. Its humanization approach focuses on wording, sentence structure, tone, and overall readability.
You can Humanize AI more effectively when you combine automated rewriting with careful manual editing. You should check the meaning, facts, tone, and structure before publishing the final version.
A humanizer can save time during the editing process. However, your judgment should remain central to the final result.

Drain Unblocking London: How to Clear Problems Properly and Prevent Repeat Blockages

Top 13 CRM Software Development Companies in California

Staying in Chora With Little Venice at Your Door

AI-Generated Nano Banana 2.1 Visuals: What Shopify Beauty Ecommerce Brands Should Check Before Publishing

YesWelder FIRSTESS MP200 Pro: One Machine for Welding, Cutting, and More


The 15 Highest-Paid Rugby Players in the World

How to Ensure Your Home is Valued Correctly for a Quick Sale

Christopher Dare: The Untold Story of Engineer and Former Husband of Angela Rippon

What Is Fanquer? The Digital Creator Platform Transforming Direct-to-Fan Engagement

Dr Jared Ross: Missouri Appeals Court Upholds Protection Order Over Graphic Torture and Murder Threats

Nancy Hallam: The Inspiring Life, Career, and Success Story Behind Ian Wright’s Wife
The 15 Highest-Paid Rugby Players in the World
How to Ensure Your Home is Valued Correctly for a Quick Sale
Christopher Dare: The Untold Story of Engineer and Former Husband of Angela Rippon
What Is Fanquer? The Digital Creator Platform Transforming Direct-to-Fan Engagement
Dr Jared Ross: Missouri Appeals Court Upholds Protection Order Over Graphic Torture and Murder Threats
Nancy Hallam: The Inspiring Life, Career, and Success Story Behind Ian Wright’s Wife
-
 Sports5 months ago
The 15 Highest-Paid Rugby Players in the World
-
 Real Estate9 months ago
How to Ensure Your Home is Valued Correctly for a Quick Sale
-
Celebrity11 months ago
Christopher Dare: The Untold Story of Engineer and Former Husband of Angela Rippon
-
 Technology5 months ago
What Is Fanquer? The Digital Creator Platform Transforming Direct-to-Fan Engagement
-
 Celebrity4 months ago
Dr Jared Ross: Missouri Appeals Court Upholds Protection Order Over Graphic Torture and Murder Threats
-
Celebrity11 months ago
Nancy Hallam: The Inspiring Life, Career, and Success Story Behind Ian Wright’s Wife
-

 Celebrity7 months ago
Who Is Azriel Crews? Inside the Life and Career of Terry Crews’ Daughter
-

 Health9 months ago
Enclomimed 25 (Enclomiphene) – Effective PCT Protocol