
Blog
How to Choose the Best Window Tint in San Antonio (Cost, Laws & Mistakes to Avoid)

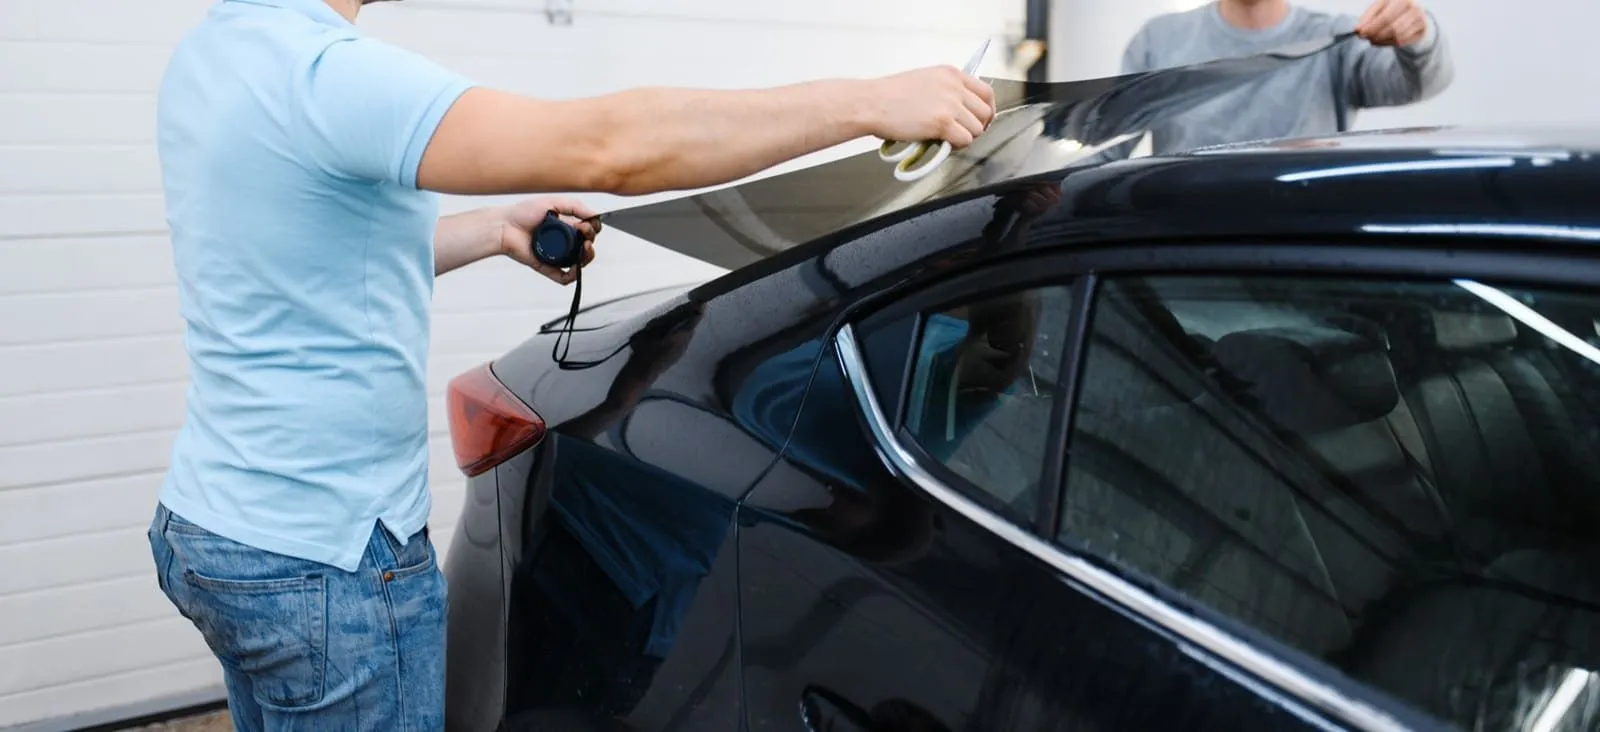
San Antonio gets extremely hot. Summers regularly push past 100°F, and the sun hits hard for most of the year. If you own a home, run a business, or drive a vehicle in this city, that heat is a daily problem. Window tinting is one of the most practical ways to deal with it.
This guide covers everything you need to know about window tinting San Antonio, including what types of film are available, how much they cost, what Texas law says, and the mistakes you should avoid before spending a single dollar.
Why Window Tinting Is Worth It in San Antonio
Regular window glass does not do much to block heat. It lets in visible light, ultraviolet (UV) rays, and infrared radiation, which is the part of sunlight that actually heats up a room or a car interior.
For homeowners, this means higher electricity bills, faded furniture, and rooms that feel uncomfortable even with the AC running. For business owners, it means increased cooling costs and glare that affects employees and customers. For drivers, it means a hot car, sun damage to the interior, and UV exposure on every trip.
Good quality window film blocks up to 99% of UV rays and cuts down a significant amount of infrared heat. Your cooling system does not have to work as hard, your interiors last longer, and the spaces you spend time in are simply more comfortable.
Types of Window Tint Available in San Antonio
The type of film you choose makes a big difference in how well your tint actually performs. Here are the main options available for homes, businesses, and vehicles.
Ceramic Window Tint
Ceramic film is the best-performing option on the market. It uses tiny ceramic particles that block heat and UV rays without affecting Wi-Fi, cellular signals, or GPS. It does not fade over time and holds up well in extreme heat.
For homeowners and business owners who want long-term results, ceramic home window tint is the most recommended option. It costs more upfront but performs better and lasts much longer than cheaper alternatives.
Best for: Homes, offices, storefronts, and vehicles where heat rejection and durability matter most. Residential/Commercial cost: $8 to $15 per square foot installed. Automotive cost: $450 to $800 or more for a full vehicle
Carbon Window Tint
Carbon film is a solid mid-range option. It blocks infrared heat, does not contain metal, so it will not interfere with your wireless signals, and has a clean matte look. It also does not fade the way dyed film does.
Best for: Residential and commercial projects where budget matters but performance still counts. Residential/Commercial cost: $5 to $10 per square foot installed. Automotive cost: $250 to $450 for a full vehicle
Dyed Window Tint
Dyed film is the cheapest option. It reduces glare and adds some privacy but does not block much heat. In a city like San Antonio, dyed film on its own usually falls short for anyone who actually wants to feel a difference inside their home, office, or car.
Best for: Privacy or aesthetics when budget is the main concern. Residential/Commercial cost: $2 to $5 per square foot installed. Automotive cost: $150 to $250 for a full vehicle
Metallic or Reflective Tint
Metallic film reflects heat and is quite durable. The downside is that the metal particles interfere with wireless signals, including Wi-Fi, cell service, and GPS. For most homes, offices, and modern vehicles, this makes it a poor choice.
Best for: Older properties or vehicles that do not rely heavily on wireless connectivity.
Window Tinting Cost in San Antonio
| Application | Dyed Film | Carbon Film | Ceramic Film |
| Residential (per sq ft) | $2 to $5 | $5 to $10 | $8 to $15 |
| Commercial (per sq ft) | $3 to $6 | $6 to $12 | $10 to $18 |
| Automotive (full vehicle) | $150 to $250 | $250 to $450 | $450 to $800+ |
If you have existing tint that needs to be removed first, expect to add $1 to $3 per square foot for residential and commercial work, or $100 to $200 flat for automotive.
Cheaper film breaks down faster in San Antonio’s heat. It fades, bubbles, and peels within a few years. Spending a little more on quality film with a solid warranty saves you money in the long run.
Texas Window Tint Laws
Texas has rules for window tinting on vehicles. Homes and commercial buildings are not subject to the same restrictions, which gives property owners a lot more freedom in what they can install.
For vehicles, the rules are as follows. The windshield can only have clear, non-reflective film applied above the manufacturer’s AS-1 line, which is roughly the top five inches. Front side windows must allow at least 25% of light to pass through. Back side and rear windows have no darkness limit as long as the vehicle has side mirrors on both sides. No window can have tint that is more than 25% reflective, and red, amber, and blue tints are not allowed.
For homes and commercial properties, Texas has no statewide rules on film darkness. Just check your HOA guidelines or lease agreement if either applies to you, as some have restrictions on exterior appearance.
5 Mistakes to Avoid When Getting Window Tinting in San Antonio
1. Thinking Darker Film Means More Heat Rejection
This is a very common misunderstanding. How dark a film looks and how much heat it blocks are two completely separate things. A light, nearly clear ceramic film can block far more heat than a very dark dyed film. Always ask for the infrared rejection rating of any film you are considering, not just how dark it is.
2. Choosing a Shop Based on Price Alone
The cheapest quote usually means cheap materials. Low quality adhesives and inferior films do not hold up in San Antonio’s conditions. Look for installers who offer a lifetime warranty on both the film and the labor. That warranty tells you a lot about how confident they are in their own work.
3. Using Metallic Film on a Property or Vehicle With Wireless Systems
If your home, office, or car depends on Wi-Fi, Bluetooth, cellular service, or GPS, metallic film is going to cause problems. Go with ceramic or carbon instead.
4. Rolling Down Windows or Cleaning Too Soon After Installation
Freshly installed film has moisture between the film and the glass that needs time to dry out. For vehicles, do not roll the windows down for at least three to five days. For residential and commercial installs, wait at least a week before cleaning the interior side of any tinted window. Doing it too early causes peeling and film failure.
5. Not Checking the Installer’s Track Record
The quality of the installer matters just as much as the quality of the film. Dust trapped under the film during installation causes bubbles that cannot be fixed without removing and replacing the film. Look for a company with a proper installation environment, experience across home, commercial, and automotive projects, and real customer reviews.
How to Take Care of Your Window Tint
Window film does not need much maintenance, but a few habits will keep it looking and performing well for years.
Do not use ammonia-based glass cleaners. Standard window sprays often contain ammonia, which breaks down the film adhesive and surface coating over time. Use an ammonia-free cleaner with a soft microfiber cloth on all tinted surfaces.
Avoid anything abrasive. Paper towels and rough cloths can scratch the film. Stick to microfiber.
Check your windows once a year for early signs of peeling or color change, especially on south and west-facing windows that get the most direct afternoon sun.
About Beat the Heat Window Tinting
Beat the Heat Window Tinting serves San Antonio homeowners, business owners, and drivers who want window film that actually works. The team handles residential, commercial, and automotive installations using quality film products and proper installation practices that eliminate common issues like dust contamination and poor adhesion.


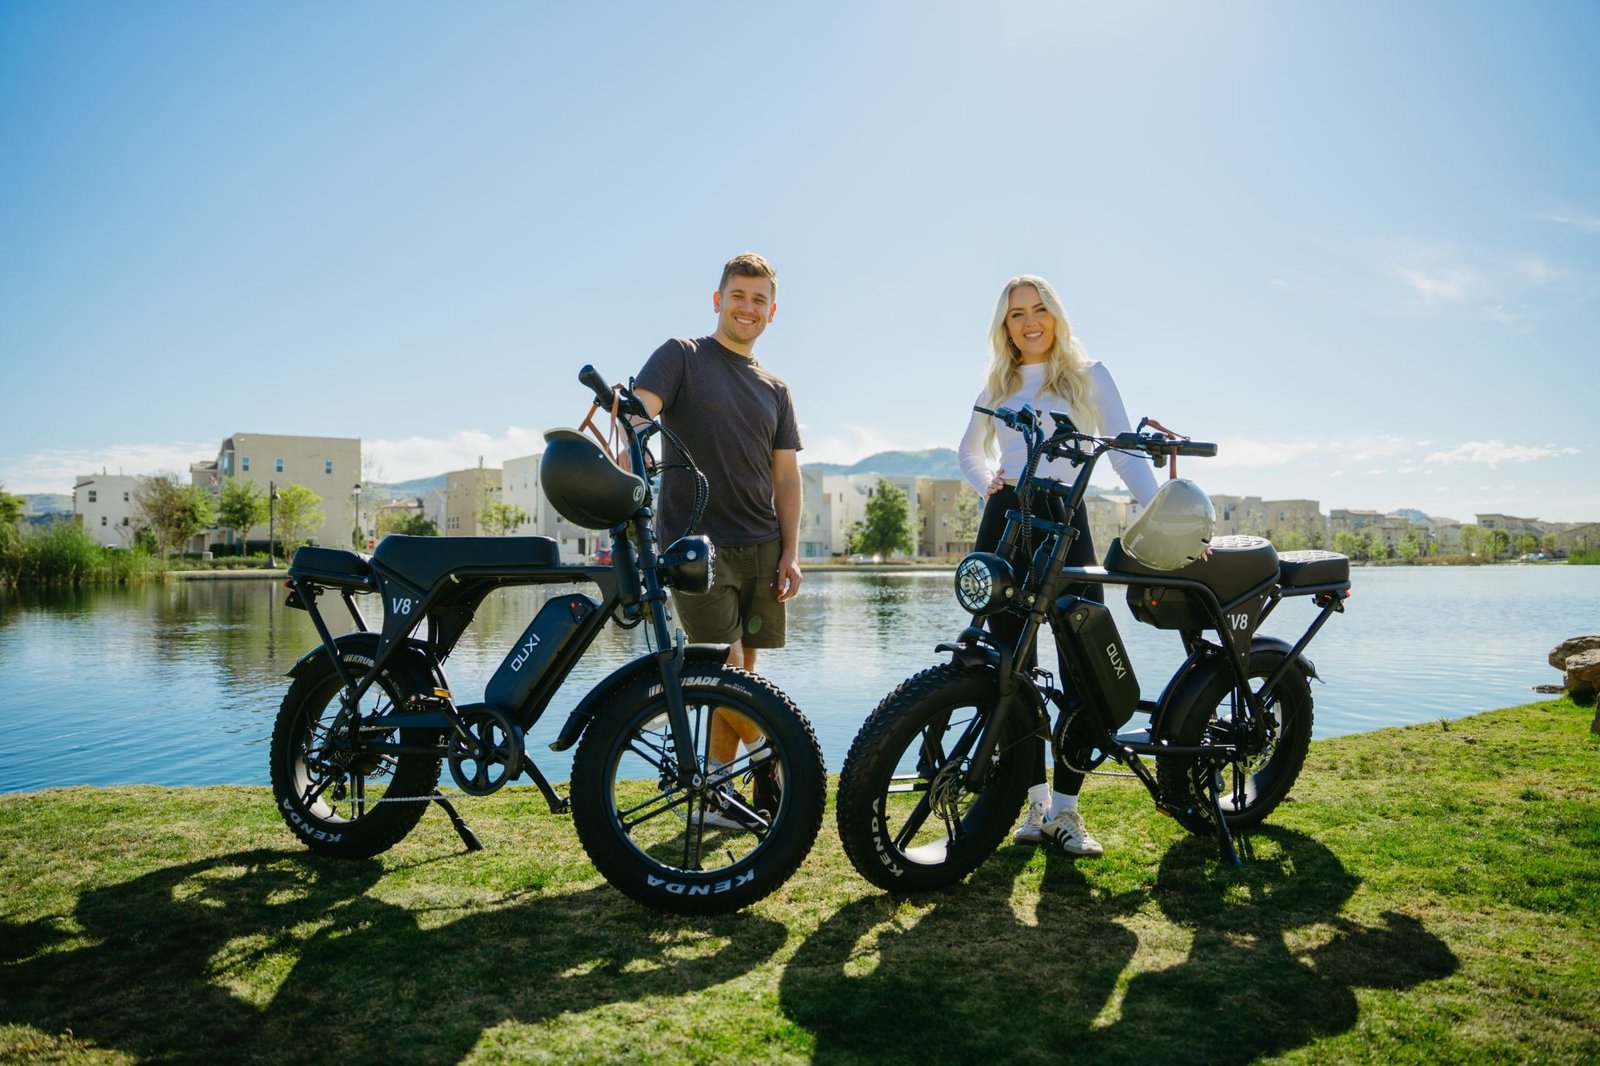
Electric bikes have expanded the possibilities for everyday travel, recreational riding, and exploring routes that may be difficult on a conventional bicycle. Among the available options, a fat tire electric bike 2000w attracts attention because it combines wide tires with a powerful motor. This setup can be appealing to riders who want extra assistance on loose surfaces, uneven paths, or challenging inclines.
However, motor power is only one part of choosing an electric bike. Tire design, battery capacity, braking performance, handling, and local regulations all influence whether a particular model suits a rider’s needs. Anyone considering a high-powered electric bike for regular road use should understand these factors before making a purchase.
Why Wide Tires and High Motor Power Appeal to Riders
Fat tires are noticeably wider than those fitted to many standard commuter bicycles. Their larger contact area can help a bike maintain traction on surfaces such as packed dirt, gravel, and some sandy paths. Depending on tire pressure and tread design, they can also provide a more forgiving ride over minor bumps.
A fat tire electric bike 2000w offers substantial power compared with the motors commonly found on many conventional pedal-assist bicycles. It may provide stronger acceleration and help the bike handle demanding terrain, depending on its design and configuration. Actual performance also depends on the controller, battery output, rider weight, gradient, and whether the motor operates continuously at its rated power or reaches that figure only as a peak.
More power is not automatically better for every rider. Someone travelling short distances on flat, paved streets may have little practical need for such a powerful system. A rider covering hilly routes or mixed terrain might value the additional assistance, provided the bike is suitable for that environment and can legally be used there.
Does a 2000W Electric Bike Qualify as a Street-Legal E-Bike?
The phrase street legal ebike can be misleading because there is no single definition that applies everywhere. Legal classification usually depends on several characteristics, including motor power, maximum assisted speed, throttle operation, and how the motor delivers assistance.
In some jurisdictions, an electric bicycle must remain within a specific power limit and stop providing motor assistance above a designated speed to qualify for ordinary bicycle status. A 2000W model may exceed those limits, meaning it could be classified differently from a standard e-bike. Depending on local law, the vehicle might fall under rules for a moped or another motor vehicle, with additional requirements for registration, insurance, licensing, or approved equipment.
The distinction matters even when a seller describes a model as road-ready. A product’s marketing label does not determine its legal status in every country, state, or province. Before riding on public roads, check the regulations that apply to the exact model and configuration you intend to use.
It is also important to distinguish between a bike being physically capable of travelling on a road and being legally permitted to do so. A powerful motor, effective brakes, and working lights do not automatically make a vehicle compliant with local e-bike regulations.
Four Checks to Make Before Buying
Rather than focusing on motor wattage alone, assess the complete riding system.
1. Confirm the motor’s rated output. Ask whether the advertised 2000W figure represents continuous rated power or peak output. These figures describe different things, and understanding the difference makes product comparisons more meaningful.
2. Check battery capacity and charging needs. Battery capacity, usually expressed in watt-hours (Wh), provides a useful starting point when comparing energy storage. Real-world range varies with speed, terrain, temperature, tire pressure, rider weight, and the amount of motor assistance used. A larger motor may consume energy quickly when operated at high output.
3. Evaluate braking and stability. A heavier, faster electric bike requires dependable braking components and predictable handling. Look at the brake type, tire condition, frame construction, and the manufacturer’s recommended rider and load limits. Test the bike at a controlled speed before attempting steep descents or crowded routes.
4. Verify the intended riding environment. Some models are better suited to private property or designated off-road areas than to ordinary streets. If commuting is the main goal, prioritize legal classification, manageable speed, lighting, visibility, and comfortable handling over maximum power.
Making a High-Powered E-Bike Easier to Manage
Powerful electric bikes reward a measured riding style. Smooth acceleration reduces sudden weight shifts, while gradual braking helps maintain control on slippery or uneven surfaces. Riders should become familiar with the throttle or pedal-assist settings in a quiet, open area before navigating traffic. Tire pressure also deserves attention. Lower pressure can improve comfort and traction on some loose surfaces, but excessively low pressure may increase rolling resistance or raise the risk of damaging the tire. Follow the manufacturer’s guidance and adjust only within the recommended range.
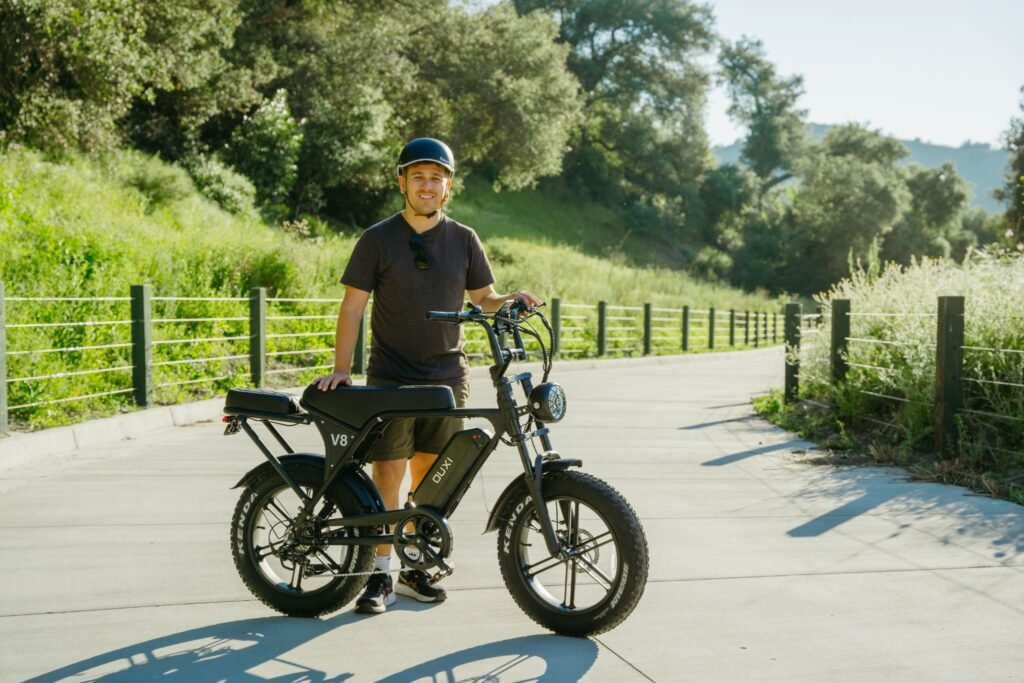
Routine maintenance is equally important. Inspect brake pads, tire wear, wheel fasteners, electrical connections, and battery condition. If the bike develops unusual noises, inconsistent power delivery, or braking problems, stop riding until the issue has been checked. When comparing manufacturers, including options from OUXI, review the specifications of the exact model to determine whether it qualifies as a street legal ebike rather than assuming every bike in a brand’s range has the same capabilities or legal status. Written specifications and relevant compliance documentation are more useful than a broad advertising description.
Conclusion
A 2000W fat-tire electric bike can offer substantial motor assistance and versatility across different surfaces, but its suitability depends on more than power and tire width. Battery performance, braking, handling, intended use, and maintenance all deserve careful consideration.
The most important step for anyone seeking a street legal ebike is to verify the rules in the place where the bike will be ridden. A model that is permitted on public roads in one jurisdiction may be restricted or classified as a motor vehicle in another. Matching the bike to both the rider’s needs and the applicable regulations helps make the purchase more practical and responsible.
Frequently Asked Questions
1. Is a 2000W fat-tire electric bike suitable for daily commuting?
It can be suitable for some commuting situations, but its size, weight, battery range, speed, and legal classification should be considered first. A lower-powered model may be more practical for short urban trips.
2. Can a 2000W e-bike be used on public roads?
That depends on local regulations and the bike’s configuration. Some places restrict electric bicycles to lower motor-power ratings or specific assisted speeds, so a 2000W model may require a different legal classification.
3. Do fat tires automatically make an electric bike safer?
No. Wide tires can improve traction and comfort on certain surfaces, but safety also depends on tire quality, appropriate pressure, braking performance, handling, road conditions, and rider skill.
4. Does a more powerful motor always provide a longer riding range?
No. A powerful motor can draw more energy, particularly during fast acceleration or sustained high-speed riding. Battery capacity and riding conditions are major factors in determining practical range.
5. What documents should I check before buying a road-use electric bike?
Review the manufacturer’s specifications, motor rating, maximum assisted speed, operating instructions, and any compliance documents relevant to your jurisdiction. If the legal classification is unclear, confirm it with the appropriate transport authority before using the bike on public roads.

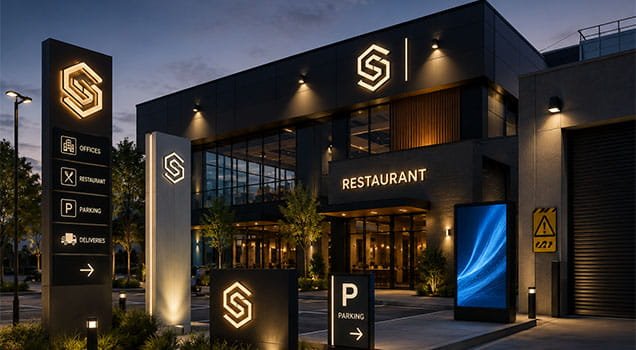
Walk down any high street, into any school reception or through the gates of a local park and you will be surrounded by signs. Most of the time you barely notice them. That is often the sign of a job well done. Good outdoor signage quietly tells people where they are, where to go and what to expect, and it says a great deal about how a place is run.
Bad signage is far easier to spot. Faded boards, confusing arrows, signs hidden behind hedges and notices nobody can read from more than a few feet away all leave visitors frustrated. Here is a look at how shops, schools and parks use outdoor signs, what good signage does for a place and what to think about when choosing someone to make it.
What good signage actually does
At its simplest, a sign answers a question before someone has to ask it. Where is the entrance? Where can I park? Which way to the toilets? Can I bring my dog in here?
Good outdoor signage does four jobs:
– Helps people find their way. Clear directions reduce wandering, missed turnings and repeated questions at reception.
– Keeps people safe. Fire exits, vehicle routes, uneven ground and water hazards all need clear warnings.
– Sets expectations. Opening hours, rules and contact details save everyone time and avoid awkward conversations.
– Shows identity and care. A tidy, consistent set of signs tells visitors a place is well looked after.
Shops and high streets
For a shop, the sign above the door is often the first thing a passer by sees. It needs to be readable from across the street and from a car, and it should tell people what the business is, not just its name.
Beyond the main fascia, shops make good use of projecting signs that can be seen by people walking along the pavement, window graphics that show opening hours and offers, and pavement boards for daily specials. Car parks and retail parks rely on directional and parking signs to keep traffic moving and customers calm.
There are rules to be aware of. Many shop signs need advertisement consent from the local council, particularly larger or illuminated ones, and listed buildings and conservation areas often have stricter controls. Pavement boards may also need permission. A quick check with the council before ordering can save a costly mistake. An experienced Outdoor Signage supplier will usually know which signs are likely to need consent and can help you prepare the drawings, which takes some of the worry out of the process for a small business owner.
It also pays to think about the view from the street at different times of day. A sign that looks smart in daylight may disappear after dark in winter, when many shoppers are heading home. Simple lighting, reflective lettering or a well placed window display can keep a shop visible long after the sun has gone down.
Schools and colleges
Schools have particular needs. Visitors must be guided to one controlled entrance, usually the main reception, so staff know who is on site. Clear signs at the gates and along the route help with safeguarding and stop visitors wandering into the wrong building.
Inside the grounds, signs mark out drop off areas, staff parking, pedestrian routes, sports pitches and separate blocks. Many schools also use the signs at the entrance to show their name, crest and values, which helps create a sense of pride and belonging. Some schools add boards celebrating achievements, events or clubs, giving parents something to read while they wait at the gate.
Accessibility matters here as much as anywhere. Signs should be easy to read for younger pupils, visitors with poor eyesight and families who may not have English as a first language. Simple words, strong contrast and well chosen symbols help everyone.
Parks and open spaces
In parks, signage has to work hard in all weathers and stay readable for years. Entrance boards often carry a map, opening times, rules about dogs or cycling and an emergency contact. Trail markers help walkers follow routes without getting lost. Information panels can tell the story of local wildlife, history or a restoration project, turning a walk into something more interesting. Clear, friendly wording works far better than a long list of rules. A sign that explains why dogs should be kept on leads near nesting birds, for example, is more likely to be followed than one that simply says no.
Durability is a big concern. Outdoor signs face sun, rain, frost and, sadly, vandalism. Materials such as aluminium and treated timber, fade resistant printing and coatings that make graffiti easier to remove all help signs last longer and look better.
Choosing a supplier
Whether you run a single shop, a school or a whole parks service, the supplier you choose has a big effect on the result. A specialist will think about the whole journey through your site, not just the look of an individual sign, and should be able to advise on materials, fixings and how the signs will stand up to the conditions they face.
Useful questions to ask include:
– Will you visit the site? A good supplier wants to see sightlines, distances and existing signs before suggesting anything.
– What materials do you recommend and why? Ask how long they expect the signs to last outdoors and how they should be cleaned.
– How do you approach accessibility? Look for attention to contrast, text size, mounting height and clear symbols.
– Can you help with permissions? Some suppliers will advise on advertisement consent or work alongside your planning adviser.
– Do you install, and what happens if a sign is damaged? Find out about fixings, guarantees and replacement panels.
– Can I see examples? Photographs of finished jobs at similar sites tell you more than any brochure.
It is also worth planning the whole set of signs together, even if you replace them in stages. A consistent style, colour scheme and typeface across every sign makes a site feel organised and easier to understand.
Making signage work for your place
Good signage is often the last thing on the list when money is tight. Yet it is one of the few improvements that every single visitor benefits from, and because it works quietly, people simply get where they need to go without a second thought. For shops, schools and parks alike, it shapes first impressions, keeps visitors safe and saves staff from answering the same questions all day. Start by walking your site as a first time visitor would, note every point where you might hesitate, and use that list to brief a supplier. The result will be a place that feels more welcoming to everyone who comes through the gate.

What you get from a mechanical bull has less to do with the machine than with the company and operator running it. The available speed settings, operating controls and surrounding matting can decide whether the night feels fun or stressful. That point runs through all seven myths below.
Cost and safety worries can make a mechanical bull seem harder to book than it is. Many of those concerns come from rodeo stories or older setups rather than the way current hire units may operate. This guide examines seven common assumptions one by one. It also explains what to ask and check so you can make a decision based on clear information.
Myth 1: the bull only suits cowboy themes
The usual picture involves sawdust and line dancing, which can make the bull seem tied to one theme. That image is dated. The same type of ride can draw a crowd at an 80s dress-up night or a school fete with no western décor in sight. It works because guests often treat it as a challenge and photo opportunity rather than a piece of themed set dressing.
At corporate events, the bull can run as a low-key contest between teams. Staff who would never dance may still have a go because the rules are simple and the turns are short. At fundraisers, it can sit near the entry and help draw people in. Riders might pay per go or teams can raise pledges, while the waiting crowd stays to watch.
You don’t need hay bales or hats to make it look appropriate. Keep the event’s main theme for the food and music, then let the bull provide a break-out moment that gets people laughing and talking.
If the theme is already strong, the contrast can make the photos even better.
Myth 2: the cost will blow the budget
Sticker shock often comes from guessing rather than requesting a real quote. The bull may be treated as a luxury add-on that costs twice as much as a DJ. In practice, the numbers can be in a similar ballpark once the included services are clear.
Quotes differ considerably, so don’t assume one price covers the same things as another. One hire company might include delivery and set-up time in the fee while another lists them separately. Some quotes bundle an operator and matting into the headline figure. Others price additional hours separately. The only way to know is to request an itemised quote that sets out ride time, staffing, power requirements and pack-down.
Comparing the price with a photo booth or DJ can help because those costs may already be familiar. A booth largely runs on its own, while a mechanical bull requires active supervision throughout the operating period. If the quotes are close, consider which option is more likely to bring guests out of their chairs and provide photos that would be difficult to stage. It is also reasonable to request two operating-time options and line up the quotes side by side.
Myth 3: the ride is dangerous by design
This concern can stop a booking before anyone checks how a hire unit actually operates. Rodeo clips create the impression that a hired mechanical bull must throw riders in the same way. That is not necessarily the case. Depending on the model, adjustable speed controls or ride programs may allow an operator to keep the movement slow and steady for nervous riders.
A safe setup involves several parts working together. The operator watches the rider’s body position and decides when to stop the unit. A suitable soft surface around the base helps cushion a fall. Some models may use a particular tether or handhold arrangement, although units do not all work in the same way. Ask the hire company to explain what its unit includes and how riders are instructed to hold on, dismount and let go safely.
You should also ask what stop control the unit has and how the operator uses it. Request proof of public liability insurance, along with details of how often the equipment is checked and cleaned. Hire companies may mention Australian Standard AS 3533.4.1 when discussing inflatable devices, but a code number alone does not explain how a particular setup is managed. Ask which standards apply to the equipment being supplied and what those requirements mean for setup, inspections and staff training on your event date. A good operator should be able to explain the process clearly. That conversation is a useful part of the safety check.
Myth 4: you need a huge venue to make it work
A mechanical bull can bring to mind a full arena, making smaller venues seem unsuitable. Most hire units need much less room than that image suggests. The mechanical base takes up one part of the space, and the soft surround takes up another. Both need to fit while leaving suitable walking space around the setup.
Outdoor courtyards and tall marquees may work if the ground is level and there is adequate headroom. Low ceilings and hanging lights are common obstacles inside. For that reason, a careful hire company will usually request photos and measurements before confirming that the unit fits. A quick site check is better than relying on a guess and discovering on the day that a post or fitting blocks the planned location.
Don’t rely on a footprint found online unless it is for the exact unit being hired. Ask the company for the full dimensions of its equipment with the matting in place, as well as the clearance required while the bull is operating. Send a floor plan or a few clear phone photos. The supplier can then assess the space using the available details rather than hope. Measure the proposed area twice. Five minutes with a tape can prevent a last-minute relocation or reschedule.
Myth 5: power will be a nightmare
Power can sound technical and risky if you have not hired amusement equipment before. Nobody wants tripped breakers or long cable runs crossing guest areas. The practical approach is to ask early how the hire company proposes to power its particular unit at your site.
Some hire companies can supply a generator for venues without a suitable nearby outlet. Others may use mains power with tested leads and safety switches, subject to the venue and equipment requirements. Perth organisers looking for a clear answer about staffing, power, padding and delivery can book a Bucking Bull for your next event in Perth and request a written list of what the quote covers for the chosen venue.
You may not need to arrange an electrician yourself, but that depends on the venue, available supply and advice from the relevant provider. Tell the hire company where the switchboard and usable outlets are located, and show where guests will walk. It can then confirm whether its leads are suitable, whether a generator is preferable or whether the venue needs to arrange further electrical support. Have that conversation before printing the final floor plan.
Myth 6: kids can’t ride
A mechanical bull is often assumed to be an adults-only activity. Some units can be operated at slower settings that may suit younger riders, subject to the model and the hire company’s rules. Where the controls allow it, the operator can keep movements gentle and increase the pace only if the rider is comfortable and asks for more.
Safety restrictions still apply. Age, height, weight or other participation limits can vary between hire companies and units. One company might set a minimum age, while another may work with a combination of height and weight requirements. Ask for the applicable limits in writing before promising rides to children. Also ask how young riders are briefed and whether a parent or guardian can remain nearby during the turn.
Children may enjoy a slow operating mode just as much as teenagers enjoy a faster one, where those settings are available and appropriate. Short turns help keep the queue moving, reducing waiting time while allowing the operator to focus on one rider at a time. There is no need to guess about supervision arrangements. Confirm where parents can watch and how close they may stand to the edge of the matting.
Myth 7: booking means weeks of paperwork and phone calls
The final concern is the amount of time involved. Booking can sound like a process full of forms and repeated site visits. In many cases, the initial exchange is straightforward. You provide the date, venue, expected guest mix and access notes, then the hire company explains what it can supply and what further information it needs.
Ask who is responsible for load-in and setup on the day. Confirm who will stay with the bull during operating time and who will handle pack-down after guests leave. The hire company should spell out these responsibilities so you are not unexpectedly left moving matting or managing cables. If power or venue access requires extra equipment, that should be identified early.
Lead times vary by season and weekend demand. Popular dates can book early, while quieter midweek slots may remain open longer. If the date is fixed, enquire sooner rather than waiting until every other detail is final. An early message can start the discussion while the venue and final guest numbers are being confirmed.
How to vet a hire company before you book
A short vetting call can tell you more than a polished gallery. Use it to assess how clearly the hire company discusses safety, equipment and setup. Specific answers are more useful than attractive photos. Bring the venue contact into the call if possible.
Start with staffing. Ask who will operate the bull on your date and what training that person has received. Find out how the operator decides when to increase the speed or stop the ride. The answer should include a calm plan for rider briefings, supervision and early stops rather than vague assurances. Listen carefully for specifics about supervision during the full operating period.
Then ask about the equipment. Find out how often the unit and matting are inspected and what records the company keeps. Ask what happens if a seam, control or electrical lead shows signs of wear before the event. You do not need every serial number during the first call, but you should hear that inspections occur on a defined schedule and faulty equipment is removed from hire.
Request proof of public liability insurance and ask what the cover means for you as the person making the booking. Check whether the venue needs to be named on any paperwork or receive a copy before load-in. Venues may request these documents, so obtain them early. Keep copies with your event file so door staff and venue managers can find them quickly. Maintain a written list of what the supplier has promised.
Finish with the quote. Request a written breakdown covering ride time, staff attendance, the proposed power source and included safety equipment. Setups vary, so two similar prices may cover different services. If matting, delivery or a generator costs extra with one hire company, the charge should appear clearly in writing. Clear paperwork at the booking stage helps prevent awkward discussions on the day.
A mechanical bull is neither wild nor tame on its own. The hire company sets the tone through its equipment, operator training and participation limits. Ask direct questions and get the answers in writing. Match the available ride pace to the expected crowd. That approach can deliver plenty of laughs without unnecessary stress, and guests will still remember who stayed on the longest.

Powerful E-Bikes on Public Roads: Understanding 2000W Fat-Tire Models and Legal Requirements

How Good Outdoor Signage Helps Shops, Schools and Parks

Cooling Mattress Pad or Smart Mattress? Two Routes to a Cooler Night

A Boutique Owner’s Guide to Buying Women’s Clothing Wholesale in the UK

A Practical Framework for Automating SEO Without Losing Editorial Control

Why Multi-Model AI Image Generation Marks the End of Multi-Tool Visual Production

How to Ensure Your Home is Valued Correctly for a Quick Sale

The 15 Highest-Paid Rugby Players in the World

Christopher Dare: The Untold Story of Engineer and Former Husband of Angela Rippon

What Is Fanquer? The Digital Creator Platform Transforming Direct-to-Fan Engagement

Dr Jared Ross: Missouri Appeals Court Upholds Protection Order Over Graphic Torture and Murder Threats

Nancy Hallam: The Inspiring Life, Career, and Success Story Behind Ian Wright’s Wife
How to Ensure Your Home is Valued Correctly for a Quick Sale
The 15 Highest-Paid Rugby Players in the World
Christopher Dare: The Untold Story of Engineer and Former Husband of Angela Rippon
What Is Fanquer? The Digital Creator Platform Transforming Direct-to-Fan Engagement
Dr Jared Ross: Missouri Appeals Court Upholds Protection Order Over Graphic Torture and Murder Threats
Nancy Hallam: The Inspiring Life, Career, and Success Story Behind Ian Wright’s Wife
-
 Real Estate9 months ago
How to Ensure Your Home is Valued Correctly for a Quick Sale
-
 Sports5 months ago
The 15 Highest-Paid Rugby Players in the World
-
Celebrity11 months ago
Christopher Dare: The Untold Story of Engineer and Former Husband of Angela Rippon
-
 Technology5 months ago
What Is Fanquer? The Digital Creator Platform Transforming Direct-to-Fan Engagement
-
 Celebrity5 months ago
Dr Jared Ross: Missouri Appeals Court Upholds Protection Order Over Graphic Torture and Murder Threats
-
Celebrity11 months ago
Nancy Hallam: The Inspiring Life, Career, and Success Story Behind Ian Wright’s Wife
-

 Celebrity8 months ago
Who Is Azriel Crews? Inside the Life and Career of Terry Crews’ Daughter
-

 Health9 months ago
Enclomimed 25 (Enclomiphene) – Effective PCT Protocol