
Technology
Front vs Rear Hub Motor Conversion Kit: Fit, Handling and Maintenance Compared

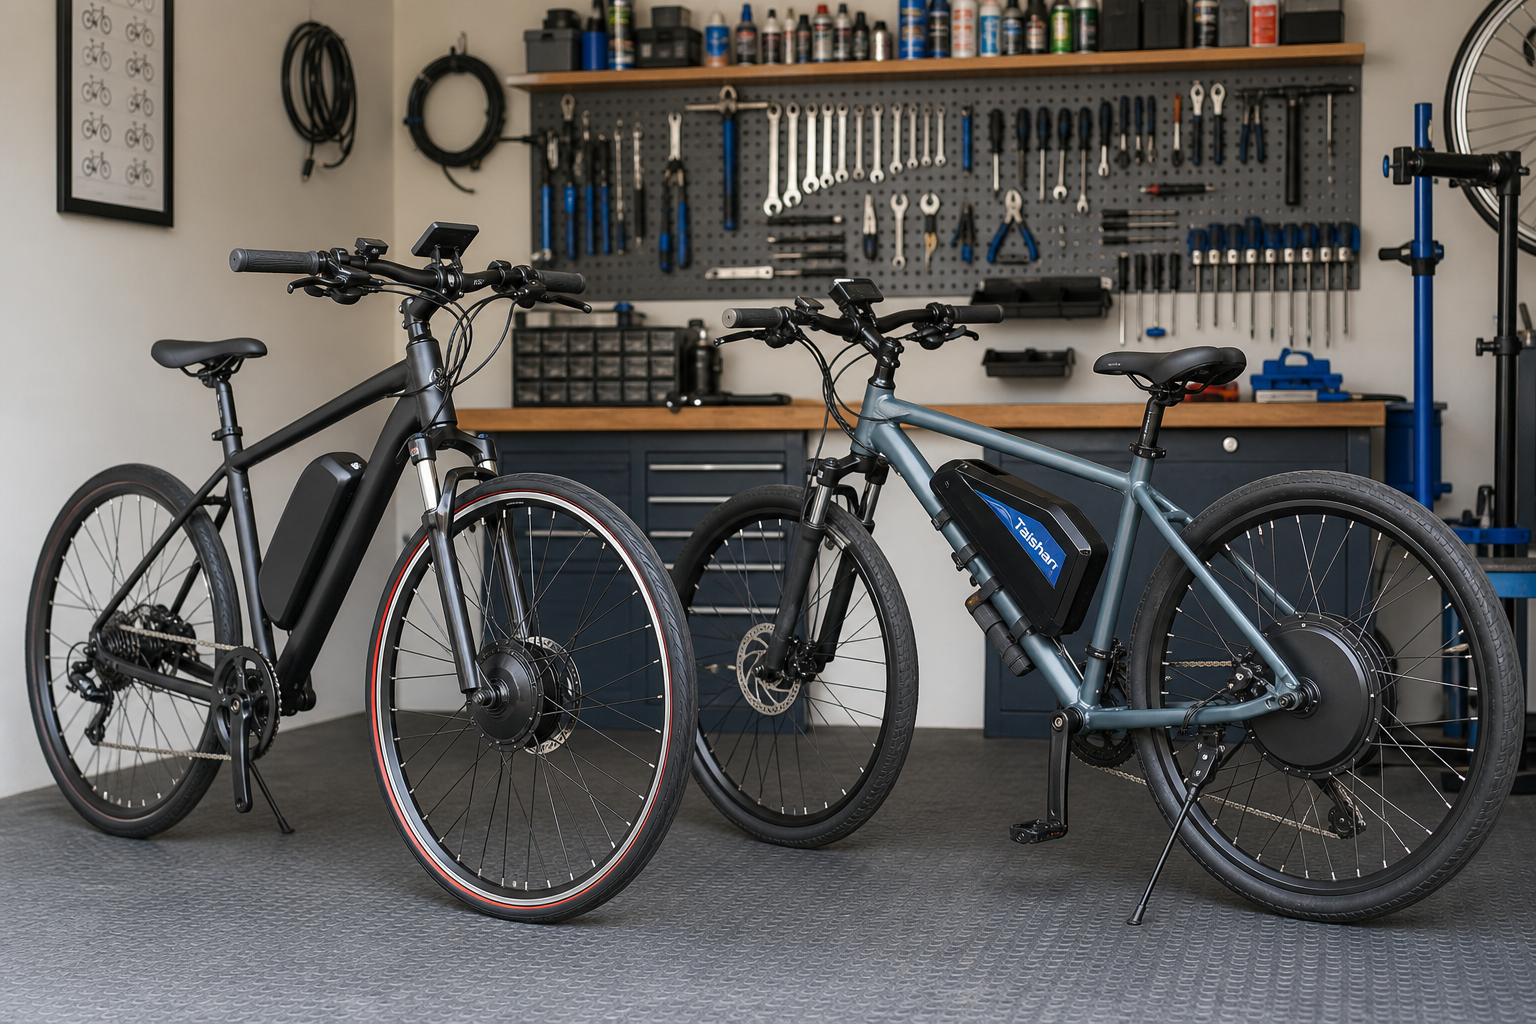
Front hub kits can simplify drivetrain work; rear hub kits often provide more driven-wheel traction and a familiar push from behind. The correct choice is the one that fits the bicycle’s axle, fork or frame, brakes and drivetrain before power is considered.
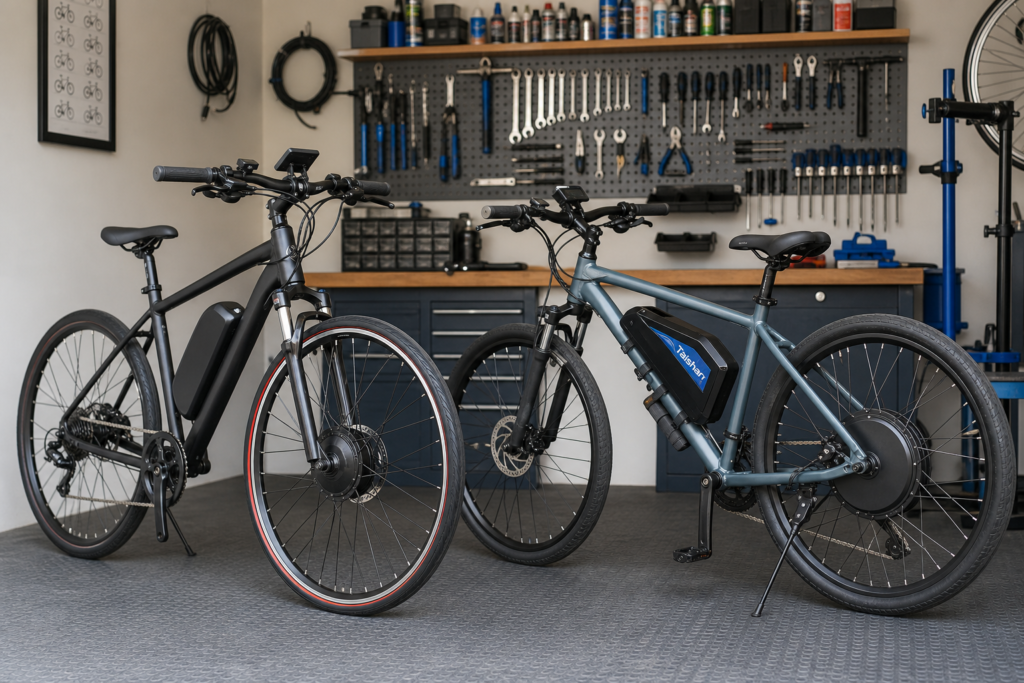
KirbEbike EZ Rider front-hub and 52V 2000W rear-hub systems. AI-generated scene created directly from the official product references.
The internet often compresses this decision into two slogans: front hubs are easier, rear hubs handle better. Both contain some truth, but neither is enough to order a wheel. A front installation moves the engineering problem to the fork and steering wheel. A rear installation moves it to the frame dropouts, gears, brake and rear-wheel service.
Decision rule: Shortlist a front hub when a conventional compatible fork can retain the motor axle safely and simple drivetrain integration matters. Shortlist a rear hub when driven-wheel traction or a heavier build matters and the rear dropout, brake and gear interface all match. If either option requires forcing an axle, spreading an unsuitable frame or accepting an unresolved brake conflict, choose neither.
Front versus rear hub motor at a glance
| Decision factor | Front hub | Rear hub |
|---|---|---|
| Installation focus | Fork spacing, axle slot, retention, brake and steering clearance | Rear spacing, axle slot, brake, chain line and gear format |
| Traction feel | Pulls from the front; grip needs attention on wet or steep loose surfaces | Pushes from the rear; driven wheel carries more rider weight |
| Drivetrain interaction | Leaves chain, cassette/freewheel and derailleur largely unchanged | Must match cassette/freewheel type, sprocket count and derailleur clearance |
| Wheel service | Front puncture work is mechanically simpler but motor cable and axle hardware add steps | Rear puncture work also involves chain and derailleur handling |
| Typical reason to choose | Simple commuter conversion on a demonstrably compatible fork | Traction, higher-load build or a fork that is unsuitable for a motor axle |
Fit the axle before choosing the drive position
Most conventional hub-motor wheels use a solid axle with flats that sits in open dropout slots. Many modern bicycles instead use thru-axles through closed holes. These are different interfaces. A wheel designed for open dropouts must not be forced into a thru-axle fork or frame, and a nominal wheel diameter does not solve axle compatibility.
Common traditional dimensions include about 100mm at the front and 135mm at the rear, but this is not permission to assume. Folding bikes, fat bikes, Boost frames, cargo bikes, internal-gear hubs and modern mountain bikes may use other standards. Measure the actual bicycle and compare it with the exact motor drawing.
- Identify open dropouts, quick release or thru-axle before shopping.
- Measure inside dropout spacing at the axle seat, not at a wider part of the fork or stays.
- Check slot width and depth, axle flats, washers, cable exit and nut recesses.
- Confirm fork or frame material, condition and the motor maker’s retention instructions.
- Verify disc rotor position or rim-brake track, calliper clearance and mudguard clearance.
- For the rear, identify cassette versus threaded freewheel and count current sprockets.
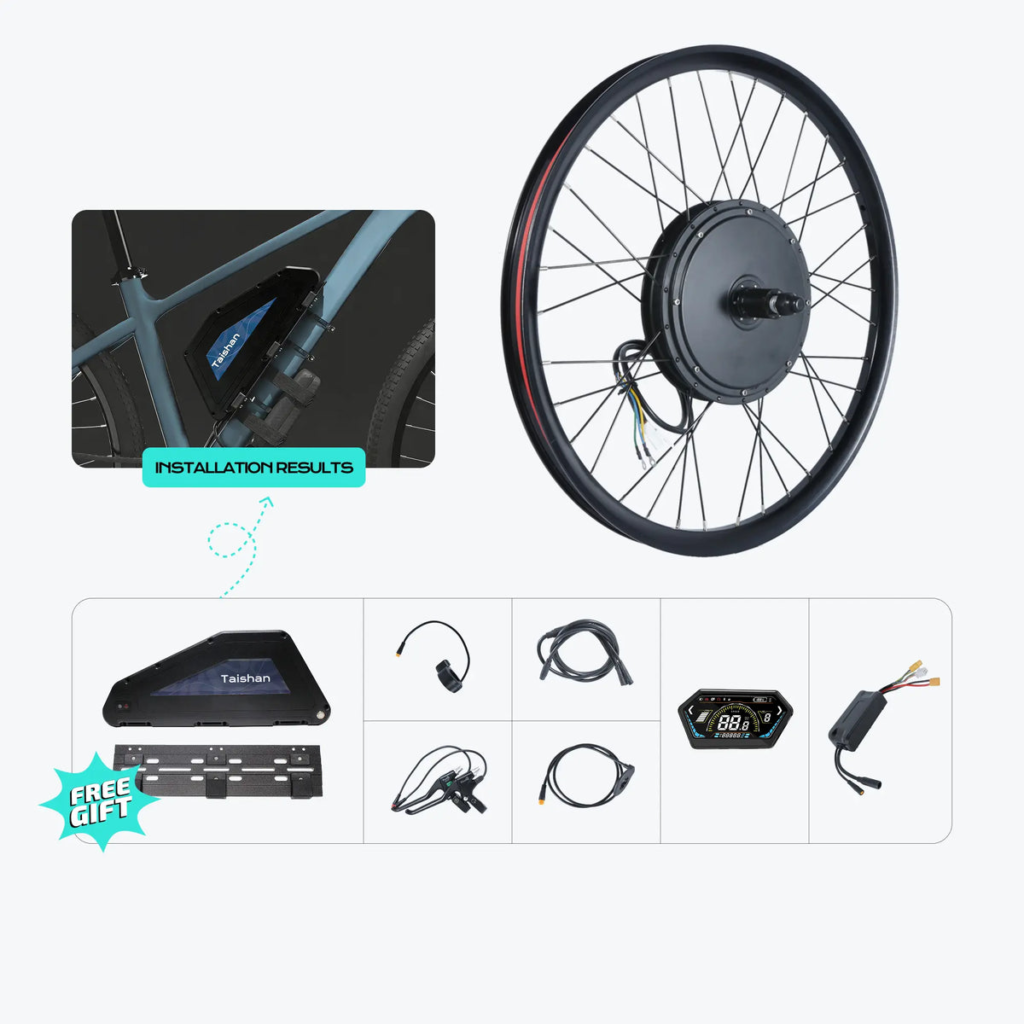
Official KirbEbike 52V 2000W rear-hub conversion kit product image.
Front hub: easier drivetrain integration, stricter fork questions
A front hub replaces the front wheel while leaving the rear derailleur, sprockets and chain system in place. That can reduce installation complexity on a conventional compatible bicycle. It also means human pedal power drives the rear wheel while the motor drives the front, which can feel stable and useful on ordinary paved routes.
The trade-off is that the fork becomes the motor’s reaction structure. The axle must seat fully, the retention hardware must suit the fork, the cable must exit without being pinched, and steering or brake movement must not pull it. Lightweight forks, damaged dropouts, deep nut recesses and unverified carbon constructions require particular caution and competent assessment.
Handling changes because motor mass is added to the steering assembly. A compact front hub can remain unobtrusive, but a heavier unit can make the front end feel slower to lift or turn. On wet paint, gravel or a steep climb, front-wheel traction can also be the limiting factor because rider weight shifts rearward. Smooth assistance and appropriate tyre grip matter.
Rear hub: more traction, more interfaces to match
A rear hub places motor drive under the wheel that already carries more rider weight. It usually feels like the bicycle is being pushed and can provide more useful traction under acceleration or on a climb. This is one reason larger hub motors are commonly fitted at the rear.
The installation is not simply the front procedure moved backwards. The motor wheel must match the rear dropout spacing, gear system, chain line, derailleur range, brake rotor position and frame clearance. A six- or seven-speed threaded freewheel requirement is different from an eight- to twelve-speed cassette body. Product descriptions should state the supported interface rather than relying on the word “compatible”.
Rear puncture service also involves the chain and derailleur, plus the motor connector and axle hardware. A tidy quick-disconnect cable helps, but the owner should still practise the removal procedure at home before needing it beside a road.
Torque reaction is a retention problem, not a power accessory
When a hub motor turns the wheel forward, an equal and opposite reaction acts on the axle. Flat-sided axles transfer part of that reaction into the dropout. If the axle can rotate, it can spread the slot, damage the cable and compromise wheel retention.
A correctly designed and fitted torque arm transfers reaction farther into the fork or frame. Whether one or two are required depends on motor torque, axle design, dropout material and thickness, regenerative braking and the kit instructions. A torque arm does not make a cracked, distorted or incompatible dropout suitable; it is one part of a complete retention design.
Recheck axle nuts, torque-control hardware and cable position after initial short rides and after any wheel removal. Many retention failures begin with a wheel that was not reseated or tightened correctly after maintenance.
Brakes and wheel construction must be checked in either position
A motor adds mass and can raise average speed, so brake condition matters before conversion. A disc-brake motor wheel needs the correct rotor mounting, diameter, lateral position and calliper clearance. A rim-brake build needs a compatible machined braking surface and correctly adjusted pads. A brake cut-off sensor stops motor assistance; it does not create more mechanical stopping power.
Wheel size labels can also hide fit problems. A 700C and a 29-inch wheel share a 622mm bead-seat diameter, but rim width and tyre volume may differ substantially. Confirm ETRTO tyre and rim dimensions, fork crown or stay clearance, mudguards and the brake system.
Battery position can outweigh motor position
A front motor with a heavy rear-rack battery can spread mass between both ends. A rear motor plus a rear-rack battery can concentrate weight behind the rider and make lifting or low-speed handling less natural. A securely mounted down-tube or frame-triangle battery often keeps mass lower and nearer the centre.
This is why handling should be judged as a complete bicycle. Motor location, battery case, luggage, tyre choice and frame geometry all contribute. A generic claim that one hub position is always better balanced ignores the rest of the build.
Choose by route and maintenance priorities
| Use case | Usually examine first | Reason | Critical check |
|---|---|---|---|
| Simple paved commuting | Compact front hub | Preserves the drivetrain and can simplify installation | Fork, axle retention and wet-surface grip |
| Hills or loose surfaces | Rear hub | More rider weight over the driven wheel | Heat, dropout retention, brakes and gearing |
| Frequent drivetrain changes | Front hub | Motor system stays independent of rear sprockets | Front wheel fit and steering cable routing |
| Cargo or higher-load build | Rear hub or specialist system | Traction and stronger purpose-selected frame interfaces | Loaded braking, wheel strength and legal category |
| Modern thru-axle bicycle | Specialist compatible motor only | A standard solid-axle hub wheel may not fit | Exact axle standard and approved adapter design |
Power and road use must be decided before ordering
For public-road use in Great Britain, an electrically assisted pedal cycle must meet the applicable EAPC conditions, including pedals capable of propelling the bicycle, maximum continuous rated motor output not exceeding 250W and assistance cutting off at 15.5mph. A higher-rated motor does not become an EAPC simply because a display limits indicated power or speed.
In the United States, classifications and equipment rules vary by state and locality. Buyers should confirm the rules for where the completed bicycle will actually be used. High-power systems also place greater demands on wheel retention, frame condition, brakes, tyres, battery current and thermal management, regardless of the legal setting.
How to compare real products without mixing categories
Use an ebike conversion kit collection to shortlist by intended use, motor position, wheel size and voltage, but open the exact product page before deciding. Starting prices may refer to motor-only variants, and one listing may contain several wheel, power or battery combinations.
A compact front system and a high-power rear system are not substitutes merely because both use hub motors. For example, KirbEbike’s 250W EZ Rider is a road-focused front-wheel product type, while its 52V 2000W rear-hub conversion system represents a different performance, fit and legal-use category. Compare each against the donor bicycle and intended location rather than treating wattage as a simple upgrade ladder.
A front-or-rear pre-order checklist
- Photograph both dropouts, axle interface, brake and drivetrain before removing a wheel.
- Measure actual dropout spacing and identify open slots versus thru-axle holes.
- Record wheel and tyre ETRTO size, rim width and brake type.
- For a rear kit, record cassette or freewheel type and sprocket count.
- Confirm torque-arm or integrated retention requirements for the exact motor and frame.
- Check battery dimensions, rail position, connector and removal direction.
- Confirm legal use, controller current, battery BMS capability and brake condition.
- Plan puncture repair and connector disconnection before the first journey.
Frequently asked questions
Is a front hub motor easier to install than a rear hub motor?
Often, because it leaves the rear gears and derailleur alone. It is only the easier choice when the fork spacing, dropout slots, axle retention and brake clearances are genuinely compatible.
Which hub position is better for hills or wet roads?
Choose by the limiting condition rather than a blanket rule:
- Rear hub: often offers more driven-wheel traction because more rider weight sits over the rear wheel.
- Front hub: can work well on ordinary paved routes, but smooth assistance and front-tyre grip matter more on steep or slippery surfaces.
- Either position: climbing still depends on motor design, controller current, battery capability, wheel size, load, speed and heat.
Can a hub motor fit a thru-axle bike?
Only when the motor system is designed for that exact thru-axle standard or uses an approved engineered interface. A conventional solid flat-sided axle for open dropouts should not be forced into a closed thru-axle frame or fork.
What should I measure before ordering a hub-motor wheel?
Record these fit facts before comparing motor power:
- Axle type and actual inside dropout spacing.
- Dropout slot dimensions, frame or fork material and retention requirements.
- ETRTO tyre and rim size, rim width and brake interface.
- For a rear hub, freewheel or cassette type and current sprocket count.
- Battery case, rail, cable exit and removal direction.
Will a rear hub work with my existing gears?
Not necessarily. Some motor wheels accept a threaded freewheel; others use a cassette body. Match the exact interface and supported sprocket count, then check frame, chain line and derailleur clearance. A shared wheel diameter does not prove drivetrain compatibility.
The best hub position is the one the bicycle can support
Front hubs can preserve the drivetrain and simplify routine conversion work; rear hubs can provide more driven-wheel traction and suit larger motors. Neither advantage overrides an incompatible axle, weak dropout, mismatched brake or unsuitable gear interface. Measure first, decide the legal use and compare complete systems before ordering.

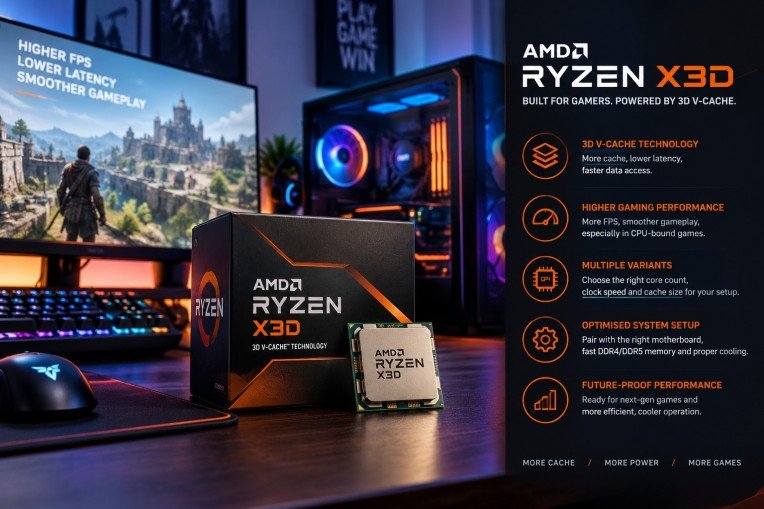
The AMD Ryzen X3D processor series represents a significant advancement in the realm of gaming CPUs, offering enthusiasts a robust combination of speed, efficiency, and enhanced graphics performance. This guide aims to explore the intricacies of the AMD Ryzen X3D, providing gamers with insights on how to harness its full potential for an unparalleled gaming experience.
To start with, the x3d architecture introduces innovative 3D V-Cache technology that substantially increases the amount of L3 cache available on the processor die. This increase in cache results in reduced latency and improved data access times, paramount for the demanding processes involved in modern gaming.
Understanding 3D V-Cache Technology
Traditional CPU designs incorporate cache memory adjacent to processor cores on a single plane. However, the AMD Ryzen X3D series stacks additional cache vertically using 3D V-Cache technology. This vertical integration allows a substantial increase in cache capacity without significantly enlarging the processor’s footprint.
The augmented cache enables quicker retrieval of gaming assets and instructions by minimizing the distance data travels. Consequently, this reduces frame times and leads to smoother gameplay, especially in games that are sensitive to cache size and latency.
Performance Benefits for Gamers
The primary beneficiary of the 3D V-Cache is gaming performance. Benchmarks demonstrate that Ryzen X3D processors achieve higher frame rates and lower latency compared to their non-3D counterparts, particularly in CPU-bound games such as strategy, simulation, and role-playing games.
This performance edge is amplified when paired with high-end graphics cards and fast memory modules, creating a synergistic effect that maximises the hardware capabilities. With the right configuration, gamers can expect a more responsive and immersive experience.
Choosing the Right Ryzen X3D for Your Setup
AMD offers several variants within the Ryzen X3D lineup, each catering to different performance tiers and budgets. Understanding the differences in core count, clock speeds, and cache size is essential when selecting the appropriate processor for a specific gaming rig.
Moreover, compatibility with motherboards and cooling solutions should be carefully considered to ensure optimal thermal management and power delivery, which directly impact the processor’s sustained performance during intensive gaming sessions.
Optimising System Configuration
Beyond the processor itself, achieving peak performance with the AMD Ryzen X3D involves fine-tuning system components and software settings. Updating BIOS and drivers ensures compatibility and stability, while adjusting in-game settings can leverage the processor’s capabilities more effectively.
It is also advisable to employ high-speed DDR4 or DDR5 memory modules, as memory speed can influence the processor’s performance, notably in CPU-bound scenarios. Adequate cooling, through either advanced air coolers or liquid cooling solutions, helps maintain stable frequencies and prevents thermal throttling.
Comparison with Other High-Performance Processors
Compared to previous generation AMD Ryzen processors and competitors in the market, the X3D models stand out for their superior cache design. While raw clock speeds may be comparable, the enlarged cache grants the Ryzen X3D a distinct advantage in gaming workloads.
This advantage translates into more consistent frame times and generally smoother visual output, which are critical metrics for serious gamers and streamers aiming for high-quality content delivery.
Future-Proofing Your Gaming Build
The integration of 3D V-Cache positions the Ryzen X3D series well for upcoming titles that demand heightened computational resources. Investing in this technology ensures a level of preparedness for next-generation games that leverage CPU cache to improve performance.
Additionally, the energy efficiency improvements in the Ryzen X3D series contribute to quieter and cooler operation, factors increasingly valued in modern gaming setups that prioritise comfort and acoustics.
Conclusion
Unlocking peak performance with the AMD Ryzen X3D involves understanding the transformative impact of 3D V-Cache technology and meticulously aligning system components to support its strengths. Gamers seeking to elevate their gameplay quality will find the Ryzen X3D a compelling choice in the current market landscape.
For those interested in exploring the range of AMD Ryzen X3D processors, reputable suppliers such as Scorptec Computers provide access to the latest models, ensuring customers can equip themselves with cutting-edge hardware primed for exceptional gaming performance.

In today’s rapidly evolving business environment, organisations must continuously adapt to stay competitive and efficient. One of the most impactful ways companies can achieve this is through implementing modern workplace solutions. These solutions are designed to enhance collaboration, improve employee productivity, and streamline business operations by leveraging advanced technology and innovative practices.
Understanding Modern Workplace Solutions
Modern workplace solutions refer to a collection of tools, strategies, and technologies that enable organisations to create a more flexible, connected, and efficient work environment. These solutions typically include cloud services, collaboration platforms, communication tools, and remote working capabilities, all focused on supporting both employees and management in achieving business goals effectively.
Key Components of Modern Workplace Solutions
The core elements that constitute modern workplace solutions include digital collaboration tools, mobile device management systems, cloud computing infrastructure, and secure communication channels. Integrating these components equips businesses to operate seamlessly across multiple locations and devices, catering to the growing demand for mobility and flexible work schedules.
Digital Collaboration Tools
Collaboration platforms enable teams to work together in real-time, regardless of their physical locations. Tools such as shared calendars, project management applications, and video conferencing systems foster effective communication and coordination, reducing delays and miscommunication.
Cloud Computing Infrastructure
Embracing cloud technology allows businesses to store and access data securely from any location. This flexibility supports hybrid and remote work models while ensuring that information is consistently available and safe from disruptions.
Mobile Device Management
With the proliferation of mobile devices in the workplace, managing device security and data access is critical. Mobile device management platforms enable IT departments to monitor, secure, and control company data on various devices, reducing the risk of security breaches.
Benefits of Adopting Modern Workplace Solutions
The implementation of modern workplace solutions offers several advantages that directly impact business efficiency and employee satisfaction. These benefits include enhanced productivity, improved collaboration, greater flexibility, and stronger security measures.
Enhanced Productivity
By automating routine tasks and simplifying communication, businesses enable employees to focus on higher-value activities. Access to integrated tools reduces downtime and streamlines workflows, contributing to overall productivity improvements.
Improved Collaboration
Modern solutions foster a culture of collaboration by breaking down silos and encouraging information sharing across departments. This increased transparency leads to better decision-making and faster project completion.
Greater Flexibility
Flexible working arrangements supported by modern workplace tools accommodate diverse employee needs and preferences. This flexibility not only improves morale and engagement but also attracts top talent seeking adaptive work environments.
Stronger Security
By employing robust security protocols and access controls, modern workplace solutions protect sensitive data and company assets. This protection is vital in mitigating risks associated with cyber threats and data breaches.
Challenges to Consider
Despite the substantial benefits, organisations must be mindful of potential challenges when transitioning to modern workplace solutions. These may include resistance to change among employees, the need for comprehensive training, and ensuring compatibility with existing systems.
Addressing these challenges requires thorough planning, clear communication, and ongoing support to ensure a smooth implementation process and maximise the return on investment.
Choosing the Right Modern Workplace Solutions Provider
Selecting an experienced provider with a proven track record is crucial for successful deployment. A reputable partner will assess business needs, recommend tailored solutions, and provide expert support throughout the transition and beyond.
For organisations seeking advanced and reliable options, exploring the range of offerings at modern workplace solutions can serve as a valuable starting point.
Impact on Business Growth
Adopting modern workplace solutions can be a catalyst for business growth by enhancing operational efficiency and enabling innovation. Organisations that leverage these technologies are better equipped to respond to market changes, improve customer satisfaction, and expand their competitive advantage.
Future Trends in Modern Workplace Solutions
The landscape of workplace solutions continues to evolve with advancements in artificial intelligence, machine learning, and automation. These emerging technologies promise to further transform how businesses operate by enabling smarter workflows and predictive analytics.
Remaining informed about these trends allows organisations to continuously upgrade their capabilities and maintain resilience in a dynamic business environment.
Conclusion
Modern workplace solutions represent a significant opportunity for organisations to transform their operational efficiency and employee engagement. By embracing these technologies and practices, businesses can foster a more agile, productive, and secure work environment geared towards sustainable success.
Implementing such solutions requires strategic planning and partnership with experienced providers to ensure alignment with specific business objectives and smooth adoption.
Technology
Streamlining Success: How OmniStar’s Grant Management System Revolutionizes Fund Allocation


In today’s complex funding landscape, organisations require reliable and efficient tools to manage grant allocations effectively. OmniStar’s grant management system stands at the forefront of this transformation, providing streamlined solutions tailored to meet the dynamic needs of grant administrators and recipients alike. This article explores the capabilities of OmniStar’s system and demonstrates how it revolutionises fund allocation with precision and ease.
Understanding the Need for Advanced Grant Management
Grant management involves multiple stages, including application processing, compliance monitoring, fund disbursement, and reporting. Manual methods or outdated systems often lead to inefficiencies, errors, and a lack of transparency. An advanced grant management system is essential to bridge these gaps and enhance operational efficiency.
The Core Features of OmniStar’s Grant Management System
OmniStar’s solution is designed with a comprehensive feature set that addresses the full lifecycle of grant management. Key functionalities include automated application workflows, integrated compliance checks, real-time fund tracking, and detailed reporting capabilities. These features ensure organisations can allocate funds accurately and maintain accountability.
Automated Workflows for Enhanced Efficiency
The system automates numerous repetitive tasks, reducing administrative burdens significantly. Automated workflows facilitate quicker application reviews, approvals, and notifications, resulting in reduced turnaround times and fewer manual errors. This automation supports organisations to focus on strategic aspects of grant distribution.
Ensuring Compliance and Accountability
Compliance with regulatory requirements and fund usage standards is paramount. OmniStar’s system incorporates built-in compliance checks that monitor grant conditions and deadlines, helping organisations avoid penalties and maintain integrity in fund management. Audit trails and documentation features provide a transparent record of all transactions and decisions.
Real-Time Fund Allocation and Tracking
One of the system’s revolutionary capabilities is its real-time fund allocation and tracking. Organisations can monitor the disbursement status of grants instantly, ensuring they remain within budgetary constraints and can quickly identify any discrepancies. This feature supports dynamic decision-making and maximises the impact of allocated funds.
Comprehensive Reporting and Analytics
Data-driven insights are critical for optimising grant programmes. OmniStar’s system offers robust reporting tools that compile financial and operational data into accessible formats. These reports enable stakeholders to evaluate the effectiveness of funding strategies and make informed decisions about future allocations.
User-Friendly Interface and Accessibility
Ease of use is central to the design of OmniStar’s platform. The user interface is intuitive, allowing users with varying technical expertise to navigate the system effortlessly. Additionally, cloud-based accessibility ensures that stakeholders can manage grants from different locations securely and efficiently.
Integration Capabilities
OmniStar’s grant management system supports integration with existing financial and organisational software. This interoperability minimises data silos and enables seamless data exchange across platforms, enhancing overall organisational workflows related to grant administration.
The Benefits of Implementing OmniStar’s System
Adopting this advanced system provides multiple advantages, including improved accuracy in fund allocation, reduced administrative costs, increased transparency, and enhanced compliance adherence. Together, these benefits contribute to the successful management and utilisation of grant funds.
Impact on Stakeholders
Grantors and recipients both gain from the streamlined processes. Grantors can enforce stricter oversight and reporting, while recipients experience faster feedback and fund disbursements. This mutual benefit fosters stronger trust and collaboration between all parties involved.
Case Studies and Industry Adoption
Numerous organisations across various sectors have adopted OmniStar’s grant management system and reported significant improvements in operational efficiency and financial control. These case studies highlight the practical advantages and return on investment achievable through this technology.
Scalability and Customisation
The modular design of the system allows it to scale with organisational growth and adapt to changing grant management requirements. Customisation options ensure the platform meets specific policy frameworks and operational preferences unique to each client.
Security Measures and Data Protection
Protecting sensitive grant information is imperative. OmniStar employs rigorous security protocols, including encryption and multi-factor authentication, to safeguard data integrity. Compliance with data protection regulations is maintained to uphold client and beneficiary confidentiality.
Future Developments and Innovation
OmniStar commits to continuous improvement, integrating emerging technologies such as artificial intelligence and machine learning to enhance predictive capabilities and automate complex analyses within grant management processes.
Conclusion
OmniStar’s grant management system represents a significant advancement in how funds are allocated, monitored, and reported. By leveraging automation, real-time tracking, and comprehensive compliance tools, the system empowers organisations to manage grants with greater efficiency, accuracy, and transparency. As demand for effective grant administration grows, OmniStar’s solution provides a reliable and innovative platform to support success in fund allocation.

How to Explore Customer Service and Call Center Careers

Account Safety 101: How to Vet Any Instagram Growth Service

What Makes Underground Streetwear Hit? Breaking Down the MF DOOM Shirt and Parke Hoodie Hype

Unlocking Peak Performance with AMD Ryzen X3D: A Gamer’s Ultimate Guide

5 questions every Sydney homeowner should ask before hiring a plumber

Transforming Business Efficiency with Modern Workplace Solutions

The 15 Highest-Paid Rugby Players in the World

Christopher Dare: The Untold Story of Engineer and Former Husband of Angela Rippon

How to Ensure Your Home is Valued Correctly for a Quick Sale

What Is Fanquer? The Digital Creator Platform Transforming Direct-to-Fan Engagement

Dr Jared Ross: Missouri Appeals Court Upholds Protection Order Over Graphic Torture and Murder Threats

Nancy Hallam: The Inspiring Life, Career, and Success Story Behind Ian Wright’s Wife
The 15 Highest-Paid Rugby Players in the World
Christopher Dare: The Untold Story of Engineer and Former Husband of Angela Rippon
How to Ensure Your Home is Valued Correctly for a Quick Sale
What Is Fanquer? The Digital Creator Platform Transforming Direct-to-Fan Engagement
Dr Jared Ross: Missouri Appeals Court Upholds Protection Order Over Graphic Torture and Murder Threats
Nancy Hallam: The Inspiring Life, Career, and Success Story Behind Ian Wright’s Wife
-
 Sports5 months ago
The 15 Highest-Paid Rugby Players in the World
-
Celebrity10 months ago
Christopher Dare: The Untold Story of Engineer and Former Husband of Angela Rippon
-
 Real Estate8 months ago
How to Ensure Your Home is Valued Correctly for a Quick Sale
-
 Technology4 months ago
What Is Fanquer? The Digital Creator Platform Transforming Direct-to-Fan Engagement
-
 Celebrity4 months ago
Dr Jared Ross: Missouri Appeals Court Upholds Protection Order Over Graphic Torture and Murder Threats
-
Celebrity11 months ago
Nancy Hallam: The Inspiring Life, Career, and Success Story Behind Ian Wright’s Wife
-

 Health9 months ago
Enclomimed 25 (Enclomiphene) – Effective PCT Protocol
-
 Celebrity11 months ago
Who Is Maisie Mae Roffey? The Private Life, Family Story, and Quiet Success of Julie Walters’ Daughter