
Fashion
Choosing the Right Carpet for Every Room in Your Home


Selecting the right carpet for your home is about more than colour or pattern. The right choice improves comfort, reduces noise, supports insulation, and stands up to daily life. Each room has different demands, and understanding those differences helps you choose a carpet that looks good and performs well for years.
Carpets remain a popular flooring option across British homes because they combine warmth, softness, and versatility. However, a carpet that works beautifully in a bedroom may struggle in a busy hallway. Foot traffic, moisture, furniture weight, and cleaning needs all vary from room to room, something homeowners often discuss when visiting a Carpet Shop in Derby for practical advice. This guide breaks down what to consider when choosing carpets for different areas of your home, focusing on practicality as much as style.
Living rooms and shared spaces
Living rooms, family rooms, and open plan areas tend to experience moderate to heavy foot traffic. These spaces also need to balance comfort with durability, as they are used for relaxing, entertaining, and everyday movement.
A medium pile carpet is often a good choice here. It offers enough softness to feel comfortable underfoot while still being resilient enough to recover from furniture pressure and regular use. Twist pile carpets are particularly popular in living rooms because their tightly twisted fibres help disguise footprints and minor wear. For households with children or pets, a carpet with a subtle pattern or flecked design can help conceal marks and small stains.
Material choice also matters. Wool carpets offer natural resilience, excellent insulation, and a premium feel, but they can be more expensive. Synthetic options such as polypropylene are widely used in living spaces due to their stain resistance and lower maintenance requirements. Colour choice should reflect both lighting and lifestyle. Lighter shades can make a room feel larger, but mid tone neutrals are often more forgiving in busy homes.
Bedrooms and low traffic areas
Bedrooms are typically low traffic environments, making them ideal spaces for softer and deeper carpets. Comfort is often the priority here, as bedrooms are places of rest and relaxation. A plush or deep pile carpet can add a luxurious feel and provide warmth first thing in the morning.
Cut pile carpets, including saxony styles, are commonly chosen for bedrooms because of their smooth and velvety appearance. These carpets feel soft underfoot and enhance the cosy atmosphere of the room. Since bedrooms experience less wear, appearance retention is less of a concern than in shared areas.
Colour plays an important role in bedrooms. Soft neutrals, warm greys, and muted tones help create a calm environment. Carpets also contribute to sound insulation, reducing noise between floors in multi storey homes. While wool remains a strong option for comfort and longevity, blended fibres can offer a good balance of softness and affordability.
Hallways stairs and practical spaces
Hallways and stairs face the toughest conditions in most homes. These areas see constant foot traffic, frequent turning movements, and higher levels of dirt and moisture from shoes. As a result, durability and safety are key considerations.
Low pile carpets are generally best suited to these spaces. They are easier to clean, less likely to flatten, and provide better grip on stairs. Loop pile carpets, such as berber styles, are known for their strength and wear resistance, although they may not be ideal in homes with pets due to potential snagging.
Darker colours or patterned designs work well in hallways as they hide dirt and wear more effectively. Stain resistant fibres are highly recommended, especially near entrances. For stairs, ensure the carpet has a strong backing and is professionally fitted to reduce movement and improve safety. Practical spaces such as home offices or dining rooms may also benefit from similar considerations, especially where chair movement or spill risk is higher.
Choosing the right carpet for each room ensures your flooring not only looks good but also supports daily life. By matching pile type, material, and colour to how each space is used, you can create a home that feels comfortable, practical, and well considered throughout.


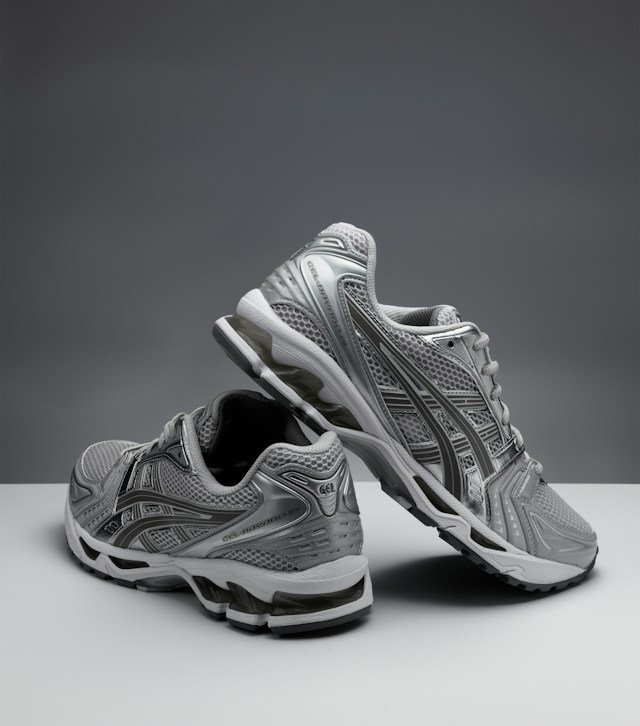
For those seeking high-quality running shoes, the Asics Gel Kayano 20 stands out as a remarkable choice. Known for its innovative design and superior support, this model has gained acclaim among athletes and casual runners alike. This guide explores how shoppers can unlock the best deals on the Asics Gel Kayano 20 at Rayslocker, ensuring affordable access to top-tier footwear.
Overview of the Asics Gel Kayano 20
The Asics Gel Kayano 20 represents a significant evolution in stability running shoes. It incorporates ASICS’s renowned Gel cushioning system, providing enhanced shock absorption and comfort. This model is designed to accommodate overpronators, offering reliable support during long runs or daily wear.
Featuring a refined mesh upper, the shoe allows for better breathability and a snug fit, reducing pressure points and increasing overall comfort. Its durable outsole ensures exceptional traction across various surfaces, making it an all-rounder for runners and fitness enthusiasts.
The Importance of Affordable Shopping for Quality Footwear
Investing in premium athletic shoes like the Asics Gel Kayano 20 is essential for performance and injury prevention. However, their cost can be a barrier for many consumers. Affordable shopping options enable a broader demographic to benefit from advanced sportswear technology without compromising financial priorities.
Rayslocker commits to bridging this gap by offering competitive prices on genuine products, combining affordability with authenticity. Understanding where and how to find such deals is crucial for making savvy purchasing decisions.
How Rayslocker Offers Value to Customers
Rayslocker specialises in presenting a diverse range of sneakers, including the Asics Gel Kayano 20, at prices that are accessible to most buyers. The platform frequently updates its collections to include the latest releases and sought-after models, ensuring that customers can secure their ideal shoe without delay.
Transparency in pricing and product details cultivates customer trust. Additionally, promotions and seasonal sales contribute to further savings, making Rayslocker a preferred destination for budget-conscious shoppers seeking high-quality footwear.
Tips to Maximise Savings on Asics Gel Kayano 20 at Rayslocker
To unlock the best deals, consider subscribing to Rayslocker’s newsletter. This subscription often grants early access to discounts and exclusive offers. Also, reviewing product pages regularly updates potential promotions, clearance sales, or bundle offers that might include the Asics Gel Kayano 20.
Monitoring customer reviews can also inform buying decisions by highlighting product performance and value. Rayslocker’s customer service is available to discuss any queries, which can lead to additional recommendations for savings or suitable alternatives based on individual requirements.
Ensuring Authenticity and Quality
Purchasing from a reputable retailer like Rayslocker assures authenticity. Counterfeit sports shoes are a common issue in the market, and buying from trusted sources guarantees genuine materials, workmanship, and product warranties.
Quality assurance measures at Rayslocker include thorough product checks and secure shipping methods to protect the shoes during transit. This ensures the Asics Gel Kayano 20 arrives in optimal condition, preserving its functional and aesthetic characteristics.
Customer Benefits When Shopping at Rayslocker
Beyond competitive pricing and authentic products, Rayslocker provides excellent customer service, including straightforward return policies and support throughout the purchase process. This comprehensive approach enhances customer satisfaction and enables confidence in investing in premium shoes such as the Asics Gel Kayano 20.
Further benefits may include loyalty programs or referral discounts, encouraging repeat business and helping customers save on future purchases. The integration of user-friendly website navigation and secure payment options adds to the overall shopping experience.
Conclusion: Making the Most of Your Purchase
Securing a pair of Asics Gel Kayano 20 shoes offers not only comfort and technological advantages but also contributes to improved running performance and injury prevention. Rayslocker provides an excellent pathway for acquiring these shoes at affordable prices without compromising authenticity or quality.
By following the tips outlined in this guide and leveraging the resources available at Rayslocker, customers can confidently make informed shopping decisions. This approach ensures that every purchase is an optimal blend of value, performance, and style.
In summary, Rayslocker is an ideal destination for those seeking affordable and genuine Asics Gel Kayano 20 shoes, coupled with exceptional customer service and buyer protection. Shopping here unlocks access to premium products and the best deals, enabling customers to enjoy quality footwear while managing their budgets effectively.

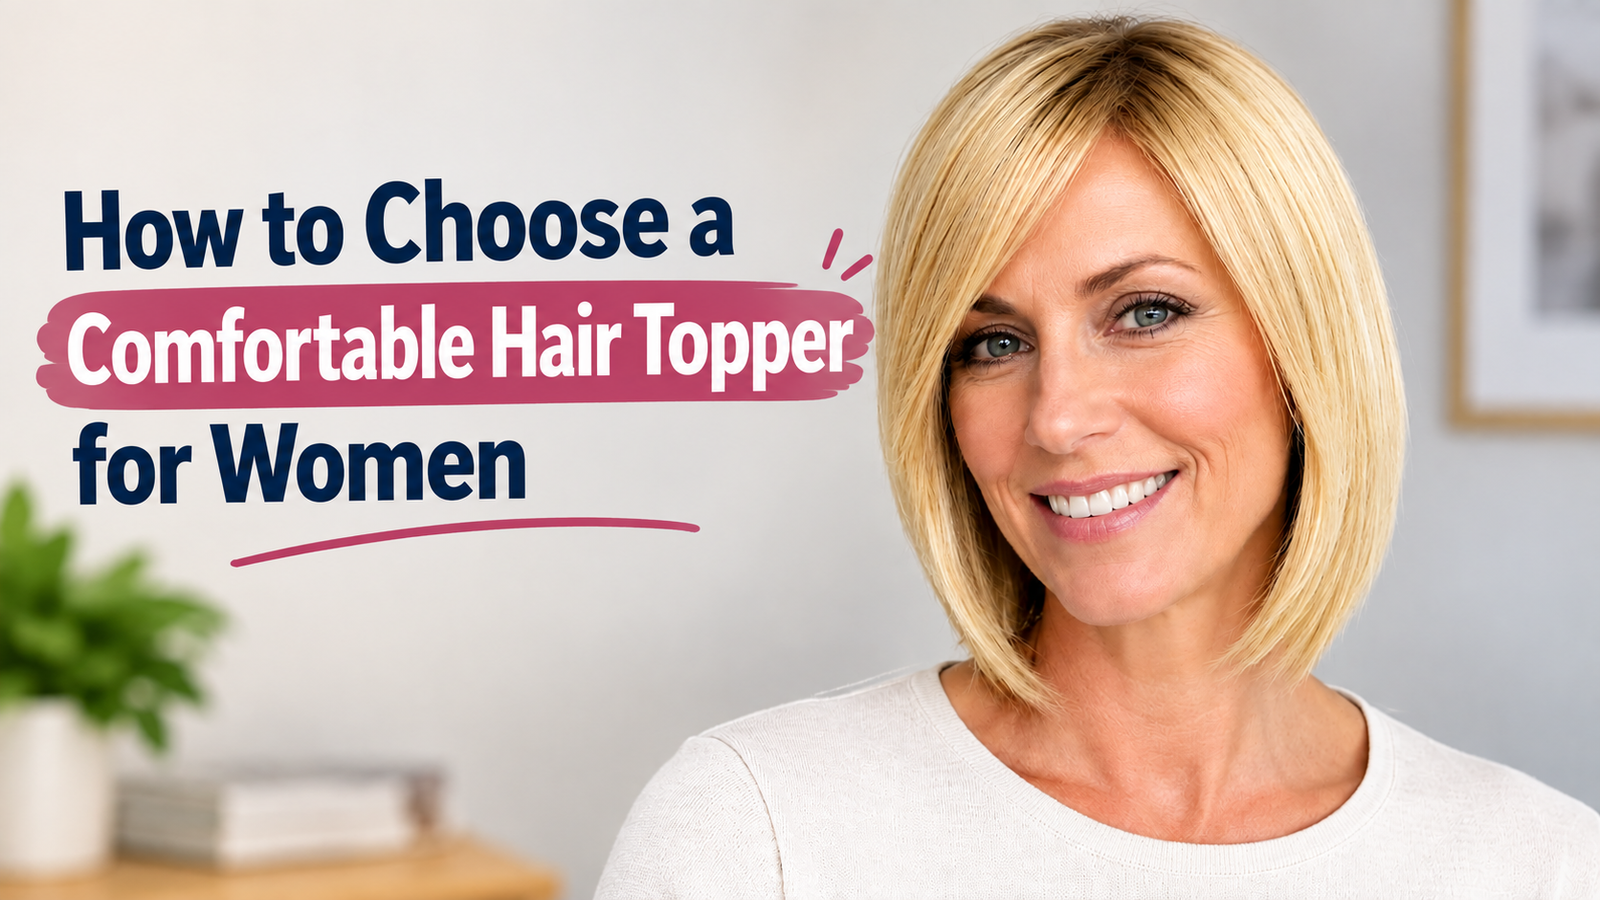
Finding a hair topper that looks natural is only part of the process. If you plan to wear one regularly, comfort, fit, breathability, and the construction of the base are just as important.
This is especially true for women who experience scalp sensitivity or simply prefer a lighter, less noticeable hairpiece. With so many styles and constructions available, understanding what to look for can make it much easier to find a topper that fits naturally into your daily routine.
What Makes a Hair Topper Comfortable?
A comfortable topper should feel secure without creating unnecessary pressure or friction. Several factors can affect the wearing experience, including the size of the base, the materials used, how the topper is attached, and how much hair coverage you actually need.
A common mistake is choosing a topper based only on its appearance. A beautiful style may not be the best choice if the base feels too warm, heavy, or restrictive after several hours.
When comparing different hair toppers for women, consider these features first:
- Lightweight construction
- Breathable base materials
- A suitable base size
- Secure but gentle attachment
- Soft materials around areas that may experience friction
- A hair density that works with your own hair
The goal is to find a balance between coverage, appearance, and comfort.
Pay Attention to the Base Construction
The base is the part of a topper that sits closest to your scalp, so its construction can have a major impact on how it feels throughout the day.
Lace Bases
Lace is often chosen for its lightweight and airy feel. The open construction can allow more airflow and may be particularly appealing if you tend to feel warm while wearing a hairpiece.
Monofilament Bases
Monofilament construction provides a smooth surface while creating a natural-looking appearance at the part. It can be a practical option for everyday wear when you want a combination of comfort and realistic styling.
Hand-Tied Bases
With hand-tied construction, individual strands are attached to the base by hand. This creates a flexible feel and allows the hair to move more naturally.
The best option depends on your personal preferences, the amount of coverage you need, and how frequently you plan to wear your topper.
Choose the Right Size
Bigger doesn’t always mean better.
A topper should cover the area where you need additional volume or coverage without extending unnecessarily far beyond it. A base that is too large may feel cumbersome, while one that is too small may not provide enough coverage or blending space.
Before choosing a size, think about where your hair is thinning and how much of your natural hair you want to incorporate into the style.
For someone with limited thinning around the crown, a smaller topper may be sufficient. If the area requiring coverage is more extensive, a larger base may provide a better transition.
Consider How You Will Attach It
A secure topper shouldn’t require excessive tension.
Many toppers use clips to attach to the existing hair. While clips can provide reliable hold, their placement matters. Repeated pressure in the same area may become uncomfortable, especially if you wear a topper for extended periods.
Some alternatives include adjustable attachment systems or accessories designed to distribute pressure more evenly.
Whatever method you choose, make sure the topper sits securely without pulling excessively on your natural hair.
Don’t Ignore Hair Density
The density of the topper can affect both comfort and appearance.
A very dense topper may provide more volume, but it can also feel heavier and may look less natural if your existing hair is fine.
On the other hand, a lighter-density topper can often blend more easily with your own hair and create a softer overall appearance.
Rather than choosing the fullest option available, consider how much hair you actually need to create the look you want.
Human Hair or Synthetic Hair?
The type of hair fiber is another consideration.
Human hair toppers generally offer more styling flexibility and can be treated much like natural hair when it comes to brushing and styling. They can also provide a soft, natural movement that makes blending easier.
Synthetic options can be convenient and may hold a particular style well, but their styling capabilities and texture can differ from human hair.
Your choice should depend on how you plan to wear and style the topper, rather than simply choosing based on the material alone.
How to Find Hair Toppers Near You
If you’re new to toppers, seeing one in person can be helpful. Searching for hair toppers near me may help you find local salons, alternative-hair specialists, or retailers where you can ask questions and explore different options.
An in-person consultation can be particularly useful if you’re unsure about:
- Which base size you need
- How much coverage is appropriate
- Which color will blend with your hair
- How a topper should be positioned
- Which attachment method feels most comfortable
If local options are limited, online retailers can provide a much wider selection. Just make sure to carefully review measurements, base construction, hair type, and return policies before making a decision.
Think About Your Daily Routine
The best topper isn’t necessarily the one with the most features. It is the one that works well with your lifestyle.
If you wear a topper for several hours every day, breathability and a comfortable attachment system may be priorities. If you mainly wear one for special occasions, styling flexibility and appearance might matter more.
Consider your typical activities as well. Someone who spends a lot of time outdoors may prefer a lightweight, breathable construction, while someone who frequently changes hairstyles may prioritize a flexible base and human hair fibers.
A Natural Look Should Still Feel Natural
A good topper should complement your existing hair rather than overpower it.
Pay attention to the transition between your natural hair and the topper. The color, density, texture, and placement should work together to create a cohesive appearance.
Small adjustments can make a significant difference. A professional trim, appropriate styling, or subtle blending with your own hair can help the topper look much more natural.
Final Thoughts
Choosing among the many hair toppers for women doesn’t have to be complicated. Start with your actual coverage needs, then consider the base construction, size, attachment method, hair density, and material.
If you’re able to visit a local specialist, searching for hair toppers near me can be a useful first step toward getting professional advice and trying different constructions in person.
Most importantly, don’t focus on appearance alone. The right topper should provide the coverage and style you want while remaining comfortable enough to fit naturally into your everyday life.

Few superheroes have proved as adaptable as Batman. Since first appearing in comics in 1939, the character has moved through television, cinema, animation and video games while remaining instantly recognisable. Different generations may picture a different actor, Batmobile or version of Gotham City, but the essential character continues to survive each reinvention.
Part of that longevity comes from flexibility. Batman can belong in a colourful adventure, a detective story or a dark crime thriller without losing the elements that make him distinctive. Each era has been able to reshape the Dark Knight around its own tastes.
Batman Does Not Need One Definitive Version
Many fictional characters become closely associated with a particular interpretation. Batman has managed something more unusual, with several very different versions becoming cultural landmarks in their own right.
The 1960s television era embraced bright colours, exaggerated villains and playful humour. Tim Burton’s 1989 Batman moved towards a darker, more gothic Gotham, while later films pushed the character further into psychological drama and grounded crime storytelling.
None of these interpretations completely erased what came before. Instead, they gave audiences multiple ways to enjoy the same hero. Someone introduced to Batman through an animated series may have a very different attachment to the character from someone who first encountered him in a cinema, comic or video game.
The Costume Changes, but the Silhouette Survives
Batman has one of the strongest visual identities in popular culture. The details change constantly, yet the cape, pointed cowl and bat emblem make the character recognisable almost immediately.
Some versions use grey and blue, others rely heavily on black, and modern interpretations often make the Batsuit resemble protective armour. The emblem itself has changed shape repeatedly, while utility belts, masks and capes have all been redesigned to suit different stories.
That visual flexibility has also helped Batman remain a favourite for fancy dress and fan events. People looking through Batman Costumes can find interpretations ranging from the classic blue, grey and yellow superhero appearance to darker versions, allowing fans to choose the Batman that feels most familiar to them. Smiffys currently carries several Batman designs for adults and children, including officially licensed DC Comics options.
The Big Screen Keeps Reinventing Gotham
Cinema has played an enormous role in keeping Batman visible across generations. Each major screen era has brought its own visual language, villains and interpretation of Gotham.
The British Film Institute (BFI) catalogue provides a useful reminder of just how different these versions can be. It records the colourful 1966 Batman, starring Adam West and Burt Ward, alongside Tim Burton’s 1989 film with Michael Keaton and Jack Nicholson.
The contrast between those films shows why the character has lasted. Batman does not depend on one tone. Filmmakers can emphasise comedy, spectacle, mystery or darkness while still drawing on the same basic mythology.
Gotham’s Villains Matter Just as Much
Batman would probably not have achieved the same cultural longevity without an equally memorable collection of villains. The Joker, Catwoman, Penguin, Riddler and Two-Face have become famous far beyond comic-book audiences.
These characters also make Gotham feel larger than its hero. Each represents a different type of threat and gives writers opportunities to shift the tone of a story. A Riddler plot can revolve around puzzles and detective work, while a Joker story may focus on chaos and psychological conflict.
The supporting cast adds another layer. Alfred, Robin, Commissioner Gordon and other recurring characters create relationships that can be reinterpreted alongside Batman himself.
A Superhero Without Superpowers
Another reason Batman remains accessible is that his abilities have traditionally come from training, intelligence, technology and determination rather than supernatural powers. His gadgets may stretch credibility, but the character is still fundamentally human.
That limitation creates vulnerability. Batman can make mistakes, suffer injuries and be outsmarted, which allows stories to place as much emphasis on investigation and strategy as physical confrontation.
It also makes him unusually adaptable across genres. A Batman story can resemble a superhero blockbuster one moment and a detective thriller the next.
Every Generation Gets a Dark Knight
Batman has changed too many times to belong exclusively to any one period. The colourful Caped Crusader, gothic movie hero, animated detective and modern armoured vigilante all represent different interpretations of the same enduring idea.
That ability to change without becoming unrecognisable is perhaps Batman’s greatest strength. New audiences can discover their own version while longtime fans keep the one that first captured their imagination. After more than eight decades, Gotham still has room for another interpretation of the Dark Knight.

6 Best Lodges For Sale: Find Your Perfect Retreat

Unlocking the Best Deals with Rayslocker: Your Ultimate Guide to Affordable Shopping

Maximizing Utility and Security: The Ultimate Guide to UTE Tool Boxes

How to Read a Property Report Like a Pro

What Happenes to Your Muscles After a Workout? Understanding the Recovery Process

What Hospital Grade Breast Pump Means Before You Choose

The 15 Highest-Paid Rugby Players in the World

Christopher Dare: The Untold Story of Engineer and Former Husband of Angela Rippon

How to Ensure Your Home is Valued Correctly for a Quick Sale

What Is Fanquer? The Digital Creator Platform Transforming Direct-to-Fan Engagement

Dr Jared Ross: Missouri Appeals Court Upholds Protection Order Over Graphic Torture and Murder Threats

Nancy Hallam: The Inspiring Life, Career, and Success Story Behind Ian Wright’s Wife
The 15 Highest-Paid Rugby Players in the World
Christopher Dare: The Untold Story of Engineer and Former Husband of Angela Rippon
How to Ensure Your Home is Valued Correctly for a Quick Sale
What Is Fanquer? The Digital Creator Platform Transforming Direct-to-Fan Engagement
Dr Jared Ross: Missouri Appeals Court Upholds Protection Order Over Graphic Torture and Murder Threats
Nancy Hallam: The Inspiring Life, Career, and Success Story Behind Ian Wright’s Wife
-
 Sports4 months ago
The 15 Highest-Paid Rugby Players in the World
-
Celebrity10 months ago
Christopher Dare: The Untold Story of Engineer and Former Husband of Angela Rippon
-
 Real Estate8 months ago
How to Ensure Your Home is Valued Correctly for a Quick Sale
-
 Technology4 months ago
What Is Fanquer? The Digital Creator Platform Transforming Direct-to-Fan Engagement
-
 Celebrity4 months ago
Dr Jared Ross: Missouri Appeals Court Upholds Protection Order Over Graphic Torture and Murder Threats
-
Celebrity11 months ago
Nancy Hallam: The Inspiring Life, Career, and Success Story Behind Ian Wright’s Wife
-

 Health8 months ago
Enclomimed 25 (Enclomiphene) – Effective PCT Protocol
-
 Celebrity10 months ago
Who Is Maisie Mae Roffey? The Private Life, Family Story, and Quiet Success of Julie Walters’ Daughter