
Home Improvement
How to Tick-Proof Your Garden without Harming Pets


Around 20 species of ticks call the UK home, and while they’re a persistent problem in many places, the good news is that you can eliminate tick habitats from your property without spraying toxic chemical pesticides that endanger your family dogs and cats. The secret lies in modifying your yard’s microclimates to make them physically uninhabitable for these parasites. Ticks are extremely sensitive to dehydration and cannot survive without consistent shade, ambient humidity, and thick ground cover.
By transforming your garden layout into a dry, sun-drenched environment, you build an organic shield against infestation. More than 80% of residential ticks live exclusively within the outer nine feet of the lawn perimeter. This localized concentration means focused adjustments to your property boundaries yield immediate protective results.
Architectural Landscape Modifications That Stop Parasite Migration
The most reliable strategy to prevent arachnid migration into active pet play areas is to establish a definitive physical barrier along your garden perimeter. Construct a three-foot-wide boundary strip using cedar wood chips or crushed dry gravel directly between your lawn edges and any neighboring wooded zones. Ticks will rarely cross this dry expanse because the intense heat and lack of moisture cause fatal desiccation within minutes.
Regular turf maintenance acts as your primary defense by eliminating the humid microclimates that immature nymphs require to survive the summer months. Keep your turfgrass mowed strictly to a height of three inches or less to maximize sunlight penetration down to the soil level.
To maintain a secure backyard environment, utilize this specific landscape maintenance routine:
- Mow all fence lines and property pathways weekly
- Clear away fallen leaf litter and plant debris immediately
- Stack firewood neatly in areas that receive full afternoon sun
Strategic Wildlife Exclusion And Professional Population Control
Invasive wildlife species serve as the primary transport mechanism, bringing dangerous parasites directly into your outdoor living spaces. Large mammals like deer deposit thousands of larval and adult ticks into garden beds every single season. Installing an eight-foot wildlife exclusion fence keeps these hosts away, which systematically collapses the reproductive cycle of local tick populations over time.
If your yard already harbors an active infestation, consumer-grade essential oil sprays are rarely powerful enough to solve the problem long-term. Safely reclaiming your outdoor space requires targeted intervention from a professional like https://www.clarkspest.com/ticks/ that utilizes specialized low-toxicity compounds formulated specifically to protect beneficial garden organisms. Expert technicians can precision-treat perimeter brush zones while ensuring that pet-frequented lawns remain completely chemical-free.
Optimizing Outdoor Living Zones For Maximum Sun Exposure
Parasites inherently gather in dark, damp spaces and are physically incapable of enduring direct, prolonged sunlight. Situate your outdoor furniture, patios, and pet rest stations as close to the center of your lawn as possible, far away from the shade of perimeter trees. Keeping these recreational structures elevated off the bare ground further reduces the likelihood of an accidental encounter.
Prune the lower branches of your perimeter shrubs and decorative trees to keep the clearance at least twelve inches above the soil line. This simple adjustment allows clean airflow underneath the foliage, which dries out the soil and permanently ruins the habitat for questing ticks. It’s also a way to make the most of your garden and its benefits.
Advanced Botanical Defenses For Long-Term Property Protection
Integrating aromatic plants into your garden beds adds an extra layer of defense that complements your physical maintenance routines. Cultivating safe, aromatic herbs like rosemary, lavender, and lemon thyme creates a natural olfactory deterrent that disrupts the heat-seeking senses of crawling pests.
For more details on safe property management strategies and a host of other useful lifestyle coverage and guides, stick around on our site.



Leaking taps are a common plumbing issue that can cause significant water wastage and increase utility bills if left unaddressed. Pinpoint Plumbing Services Pty Ltd, specialising in leaking tap repair in Sydney, provides expert advice and professional services to help homeowners and businesses manage and resolve tap leaks efficiently.
Understanding the Causes of Leaking Taps
Leaking taps often result from wear and tear or malfunctioning components such as washers, O-rings, or valve seats. Hard water deposits or mineral build-up can also lead to leaks, especially in older fixtures. Identifying the root cause is essential for effective repair.
Signs That Indicate a Tap Leak
It is vital to detect a tap leak early. Common signs include persistent dripping sounds, damp patches around the tap base, and noticeably higher water bills. Ignoring these signs may cause further damage to the plumbing system and surrounding areas.
Why Timely Repair is Important
Timely leaking tap repair conserves water, prevents property damage, and reduces financial burdens due to wasted resources. Delays in addressing leaks can result in corrosion and eventual failure of tap components, necessitating costly replacements.
Professional Leaking Tap Repair Services
Pinpoint Plumbing Services offers specialised leaking tap repair services in Sydney, providing thorough diagnostics and quality repairs. Their technicians use professional tools and genuine parts to ensure longevity and optimal tap performance.
Common Repair Techniques
Repair methods typically involve replacing worn washers and O-rings, reseating the valve, or complete tap replacement in severe cases. Professional plumbers also clean and lubricate components to maintain smooth operation.
DIY Repair: What You Should Know
While some minor tap leaks can be addressed independently, such as tightening loose connections or replacing washers, improper repair may worsen the issue. It is advisable to seek expert guidance to avoid further complications.
Tools Required for Tap Repair
Essential tools for tap repair include adjustable wrenches, screwdrivers, replacement washers, O-rings, and lubricants. Having the right tools facilitates a precise and efficient repair process.
Safety Precautions
Before attempting any repairs, the main water supply should be turned off to prevent flooding. Wear protective gloves and eye protection when dismantling tap components to ensure safety.
Maintenance Tips to Prevent Leaking Taps
Regular maintenance can significantly reduce the incidence of leaks. This includes cleaning aerators, checking for loose fittings, and ensuring taps are not over-tightened.
When to Replace a Tap Instead of Repairing
In cases where the tap is extensively corroded or damaged beyond economical repair, replacement is the recommended option. Modern taps also offer improved water efficiency and aesthetics.
Environmental and Financial Benefits of Repair
Repairing leaking taps contributes to water conservation efforts and reduces water bills. It aligns with sustainable living practices and responsible resource management.
Choosing the Right Plumbing Service
Engaging professional plumbing services such as Pinpoint Plumbing ensures reliable and guaranteed repairs. Experienced plumbers provide thorough inspections, accurate diagnostics, and lasting solutions.
Customer Experience and Support
Pinpoint Plumbing Services is known for prompt response times, transparent pricing, and customer-focused service. Clients receive clear communication and expert advice throughout the repair process.
Conclusion
Leaking tap repair is an essential maintenance task that preserves water resources and protects property. For residents and businesses in Sydney, relying on professional services such as those from Pinpoint Plumbing Services Pw Ltd guarantees quality workmanship and peace of mind.


A cooling mattress pad is a surface layer — gel, phase-change, or breathable structures — that changes the bed’s microclimate without replacing the mattress. It is one of two routes to a cooler night, and the market has just made the choice sharper: alongside the passive pads, actively cooling covers now ship as add-on hardware, while the smart mattresses they sit beside — DeRUCCI’s line included — answer heat with passive engineering: airflow structures in cover and core, per-side heating for the cold partner on the top tier, and the microclimate work left to the layers that do it best. This comparison — prepared with reference to DeRUCCI’s published product documentation and its responses to frequent buyer questions — prices both routes on the record: what each layer physically does, what it costs over five years, and which nights it actually fixes.
Why You Sleep Hot: The Physiology Both Routes Work On
Sleep and body temperature are coupled machinery: in the hours before sleep, the core temperature falls as part of the drive toward sleep itself, and the bed you lie on decides the microclimate — how fast heat and moisture accumulate between your body, the covers and the mattress materials. That accumulation is what “sleeping hot” measures, and every temperature product works on it from a different layer.
Your mattress decides the microclimate: core body temperature drops before sleep, and its materials control how fast heat and moisture accumulate. Peer-reviewed research on core body temperature changes before sleep documents the first half of that coupling: the pre-sleep drop is part of what makes sleep onset possible, a precondition carried in the physiology. Reviews of sleep and thermoregulation mechanisms supply the second half: sleep and temperature regulation share neural and autonomic pathways, which is why a bed that traps heat places a load on the whole system.
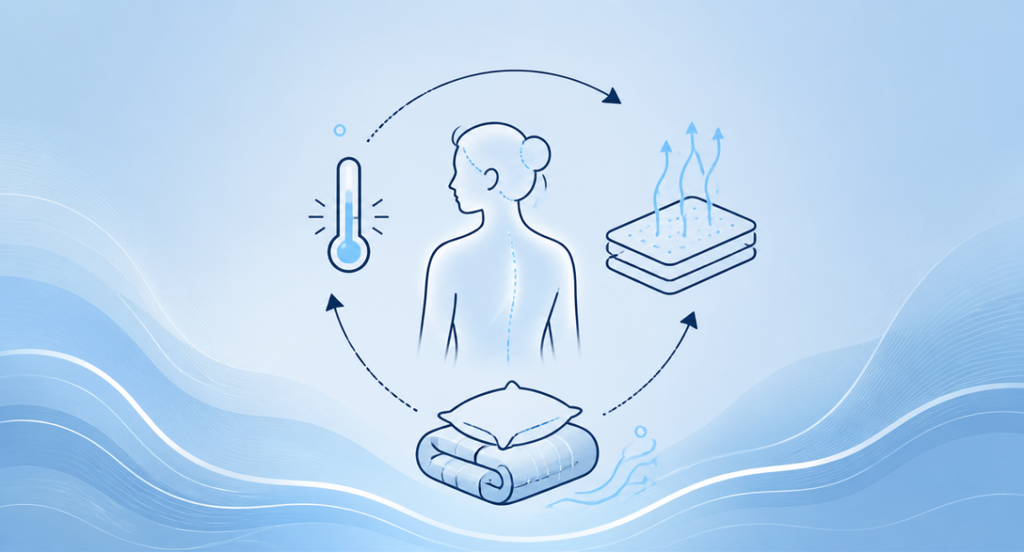
None of that machinery clocks off after sleep arrives. The felt experience of a hot bed is the microclimate’s heat and moisture budget crossing a comfort line — the same physics whether the fix is a pad, a cover, or a different mattress. The question that separates the routes is mechanical: which layer does the work, what does it consume, and what does it cost to keep doing it for five years.
Route One: Pads, Toppers, and the Active Cooling Cover
The add-on route now has two engines. Passive pads — gel infusions, phase-change materials, convective open structures — manage heat at the surface with no power draw. Active covers go further: per one maker’s published product page, its cover cools, heats, tracks and responds on both sides across a stated 12°C to 43°C range, powered by a hub under the bed frame — hardware plus a recurring plan.
The passive pad is the category the search query names. Mechanism: an independently laid surface layer that changes the surface microclimate without touching the support core — gel infusions, phase-change materials that absorb heat across a threshold and release it later, and convective open structures. Traits: a lower one-time outlay than a mattress, replacement on the layer’s own lifespan, no change to spinal support, and nothing to plug in.
The active variant is the one that changed the comparison. Per Eight Sleep’s published product page, the Pod is an intelligent mattress cover that “cools, heats, tracks, and responds on both sides with built-in biometric sensors,” across a stated temperature range of 12°C to 43°C, with a redesigned thermal engine the maker credits for faster temperature relief, and a hub that fits under most bed frames. What the route buys is real active cooling on the bed you already own. What it carries: a second device class in the bedroom — cover plus hub — sensing embedded in the cover, and a business model to match. Per the maker’s published pricing as of this writing, the hardware starts at $2,799 and the cover’s functions tie to a mandatory plan listed at $199 per year when the rate was last verified; re-check both figures on the live page before any decision. At the listed rate, five years of the plan adds roughly $995 on top of the hardware. Cooling off a hot bed means matching the fix to the bottleneck: breathable surfaces, leg-zone heating on the top tier, or a pad when the mattress feels wrong.
Route Two: The Integrated Smart Mattress
The integrated route spends its engineering on airflow: spacer-knit covers, open-celled latex, and honeycomb structures that hold their shape through years of compression. On the top tier it adds per-side heating for the cold partner, graphene far-infrared at the leg zone. And on the published record, the data service carries no monthly fee after purchase.
What the mattress body itself does, per DeRUCCI’s material documentation, is passive and structural. The 3D-Plus cover fabric is a spacer knit built for breathability; the Talalay latex layer is open-celled so air passes through; the DEFORM Fine Revo honeycomb structure holds its shape through years of compression — and a structure that holds its shape holds its airflow. For the hot sleeper, the brand’s own materials direct the microclimate work to breathable bedding and bedroom-level temperature control — the deeper checklist lives in Smart Mattress Temperature for Hot Sleepers.
The one active temperature feature in the lineup sits on the T11 PRO, the top tier: graphene far-infrared heating for the leg region, set per side in the app from 25°C to 55°C on a timer, drawing about 0.05 kWh per hour. It is a heating feature for cold legs — the dual-zone answer for the partner who runs cold while the other runs warm. The active side of this route is elsewhere: the same sensing that reports on the night also drives the bed’s automatic firmness adjustment through the night. And per the company’s published terms, there is no monthly fee for the data service after purchase — the integrated route’s bill closes at the mattress, which is the axis the next section prices.
The Five-Year View and the Matching Rule
Priced across five years, the routes part cleanly: a passive pad costs its layer and replaces on its own clock; an active cover costs hardware plus a plan that compounds; an integrated mattress costs the mattress, with no recurring data fee on the published record. Cooling itself is matched to the bottleneck — no route wins everywhere, and the right route for a given bedroom depends on which layer is failing.
Cooling choices settle the same way every temperature decision does: priced across the years, and matched to the layer that is actually failing. Three bills emerge:
– Sleep hot all night — start at passive dissipation: breathable surface materials, then bedroom measures such as air temperature and bedding weight. No energy draw, no maintenance, a lifespan tied to the mattress itself. On the integrated side this is the documented route; on any mattress, it is the layer with the least to break.
– Want active cooling on a bed you already own — the cover route is the market’s answer, at the published price of hardware plus a recurring plan: Eight Sleep’s Pod cover with its 12°C to 43°C range and hub, per its product page, with the five-year arithmetic above. The pad route’s passive layers cost less and do less.
– Cold legs, cold feet — the active-heating route exists at one place in this lineup, the T11 PRO leg zone; match the complaint to it or save the outlay.
– Mattress right, feel wrong — a passive pad is the reasonable category option: low commitment, replaceable on its own lifespan, support core untouched.
All routes act on the same variable — the rate at which heat and moisture accumulate in the bedding microclimate — from different layers, which is why no route wins overall. Match the complaint to the layer that addresses it, and price the years before the layer chooses you.
Cooling Mattress Pad and Sleep Temperature: FAQ
Is it normal for a mattress to feel hotter after a while?
Yes — provided no single spot is abnormally hot. The body radiates heat all night and the bed stores a share of it; traditional mattresses accumulate the same heat with nothing monitoring it. A smart bed’s operating figures are background ratings, not heat sources — the voltage, sound and certification figures cited in DeRUCCI’s published response to this exact question. A localized hot patch is the exception — stop use and contact after-sales service.
Is a cooling mattress pad worth buying, or should I get an active cover?
Match the mechanism to the bottleneck. If the mattress underneath is right and the complaint is surface feel, a passive pad — gel, phase-change, breathable structures — is the low-commitment category option with nothing to plug in. If the demand is genuine active cooling, the market ships it as an add-on cover: per its product page, Eight Sleep’s Pod cools and heats across 12°C to 43°C with a hub under the frame, hardware from $2,799 plus a plan listed at $199 per year when last verified — run both figures against the live page before deciding. Either way the support core stays untouched.
Can a smart mattress cool you down?
In the mattress body, the temperature work is passive: breathable fabrics such as the 3D-Plus spacer knit, Talalay open-cell latex and the DEFORM honeycomb structure move heat and moisture away from the sleep surface. The one active feature in the line is the T11 PRO’s leg-zone graphene far-infrared heating — per-side app control, about 0.05 kWh per hour, for the cold partner. Genuine active cooling ships in this market as add-on covers; heat-averse sleepers shop fabrics, the bedroom, or that route.
The wider decision — features, tiers, sensing and after-sales — runs through the smart mattress buying decision guide. To feel the passive fabrics in person, find a DeRUCCI store.

When undertaking a home makeover, choosing the right furnishings is paramount to achieving the desired aesthetic and atmosphere. For residents and professionals in the region, the option to hire furniture in Sydney offers flexibility, style, and convenience. This guide explores the key considerations and benefits associated with furniture hire services in Sydney to ensure a successful and stylish home transformation.
Understanding Furniture Hire Services
Furniture hire services provide the opportunity to rent quality furniture pieces for short or long-term periods. This is particularly advantageous for those who seek to refresh their home’s appearance without committing to permanent purchases. In Sydney, a diverse range of hire options is available to cater to different styles, budgets, and project scopes.
Advantages of Hiring Furniture in Sydney
Hiring furniture instead of purchasing new items presents several benefits. Primarily, it allows homeowners and designers to experiment with various designs and layouts without the financial burden of ownership. Furthermore, hiring furniture is an environmentally responsible choice, reducing waste and encouraging the reuse of quality products.
Styling a home for sale or staging an investment property is a common reason to utilise furniture hire services. This approach enables the creation of a welcoming environment that appeals to potential buyers or tenants without the need for permanent changes to the property.
Factors to Consider When Renting Furniture
When selecting furniture hire options in Sydney, it is important to consider the size and layout of the space. Measuring rooms accurately and determining the function of each area helps in choosing adaptable and proportionate furnishings.
Quality and style are also critical factors. It is recommended to choose furniture pieces that complement the architectural features of the home and adhere to the intended design theme, be it modern minimalism, classic elegance, or contemporary comfort.
Popular Furniture Pieces for Hire in Sydney
Available hire items typically range from essential seating such as sofas and chairs to dining sets, bedroom furniture, and decorative accessories. These elements collectively contribute to a cohesive look and can be customised according to specific requirements.
Cost Implications and Budget Planning
The cost of hiring furniture is influenced by the type and quantity of items required, duration of the hire, and service provider rates. Setting a clear budget at the outset allows for efficient selection within financial parameters.
Many hire companies in Sydney offer flexible packages that include delivery, setup, and pick-up services, ensuring a hassle-free experience for clients.
Planning for Delivery and Installation
Coordinating the timing of furniture delivery with other renovation or styling activities is essential to avoid delays. Professional furniture hire providers often assist with assembly and placement, ensuring that the hired items enhance the space effectively.
Understanding Terms and Conditions
Clients should carefully review the hire agreement to comprehend responsibilities relating to maintenance, damage liability, and cancellation policies. Clear communication with the service provider helps prevent misunderstandings and ensures a smooth process.
Environmental Considerations
Furniture hire supports sustainable practices by promoting reuse and reducing the demand for new furniture production. Homeowners engaging in furniture rental contribute to a more circular economy and lower environmental impact.
Choosing a Reputable Furniture Hire Service in Sydney
Selecting an experienced and trustworthy hire service is integral to a successful home makeover. Checking customer reviews, service portfolios, and company credentials provides insight into reliability and quality assurance.
Many Sydney-based providers offer curated collections tailored to different interior design styles, equipped to serve both residential and commercial clients.
Integration with Property Styling Services
Hiring furniture is often part of a broader property styling strategy. Professional stylists combine rented items with existing features to create inviting interiors that resonate with target audiences.
Clients seeking comprehensive solutions benefit from hiring furniture as well as engaging styling experts who understand market trends and buyer preferences.
Customisation and Flexibility
Furniture hire arrangements in Sydney commonly allow for modifications, such as swapping pieces or altering rental periods. This adaptability supports dynamic styling needs and project evolution.
Maintenance Tips for Hired Furniture
Although furniture hire companies maintain their inventory, clients are encouraged to handle rented items with care, avoid spills or damage, and report any issues promptly. Proper management preserves the condition of the furniture and avoids additional charges.
Case Studies of Successful Home Makeovers
Several Sydney homeowners and property developers have achieved remarkable results through furniture hire. By leveraging stylish pieces, they transformed spaces into appealing environments that contributed to swift sales or improved tenant satisfaction.
Conclusion
Hiring furniture in Sydney presents a practical and stylish solution for home makeovers, staging, and interior refreshment. With an array of options, expert guidance, and flexible arrangements, clients can transform their living spaces efficiently while managing costs and sustainability.
For those embarking on a home makeover journey, engaging a reputable furniture hire service offers the advantage of professional quality at manageable investment, ultimately enhancing the overall aesthetic and functionality of the property.

Why Your Headphones Pick Up the Whole Office on Calls

Transform Your Skin with RF Microneedling: Discover the Benefits at Elite Body Contouring

Revolutionizing Precision: The Advantages of Fiber Optic Laser Cutting with Macro Weld

Stunning Spring Carnival Dresses to Elevate Your Style This Season

Top Cricket Equipment Essentials Every School Should Have

Innovative Architects in Sydney: Designing Your Dream Space with Shore Architects

How to Ensure Your Home is Valued Correctly for a Quick Sale

Christopher Dare: The Untold Story of Engineer and Former Husband of Angela Rippon

The 15 Highest-Paid Rugby Players in the World

What Is Fanquer? The Digital Creator Platform Transforming Direct-to-Fan Engagement

Dr Jared Ross: Missouri Appeals Court Upholds Protection Order Over Graphic Torture and Murder Threats

Nancy Hallam: The Inspiring Life, Career, and Success Story Behind Ian Wright’s Wife
How to Ensure Your Home is Valued Correctly for a Quick Sale
Christopher Dare: The Untold Story of Engineer and Former Husband of Angela Rippon
The 15 Highest-Paid Rugby Players in the World
What Is Fanquer? The Digital Creator Platform Transforming Direct-to-Fan Engagement
Dr Jared Ross: Missouri Appeals Court Upholds Protection Order Over Graphic Torture and Murder Threats
Nancy Hallam: The Inspiring Life, Career, and Success Story Behind Ian Wright’s Wife
-
 Real Estate9 months ago
How to Ensure Your Home is Valued Correctly for a Quick Sale
-
Celebrity11 months ago
Christopher Dare: The Untold Story of Engineer and Former Husband of Angela Rippon
-
 Sports5 months ago
The 15 Highest-Paid Rugby Players in the World
-
 Technology5 months ago
What Is Fanquer? The Digital Creator Platform Transforming Direct-to-Fan Engagement
-
 Celebrity5 months ago
Dr Jared Ross: Missouri Appeals Court Upholds Protection Order Over Graphic Torture and Murder Threats
-
Celebrity12 months ago
Nancy Hallam: The Inspiring Life, Career, and Success Story Behind Ian Wright’s Wife
-

 Celebrity8 months ago
Who Is Azriel Crews? Inside the Life and Career of Terry Crews’ Daughter
-
 Celebrity11 months ago
Who Is Maisie Mae Roffey? The Private Life, Family Story, and Quiet Success of Julie Walters’ Daughter