
Business
The Ultimate Bathroom Custom Design Remodel Checklist for US Homeowners in 2025


Bathroom renovations have become one of the most scrutinized home improvement decisions in the US housing market. Rising material costs, tighter contractor availability, and longer lead times on fixtures have changed how homeowners plan and execute these projects. What once took a few weeks of planning now requires months of coordination between designers, tradespeople, and suppliers. In 2025, the gap between a bathroom remodel that runs smoothly and one that stalls midway often comes down to preparation, not budget.
Most homeowners begin a bathroom remodel with a general idea of what they want — more storage, better lighting, a walk-in shower — but without a structured approach to move from concept to completion. Without that structure, decisions get made out of sequence, materials arrive before walls are ready, or permits are pulled too late. The result is cost overruns, extended timelines, and finishes that don’t quite meet the original vision. A clear, step-by-step checklist addresses these problems before they occur.
Why a Structured Checklist Matters Before Any Work Begins
A bathroom remodel is not a single project. It is a sequence of interdependent tasks that must happen in a specific order for the outcome to be functional, code-compliant, and visually cohesive. Electrical rough-in must happen before drywall. Plumbing must be roughed in before tile. Tile must be set before vanities are installed. Skipping steps or starting them out of order creates cascading delays that are difficult and expensive to correct.
Before hiring a single contractor or ordering one fixture, homeowners benefit from reviewing a structured Bathroom Custom Design Remodel guide that maps each phase of the process in sequence. This kind of reference helps homeowners communicate more clearly with their design and trade teams, ask better questions, and catch gaps in scope before demolition begins.
The Relationship Between Planning Depth and Project Outcomes
There is a consistent pattern in bathroom remodels that run over budget: decisions were deferred to the construction phase rather than resolved in the planning phase. When a homeowner has not selected tile before demo begins, the contractor has to pause work and wait. When plumbing layouts are not finalized before a plumber roughes in, changes mid-project require additional labor and sometimes structural repairs. Every deferred decision has a downstream cost.
Planning depth does not mean over-specifying every detail. It means resolving the high-stakes decisions early — layout, plumbing locations, electrical loads, and material lead times — so that the construction phase runs on defined information rather than assumptions. Contractors operate more efficiently and accurately when their scope is well defined before work begins.
Defining the Scope of a Bathroom Custom Design Remodel
Scope definition is the process of deciding exactly what will change and what will stay in place. In a bathroom remodel, this is more consequential than in other rooms because bathrooms contain infrastructure — plumbing, ventilation, and electrical — that is expensive to move. The scope of a bathroom custom design remodel determines the complexity of permits required, the number of subcontractors involved, and the realistic timeline for completion.
A cosmetic update — replacing fixtures, painting walls, swapping out a vanity — is structurally different from a full gut remodel that moves walls, relocates plumbing, or adds a heated floor system. These two categories of work require different budgets, different professionals, and different permitting processes. Homeowners who treat them interchangeably at the outset often encounter scope creep when what they assumed was cosmetic turns out to require structural changes.
Identifying What Drives Scope Expansion
The most common reason bathroom remodel scopes expand is the discovery of concealed conditions once walls are opened. Aging waterproofing, corroded pipes, outdated wiring, and subfloor damage frequently appear during demolition in homes built before the mid-1990s. These are not failures of planning — they are the nature of older construction. However, having a contingency framework built into the project plan from the beginning prevents these discoveries from causing panic or poor reactive decisions.
Before demolition, an inspection of accessible plumbing and electrical systems, combined with a moisture assessment of the existing floor and walls, gives homeowners a more informed starting point. This does not eliminate surprises, but it reduces the number of unknown variables entering the construction phase.
Permits, Codes, and Compliance in 2025
Building permits for bathroom remodels are required by most US municipalities whenever the work involves changes to plumbing, electrical systems, or structural components. The specific requirements vary by jurisdiction, but the underlying principle is consistent: work that affects health, safety, or structural integrity must be inspected by a licensed authority before it is closed in. According to the US Department of Housing and Urban Development, unpermitted work can affect home insurance coverage and create complications during property sales.
In 2025, the permit process in many US cities has become more accessible through online submission systems, but it has also become more scrutinized. Inspectors are more attuned to issues like ventilation adequacy, GFCI outlet placement, and shower pan waterproofing than in previous decades. Understanding what triggers an inspection requirement in the specific city or county where the project is located should be one of the first administrative tasks completed.
Working With Inspectors Rather Than Around Them
Some homeowners attempt to avoid permits to save time or money. This is consistently counterproductive. When unpermitted work is discovered during a future sale or following an insurance claim, the remediation costs almost always exceed what the permit would have cost. More importantly, inspectors serve a legitimate function: they catch installation errors that even experienced contractors sometimes make under time pressure.
Scheduling inspections at the appropriate project milestones — rough plumbing, rough electrical, waterproofing, and final — keeps the project moving forward on a documented, compliant path. This also provides homeowners with a clear record of what was done and when, which has real value for long-term maintenance and resale.
Material Selection and Lead Time Management
Material selection for a bathroom custom design remodel involves more than aesthetic preference. It involves availability, lead time, compatibility with existing or planned systems, and long-term maintenance requirements. Custom tile, specialty fixtures, and made-to-order cabinetry often have lead times that extend well beyond the time it takes to complete demolition and rough-in work. Ordering these items late in the planning process is one of the most common causes of project delays.
The sequence for material decisions should mirror the sequence of installation. Flooring and tile are installed early, so those selections must be finalized and ordered first. Vanities and cabinetry follow. Fixtures — faucets, shower heads, hardware — come last in installation but are often the decisions homeowners want to make first because they are the most visible elements. Reversing this sequence creates a situation where walls are tiled before the homeowner realizes the freestanding tub requires a floor-mount rough-in that was never framed for.
Custom Versus Stock: Understanding the Trade-Off
Custom cabinetry, stone fabrication, and specialty tile offer finishes and dimensions that stock materials cannot replicate. However, they come with longer lead times, higher upfront costs, and less flexibility for last-minute changes. In a bathroom custom design remodel, the value of custom elements is most realized when the design has been finalized before orders are placed — not while construction is already underway.
Stock materials offer speed and cost predictability but may require more creative planning to achieve a cohesive design in non-standard bathroom configurations. Neither approach is inherently superior. The right choice depends on the project timeline, the flexibility of the design, and how central the bathroom is to the homeowner’s daily routine during the construction period.
Contractor Selection and Workflow Coordination
A bathroom remodel typically involves at least three licensed trades: a plumber, an electrician, and a tile setter. In larger remodels, this expands to include a general contractor, a glass installer, a cabinetry fabricator, and potentially a structural engineer. The coordination between these trades is where most schedule disruptions occur.
Hiring a general contractor to manage the trade sequence reduces the administrative burden on the homeowner and minimizes the risk of scheduling conflicts. However, in smaller-scope remodels, homeowners sometimes act as their own project managers. This is workable only when the homeowner has the availability to communicate daily with contractors, make timely decisions about field changes, and track material deliveries against the work schedule.
Evaluating Contractor Experience in Bathroom-Specific Work
Not all licensed contractors have equal experience with bathroom remodels specifically. Waterproofing behind tile, shower pan installation, and wet area ventilation are techniques that require specific trade knowledge. Requesting references from recent bathroom projects — not just general renovation work — gives a clearer picture of a contractor’s relevant experience. Reviewing those references against the complexity of the planned project is more informative than license status alone.
Clear written scope documents, payment schedules tied to milestones rather than dates, and explicit change order procedures protect both parties when unexpected conditions arise mid-project. These are standard practices in professional contracting and should be treated as non-negotiable elements of any agreement.
Final Walkthrough and Long-Term Maintenance Planning
The completion of a bathroom remodel is not defined by the last tile being grouted or the last fixture being mounted. It is defined by a systematic walkthrough that confirms every element of the installed work performs as intended. Faucets should be tested under pressure. Drains should be checked for proper flow. Ventilation fans should be confirmed to exhaust outside, not into an attic or wall cavity. Caulk lines and grout joints should be inspected before the contractor leaves the site.
A punch list — a written record of items that need correction before final payment is released — is a standard professional practice that protects homeowners from accepting incomplete or deficient work. It is not adversarial. It is the final quality checkpoint in a process that, when executed well, produces a bathroom that performs reliably for years.
Planning for Maintenance Before the Project Closes
Every material and system installed in a bathroom has a maintenance requirement. Natural stone requires periodic sealing. Grout joints in wet areas need inspection for separation or cracking. Caulk at tub and shower transitions deteriorates over time and must be replaced before water intrudes behind the tile. Ventilation fans accumulate debris and should be cleaned annually to maintain airflow.
Before the contractor leaves the project, homeowners should collect documentation for every installed system — warranty information for fixtures, care instructions for stone or specialty surfaces, and model numbers for mechanical components. This information is difficult to reconstruct after the fact and is essential for warranty claims and future repairs.
Conclusion
A well-executed bathroom custom design remodel in 2025 is not the result of a large budget or a fast timeline. It is the result of structured preparation that resolves the high-stakes decisions before construction begins, manages the sequence of trades and materials without gaps, and closes the project against a defined standard of completeness. The homeowners who experience the fewest problems during a remodel are almost always the ones who invested the most time in the planning phase, not the construction phase.
This checklist approach does not eliminate complexity. Bathrooms are inherently complex spaces where infrastructure, finishes, and daily use intersect in a small footprint. But it does make that complexity manageable by breaking it into phases that can be addressed one at a time, in the right order, with the right professionals involved at each stage. That is the foundation of a remodel that delivers what was originally envisioned — reliably, completely, and without avoidable setbacks.


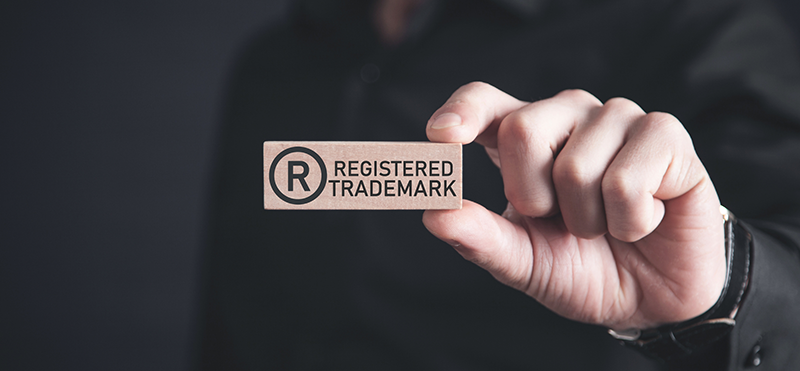
When starting a UK business, registering a company name is usually one of the first things on the list. But there is another name-related decision that many business owners overlook: trade mark registration. This often leads to a simple question:
If my company name is already registered with Companies House, why would I need a trade mark?
The answer is that they protect different things. Companies House deals with company registration and company-name rules, while the UK Intellectual Property Office (IPO) deals with trade marks. Registering a company name does not automatically give you trade mark protection.
Need help registering your UK trade mark? BusinAssist can guide you through the UK trade mark application process, helping you take the next step towards protecting your brand.
Explore Our UK Trade Mark Registration Service and start building a stronger foundation for your business.
What Does Companies House Registration Do?
When you form a limited company, you register its legal name with Companies House.
The name must meet Companies House rules and cannot normally be the same as an existing registered company name. If a name is too similar to another company name, you may also have to change it following a complaint.
This gives your company its legal identity. For example, imagine you register: BrightPath Solutions Ltd. That becomes the official name of your limited company. But this does not automatically mean that you have exclusive trade mark rights over “BrightPath Solutions”.
That is where the difference becomes important.
What Does Trade Mark Registration Do?
A trade mark protects a brand used to distinguish your goods or services from those of other businesses.
It can include things such as:
- Business or product names
- Logos
- Certain sounds
- Colours
- Combinations of these elements
A registered trade mark can give the owner stronger rights to take action against unauthorised use of the mark within the relevant scope of protection.
So while Companies House helps establish your company as a legal entity, a trade mark can help protect the brand customers recognise.
Companies House vs Trade Mark Registration
The easiest way to understand the difference is to look at what each registration is designed to do.
| Companies House Registration | Trade Mark Registration |
| Registers a company | Protects a brand or trade mark |
| Gives the business a legal identity | Helps establish exclusive rights in the registered mark |
| Managed by Companies House | Managed by the UK Intellectual Property Office |
| Focuses on company-name rules | Focuses on goods and services covered by the mark |
| Does not automatically create trade mark rights | Can provide stronger legal protection for the registered brand |
| Mainly relevant to the company’s legal identity | Particularly important for customer-facing brands |
The two systems work separately, so registering one does not replace the other.
Why Company Registration Alone May Not Be Enough
Imagine a startup spends two years building a brand around its company name.
It has:
- A popular website
- Thousands of customers
- Social media followers
- Branded packaging
- Paid advertising
- Positive reviews
The founders may assume the company name is protected because it appears on the Companies House register. But company registration does not automatically give the same rights as a registered trade mark.
The IPO specifically warns that registering a company name does not prevent someone else from using a similar or identical trade mark.
That is why checking trade marks should happen before investing heavily in a new brand.
What If Someone Already Has a Similar Trade Mark?
This is where things can become complicated. A company name may be accepted by Companies House but still create a trade mark problem.
For example, you might find that your preferred company name is available, but another business already has a similar registered trade mark covering related goods or services.
Simply having your company name accepted does not automatically solve that problem. Current Companies House guidance recommends checking the UK IPO trade mark register before choosing a company name.
Does a Trade Mark Replace Company Registration?
No. A trade mark and a company are not alternatives.
You can have:
Company registration + trade mark registration
The company registration gives your business its legal identity, while the trade mark can protect the brand you use in the marketplace. A business might therefore operate as:
ABC Innovations Ltd
while using:
ABC
as its customer-facing brand.
The legal company name and the protected brand do not necessarily have to be identical.
What About a Trading Name?
A limited company can also trade under a different name from its registered company name.
For example:
ABC Innovations Ltd
could operate publicly under a trading name.
But using a trading name does not automatically give it trade mark protection.
If the trading name becomes an important part of the company’s brand, registering it as a trade mark may be worth considering. GOV.UK guidance specifically notes that trading names and brands are not automatically protected.
When Should a New Business Think About a Trade Mark?
There is no need to wait until a company becomes large.
In fact, checking the brand early can make business planning easier.
A sensible process is:
- Choose a potential business name.
- Check Companies House.
- Search the UK trade mark database for similar marks.
- Check relevant domains and social media handles.
- Think about how the business could grow.
- Identify the goods and services the brand will cover.
- Consider trade mark registration if the brand is important to the business.
The IPO recommends checking for similar marks before applying and choosing classes and terms that fit the business’s plans.
What Does a Trade Mark Actually Protect?
Trade mark protection is not unlimited. It relates to the goods and services covered by the registration. For example, registering a brand for one category does not automatically mean that nobody anywhere can use the same word for completely unrelated products.
This is why selecting the relevant classes and terms is an important part of the application. The IPO recommends choosing classes and terms that are relevant to your business plans for the next five years. You can consider Trademark Registration guide by BusinAssist to know all the details about trademark registration.
The Simple Way to Think About It
If you remember only one thing from this article, remember this: Companies House protects your company’s place on the company register. A trade mark protects the brand identity you use in the marketplace.
They solve different problems. For a business that is serious about building a recognisable brand, understanding that difference early can prevent unnecessary complications later.
Build the Company. Then Protect What Customers Recognise.
Registering a company is an important first step, but it is only part of building a business. As the company grows, its name, logo and product identity can become valuable commercial assets. Protecting those assets should therefore be considered alongside company formation rather than after the brand has already become established.
If you are setting up or managing a UK company and need support with the administrative side of your business, BusinAssist can help with services including company formation, confirmation statement filing, identity verification and company closure. Your company name may give your business its legal identity. Your brand is what customers remember.

Nobody sets out to tear their software stack apart after six months. But it happens constantly. A founder grabs a free tool early on because it does one job well enough, and then the team doubles, the sales process completely changes, customers start expecting more, and suddenly that same tool becomes the bottleneck holding everyone back.
Startups don’t grow in straight lines. Software picked when the company was three people won’t hold up once there are fifteen, with proper sales channels, active marketing campaigns, revenue targets to hit and new hires to onboard. So what causes the mismatch, and how do you pick something you won’t need to bin within twelve months?
Your Processes Will Change Faster Than You Think
Early on, process doesn’t exist. Leads trickle in from emails, LinkedIn, referrals and maybe the odd event, and someone tracks everything in a spreadsheet that works fine because one person is doing all the selling.
Things change fast though. A second hire joins, marketing kicks off campaigns, and the spreadsheet can’t tell you who last spoke to a lead or how long deals have gone untouched. So the team grabs a CRM, but they pick one that fits the current workflow instead of what they’ll actually need in a few months when the whole operation looks different.
Most startups move from total disorder to a rough system and then to a proper repeatable playbook within about twelve months. That journey breaks tools. Whatever CRM worked during the messy early days will almost certainly buckle once processes get tighter and the team starts demanding more from it.
Pick for Flexibility, Not Just Features
Founders love a long feature list. It’s natural to compare platforms by counting what they offer and going with the one that ticks the most boxes, but that logic falls apart the moment your workflow changes and the tool can’t bend with it.
What actually matters is flexibility. Can you customise fields, rework pipeline stages, add automations and plug in other tools as your stack grows? Reviews comparing the top CRMs for early stage startups now rate platforms on scaling pain points and exit strategies alongside the usual pricing breakdowns, which tells you how common this problem really is. So before you commit, ask yourself whether you can reshape the tool in six months without having to rebuild everything from scratch.
Check the Exit Before You Enter
Before you put anything into a new platform, check how easy it is to get your data back out. This step gets skipped constantly. Export options, API access, data portability and migration support aren’t exciting things to evaluate during a free trial, but they’ll save you weeks of pain when you eventually need to switch.
Don’t overlook this part. If a platform makes it difficult to pull out contacts, deal history, pipeline data and communication logs, you’re handing your most valuable business information to a vendor that could effectively trap you, and you won’t spot the problem until it’s already too late.
Every Tool Is Temporary
That sounds dramatic. But it’s a much healthier way to think about software when you’re running a startup, and it changes the way you set things up from day one. You’ll keep data cleaner because you know it’ll need exporting eventually. You’ll document workflows properly because someone new will need to understand them when the platform changes. And you’ll stop building your entire operation around one vendor’s quirks, because you’ve accepted that the tool serving you well right now probably won’t be the one serving you well in eighteen months.
Startups that handle transitions well planned for change from the very beginning. They picked platforms with decent APIs and clean export options, they kept their data structured, and when the time came to move, the migration took days instead of months. Getting lucky with your first platform pick is rare. Being ready to move when you outgrow it is something you can actually control.
What This Means for Your Next Software Decision
Cycling through tools in a young company isn’t a sign that someone made a bad call. It happens naturally when a business grows fast and works things out along the way. The founders who waste the most time and money are the ones who either cling to a tool long past the point where it stopped working, or who panic-switch to something new without checking whether it’ll last any longer than the last one did.
Test the export options before you test the features. Push the flexibility during the trial, not after you’ve committed. Ask about migration paths and what happens to your data if you leave. And don’t get attached to any platform just because it works right now, because what your startup needs at three months old will look nothing like what it needs at eighteen, and the only real mistake is being surprised when that day arrives.


Businesses have to make a lasting impression, and the best way to do it is by increasing their brand visibility through capturing customer interest and developing strong relationships. Branded items are a great way to raise brand awareness, like traditional advertising, social network campaigns, and digital advertising. Corporate pins are among the many options for branding because of their lightweight nature, trendiness, and suitability for branding with logos, colours, and text. This article explains how lapel pins can be used by companies in the UK to promote their business by gifting them, using them in corporate events, and branding employees and clients.
Here are ways businesses use lapel pins to increase visibility of a brand:
For Promotional Gifts
Promotional gifts are an effective tool to introduce a company to potential clients and to keep its products or services in the minds of existing ones. Custom lapel pins are excellent freebies because they are lightweight, portable, and easy to distribute during marketing campaigns. Companies can use branded pins as part of welcome kits, seasonal promotions, purchase incentives, and thank-you packages for customers. Combining lapel pins UK with other promotional products can help a business to design coordinated gift packages that increase their brand awareness.
Employee Branding & Identity
Their interactions with your employees strongly influence your clients’ perception of your company. A clear and professional brand identity throughout the workforce helps customers recognise employees and connect their appearance with the company’s values. Custom lapel pins can be used in corporate attire, uniforms for employees, and name tags. Companies can also use Lapel pins UK to celebrate years of service, distinguish departments, and recognise staff achievements, to keep visual consistency.
Corporate Events & Exhibitions
Exhibitions, trade shows, conferences, and corporate events are some of the best opportunities that companies have to grow their networking with different industry professionals and potential clients. But it’s hard to stand out from the many popular exhibitions. The importance of personalised lapel pins in the UK is very high for companies that want to differ from others with a message through a unique design. You can check out Rocketbadge to get custom-made lapel pins at affordable prices.
Special Edition Products for Special Occasions
Producing special edition products is a great way to raise awareness for the brand and create a sense of intrigue around it. These days, it is quite popular to make custom lapel pins in the UK for many worthy occasions such as milestone events or product launches.
Their uniqueness may be enough to encourage customers, staff, and event-goers to keep them as collectors. Businesses can also encourage customers to post pictures of their limited-edition products on social media to increase the campaign’s reach and visibility online.
Select Designs That Will Help Your Brand
The way promotional lapel pins in the UK are designed has much to do with how well they work. The pin needs to be attractive enough that people will want to wear it, and it needs to clearly identify the company. Businesses should be focusing on recognisable logos, consistent brand colours, clear writing, and appropriate shapes. Simplicity is often more effective, as overcomplicated designs can make it hard to see the finer details.
Conclusion
Lapel pins are a cost-effective and versatile way for companies to market their brand in several ways. They provide companies a chance to connect with the public through everyday connections, collectables, corporate event items, employee accessories, or gifts. Lapel pins in the UK can be an effective part of a bigger promotion plan, as they keep the company in people’s minds long after the end of a campaign when used properly.

The Ultimate Guide to Women’s Sandals for Style and Comfort

Essential Guide to Hire Furniture in Sydney for Stylish Home Makeovers

Publishing AI-Assisted Drafts as PDFs: A Free Markdown Workflow with iBoomto

Spinal Alignment in Kuala Lumpur: What It Involves and What It Costs

When Weeks Turn Into Months: Planning Car Hire for a Longer Stay

Top 10 Best Minicab Companies in London & Surrounding Counties

The 15 Highest-Paid Rugby Players in the World

Christopher Dare: The Untold Story of Engineer and Former Husband of Angela Rippon

How to Ensure Your Home is Valued Correctly for a Quick Sale

What Is Fanquer? The Digital Creator Platform Transforming Direct-to-Fan Engagement

Dr Jared Ross: Missouri Appeals Court Upholds Protection Order Over Graphic Torture and Murder Threats

Nancy Hallam: The Inspiring Life, Career, and Success Story Behind Ian Wright’s Wife
The 15 Highest-Paid Rugby Players in the World
Christopher Dare: The Untold Story of Engineer and Former Husband of Angela Rippon
How to Ensure Your Home is Valued Correctly for a Quick Sale
What Is Fanquer? The Digital Creator Platform Transforming Direct-to-Fan Engagement
Dr Jared Ross: Missouri Appeals Court Upholds Protection Order Over Graphic Torture and Murder Threats
Nancy Hallam: The Inspiring Life, Career, and Success Story Behind Ian Wright’s Wife
-
 Sports5 months ago
The 15 Highest-Paid Rugby Players in the World
-
Celebrity11 months ago
Christopher Dare: The Untold Story of Engineer and Former Husband of Angela Rippon
-
 Real Estate9 months ago
How to Ensure Your Home is Valued Correctly for a Quick Sale
-
 Technology5 months ago
What Is Fanquer? The Digital Creator Platform Transforming Direct-to-Fan Engagement
-
 Celebrity5 months ago
Dr Jared Ross: Missouri Appeals Court Upholds Protection Order Over Graphic Torture and Murder Threats
-
Celebrity11 months ago
Nancy Hallam: The Inspiring Life, Career, and Success Story Behind Ian Wright’s Wife
-

 Celebrity8 months ago
Who Is Azriel Crews? Inside the Life and Career of Terry Crews’ Daughter
-

 Health9 months ago
Enclomimed 25 (Enclomiphene) – Effective PCT Protocol