
Business
How to Successfully USB Print from Your Phone: A Step-by-Step Guide


Printing directly from your mobile device has become easier with modern technology, but many users still struggle to navigate the process. In this ultimate guide, you will learn how to successfully perform a usb print from your phone, allowing you to print documents and photos seamlessly. Whether you’re a student, a professional, or someone who enjoys printing cherished memories, this article will provide you with a detailed, user-friendly walkthrough.
From understanding the necessary connections and settings to troubleshooting common issues, we’ve covered all aspects of mobile printing using USB. By the end of this guide, you’ll have the confidence to connect your phone to a printer and produce high-quality prints with ease.
Understanding USB Printing
Before diving into the step-by-step process, it’s essential to grasp what USB printing involves. USB printing refers to the method of connecting a printer to your mobile device directly using a USB cable, allowing for faster and more reliable printing without the need for a wireless network.
The Basics of USB Connection
There are a few fundamental components to consider when setting up a USB print:
- USB Type: Identify whether your printer uses USB Type-A or Type-B. Most printers use Type-B, while your phone may require an OTG (On-The-Go) adapter to connect.
- Compatibility: Ensure that your printer is compatible with mobile devices. Check the manufacturer’s website or user manual for compatibility information.
- Cables and Adapters: Acquire the necessary cables and adapters. You might need a USB-C to USB-A adapter, depending on your device.
Advantages of USB Printing
USB printing offers several advantages over traditional wireless printing methods. Here are a few key benefits:
- Speed: USB connections typically allow for faster data transfer, which can reduce the time it takes to print documents and photos.
- Reliability: By eliminating the need for a wireless network, USB printing provides a stable connection, minimizing printing errors or failures due to network issues.
- Simplicity: Many people find USB printing easier to set up and troubleshoot compared to networked options that involve various configurations.
Step-by-Step Guide to USB Print from Your Phone
Now that you have a basic understanding of USB printing, let’s get into the detailed steps for printing from your phone.
Step 1: Gather the Required Items
To start, gather the following items:
- A compatible printer
- A USB cable (Type-A to Type-B typically)
- An OTG adapter if your phone has a USB-C port
- Your phone (Android or iPhone)
Step 2: Connect Your Phone to the Printer
- Power On the Printer: Make sure your printer is plugged in and powered on.
- Connect the USB Cable: Plug one end of the USB cable into the printer’s USB port and the other end into the OTG adapter (if required).
- Plug the OTG Adapter into Your Phone: Connect your OTG adapter into your phone. If you are using a traditional USB connection (like on some Android devices), you can usually connect directly.
Step 3: Install Necessary Apps
Most mobile devices require specific applications to facilitate printing. Download and install any of the following:
- Android: Google Cloud Print, PrinterShare, or the manufacturer’s specific app (e.g., Canon PRINT, HP Smart).
- iPhone: AirPrint-compatible apps or the printer manufacturer’s app.
Many printer manufacturers develop dedicated applications to enhance the functionality of their printers. These apps often come equipped with capabilities such as scanning through the printer or managing print jobs remotely, adding further value to your printing experience.
Step 4: Set Up the Printing App
- Open the App: Launch the installed printing app.
- Select Your Printer: Choose your printer from the list. If prompted, grant necessary permissions for the app to access your phone.
- Customize Print Settings: Adjust settings like paper size, orientation, and color options according to your preferences. It’s also a good idea to review the print quality settings, especially if you are printing high-resolution images.
Step 5: Print Your Document or Photo
- Select the File: Locate the file or photo you wish to print from your phone (this could be in your gallery, documents, or cloud storage).
- Choose Print Option: Tap the share icon (or print option within the app) and select the printer you’ve set up.
- Confirm and Print: Review the final print preview and hit the print button to initiate the process.
Tips for Optimizing Print Quality
To ensure the best possible print quality:
- Always use high-quality images and documents when printing photos or detailed documents.
- Regularly check and replace ink cartridges when necessary, and use the printer’s maintenance functions to keep it in optimal condition.
- Use the correct paper type for your printing needs — photo paper for photos and standard paper for documents.
Troubleshooting Common Issues
While the steps above generally work seamlessly, you may encounter issues. Here are common problems and solutions:
- Printer Not Recognized:
- Ensure that the USB cable is securely connected.
- Disconnect and reconnect your phone and the printer.
- Restart both devices.
- Print Quality Issues:
- Check for low ink levels or paper jams in the printer.
- Ensure you’ve selected the correct print settings in the app.
- App Crashes or Not Responding:
- Ensure your app is updated to the latest version.
- Restart the app or your phone.
- Limited Print Functionality:
- Some mobile apps may have limitations on the file types you can print. Check the app’s FAQ for supported formats.
Additional Printing Options
While the focus of this guide is USB printing, it’s worth mentioning alternative methods to print from your phone, including:
- Wireless Printing: Utilizing Wi-Fi or Bluetooth to connect to a printer. Wireless printing offers the convenience of being able to print from anywhere in your home or office without the limitation of cables.
- Cloud Printing: Using services like Google Cloud Print allows you to print from any internet-connected device, even when you’re not physically near the printer.
Exploring More Advanced Printing Techniques
As you become more comfortable with mobile printing, you might want to explore other advanced techniques such as:
- Printing from External Cloud Services: Many print apps allow you to access documents directly from cloud services like Google Drive or Dropbox, which can streamline your printing process.
- Remote Printing: Some printers offer a feature where you can send documents to print remotely, a great option if you’re not physically near the printer but still want to prepare documents ahead of time.
Frequently Asked Questions
How do I print with a USB?
To print with a USB, connect your printer directly to your device using a USB cable and any necessary adapters. Download a printing app, select your file, and confirm the printer settings to print directly.
Can I print from a USB at CVS?
Yes, CVS offers printing services where you can print photos and documents from a USB drive at their photo kiosks.
Can I print from USB at Walgreens?
Yes, Walgreens provides the option to print from USB at their in-store photo centers, allowing you to access and print images conveniently.
Can I print from my phone with USB?
Absolutely! By connecting your phone to a printer using a USB cable and appropriate apps, you can easily print documents and photos directly from your mobile device.
Conclusion
USB printing from your phone can be straightforward and efficient when you know the right steps to follow. By completing the designated steps outlined in this guide, you’ll be able to produce the prints you need without hassle. Whether for work, study, or personal projects, mastering the usb print process can significantly enhance your printing experience. Embrace the convenience of mobile printing and enjoy high-quality results from the comfort of your home or office. As technology continues to evolve, staying informed about the latest printing methods and devices will ensure that you remain ahead of the curve in your printing endeavors.



Meetings help teams solve problems, make decisions, and coordinate work. But important details can disappear when nobody records them. Employees may leave with different interpretations, forget commitments, or ask colleagues to repeat what happened.
An online meeting notetaker for business helps preserve key points, decisions, and follow-up tasks. These tools support collaboration across distributed workplaces, while reliable documentation also matters when employees meet customers or colleagues in person.
1. Keeps Employees Focused on the Discussion
Taking notes while participating is difficult. Employees must listen, ask questions, interpret information, and write key points at once. Too much focus on typing can make them miss concerns or hesitate to contribute.
A notetaker reduces this divided attention by creating a transcript or summary for later review. Participants can engage more fully during customer discussions, planning sessions, and collaborative meetings. It supports active listening rather than replacing it.
2. Creates a Consistent Record of Decisions
People can remember the same discussion differently. One employee may recall an agreed deadline, while another remembers only a possible date. These gaps create confusion once work begins.
A structured record separates confirmed decisions from suggestions and open questions. Teams can review what they approved and which issues still need attention. A common summary format also helps employees locate decisions and understand project history across departments.
3. Makes Follow-Up Faster and Clearer
A productive meeting should lead to action, but employees often spend time organizing notes and identifying tasks afterward. Delays can weaken commitments.
Automated summaries provide a starting point. A reviewer can confirm details, assign responsibilities, and share the record while the conversation remains fresh.
Useful meeting outputs often include:
- Action items: The task each participant agreed to complete.
- Owners and deadlines: The person responsible and the expected completion date.
- Decisions: The choices the group confirmed during the discussion.
- Open questions: Issues that need more information or another decision.
Clear follow-up helps employees understand what happens next instead of relying on memory or scattered messages.
4. Helps Absent Employees Catch Up
Modern teams rarely share one location or schedule. Employees may miss meetings because of time zones, customer commitments, leave, or urgent work. Without a record, they may need a colleague to explain the discussion or watch a full recording.
A concise summary helps absent employees catch up on topics, decisions, and responsibilities. A transcript can provide more detail when needed. This reduces repeated explanations and keeps projects moving when stakeholders cannot attend.
5. Improves Collaboration Across Departments
Projects often involve sales, operations, finance, product, support, and leadership. Each group has different priorities, so a shared record gives everyone the same account of the discussion.
For example, a product team may investigate a feature request while customer support gathers examples. A summary records both responsibilities and how the tasks connect. It also supports handoffs when another employee takes ownership, preserving context without restarting earlier conversations.
6. Makes Organizational Knowledge Easier to Find
Important information often remains buried in notebooks, chats, emails, or employees’ memories. When similar issues return, teams may repeat research because they cannot find the original discussion.
Searchable transcripts and summaries help employees retrieve a project name, customer requirement, decision, or recurring issue without asking several colleagues. Organized records can also support onboarding by helping new employees understand project background and previous decisions. Teams should label records clearly and distinguish official guidance from informal comments.
7. Supports Better Accountability and Project Visibility
When a record identifies tasks and owners, teams can check progress, revisit unresolved issues, and spot blockers before they affect a project.
This shared reference supports regular check-ins without requiring managers to monitor every conversation. Employees can update changed priorities so everyone understands the current plan. Customer-facing colleagues can also review previous requirements and commitments before a later discussion.
Choosing a Notetaker That Fits the Team
The benefits depend on choosing a tool that suits the organization’s meeting habits and information policies. Consider what details employees need and where notes should go.
Check for readable transcripts, useful summaries, speaker labels, and action items. Test different accents, speaking speeds, background noise, and industry terminology. If employees meet customers in person, check whether the tool supports those conversations too.
Privacy matters. Records may contain customer details, employee information, or confidential plans. Set rules for notification, consent, access, storage, retention, and deletion. Follow applicable laws and internal policies.
Finally, make the review simple. Assign someone to verify decisions, names, figures, and deadlines before sharing notes as an official record. An inaccurate summary can create more confusion than no summary at all.
Before making a decision, involve employees who will use the notes every day. Ask which details they need after a meeting and what currently slows their follow-up. A team that manages complex projects may value searchable transcripts, while a field team may need a simple way to capture conversations away from a desk. Run a short trial with representative meetings and collect feedback from attendees. Measure whether employees can find decisions faster, complete follow-ups more consistently, and avoid repeat discussions. These practical checks help distinguish a useful workflow improvement from another tool that adds work.
Teams exploring how connected workflows coordinate information and tasks can also read about AI agent orchestration across business workflows. The central principle is to make useful information available where employees can act on it, rather than leaving it isolated in a document.
Making Meeting Documentation Part of Everyday Work
An online meeting notetaker delivers value when teams build it into a sensible process. Organizers should set an agenda and identify the decisions needed. Participants should clarify responsibilities, and a reviewer should correct the generated record.
Not every conversation needs detailed documentation. A brief catch-up may need only action points, while a project review may require a fuller record. Choose the right level of capture and avoid recording sensitive discussions without a clear purpose and proper consent.
When employees trust the record, they spend less time reconstructing conversations and more time completing work. Clear decisions, shared context, and visible responsibilities strengthen collaboration.
Frequently Asked Questions
1. What is an online meeting notetaker?
An online meeting notetaker is a tool that captures meeting conversations and turns them into written records. Depending on its capabilities, it may create transcripts, summaries, speaker labels, decisions, and action items that participants can review after the meeting.
2. How does a meeting notetaker help remote teams?
It gives remote employees a shared record of discussions, decisions, and responsibilities. Team members who cannot attend can review the summary, while participants in different locations can refer to the same information and reduce misunderstandings.
3. Can an online meeting notetaker identify action items?
Many tools can identify potential tasks, owners, and deadlines from a conversation. However, participants should verify the extracted details before treating them as confirmed commitments, especially when speakers discuss options or tentative plans.
4. Are meeting transcripts safe to share?
That depends on the information captured and the organization’s privacy controls. Businesses should limit access to authorized people, follow consent and notification requirements, set retention rules, and remove records when policy or law requires it.

You know that feeling when you see a specific shade of red and immediately think of Coca-Cola? That’s brand identity doing its job. And if you’ve ever asked yourself “what is brand identity,” you’re already thinking like someone who takes their business seriously.
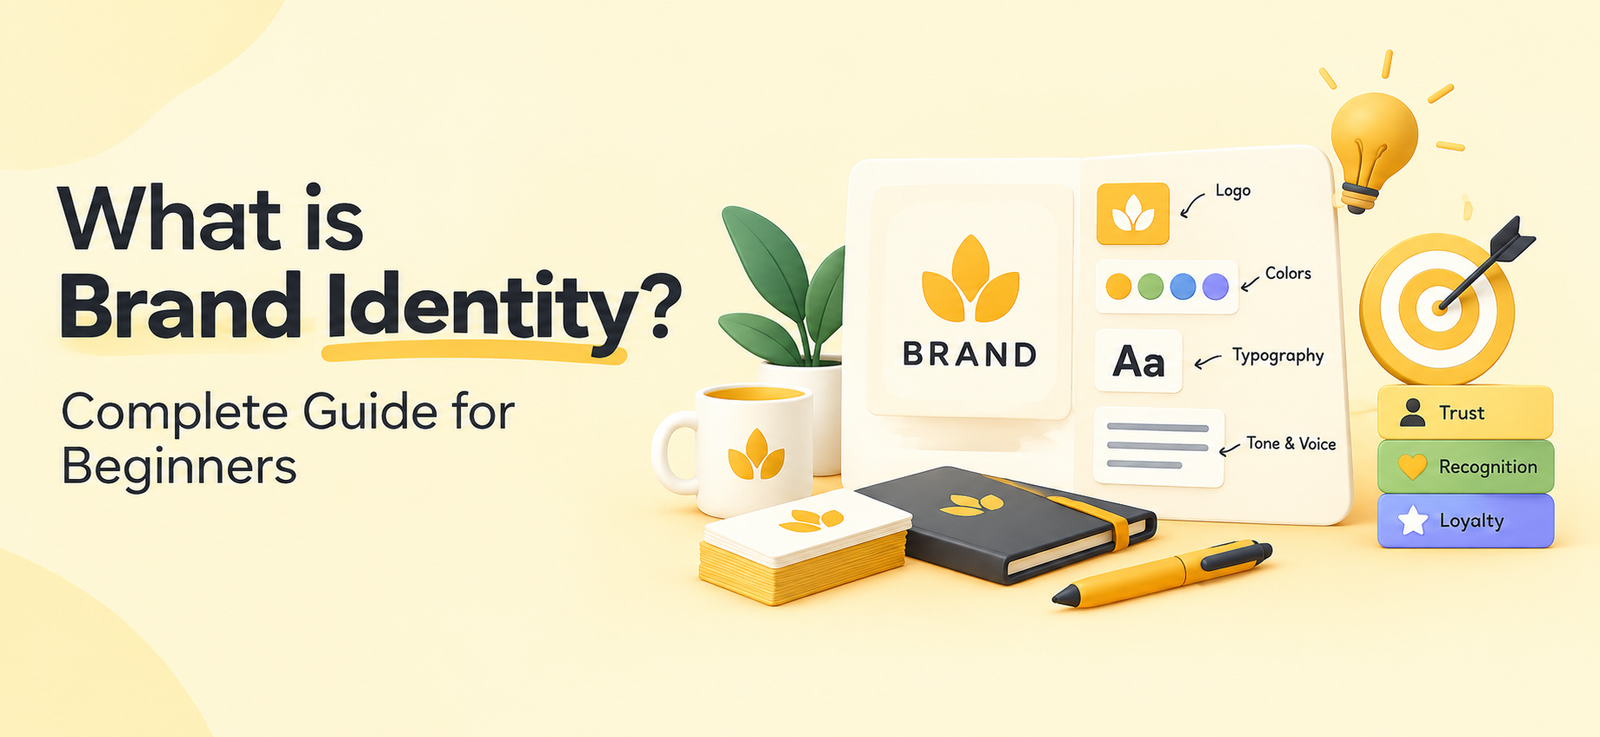
Here’s the thing. Brand identity isn’t your logo. It’s not your color palette. It’s not even your tagline. It’s the complete system of visual, verbal, and emotional signals your brand puts out into the world. It’s how people recognize you, remember you, and (ideally) choose you over the competition.
If you’re building a brand from scratch or rethinking your company branding, the smartest move is getting the identity right before you spend a single dollar on ads. A team that specializes in Creative Services can speed that up considerably, but let’s first make sure you understand what you’re building.
What is Brand Identity vs. Brand Image?
People mix these up all the time. Brand identity is what you put out. Brand image is what people take away.
Think of it this way. You choose your outfit in the morning (identity). But other people form their own opinion about how you look (image). You control one. You influence the other.
Your brand identity includes your logo, typography, colors, photography style, tone of voice, and messaging framework. Brand image lives in customer perception, reviews, word of mouth, and gut feelings.
The goal? Make your identity so clear and consistent that the image people form matches exactly what you intended.
Quick summary: Brand identity is the collection of visual and verbal elements a company creates to present itself. Brand image is how the audience actually perceives the brand. One is designed. The other is earned.
How to Create a Brand Identity That Actually Sticks
So how do you go from a blank canvas to a brand people recognize? Let’s break it down.
Start with Strategy, Not Design
Most beginners jump straight into designing a logo. That’s backwards.
Before you touch a single font or color swatch, answer these questions:
- Who exactly is your audience?
- What problem do you solve better than anyone?
- What do you want people to feel when they interact with your brand?
- Who are your top three competitors, and how do they position themselves?
Your answers become the foundation for everything that follows. Skip this step, and you’ll end up redesigning everything six months later.
Build Your Visual System
This is where most people think branding design starts (and ends). But it’s really just one layer. Your visual system typically includes:
- Logo and logo variations (wordmark, icon, horizontal, stacked)
- Color palette (primary, secondary, accent colors with hex codes)
- Typography (headline fonts, body fonts, size hierarchy)
- Photography and illustration style
- Iconography and graphic elements
Every piece should feel like it belongs to the same family. If your logo says “modern and minimal” but your Instagram posts look like a 2009 Myspace page, something’s off.
Note: When designing a brand identity, consistency beats creativity. A simple, repeatable system will always outperform a flashy one-off design that can’t scale across channels.
Define Your Voice and Messaging
Visual identity gets all the attention. But how you sound matters just as much.
Your brand voice is the personality behind the words. Are you witty and informal? Authoritative and polished? Friendly and educational? Pick a lane and stay in it.
Then build a messaging framework:
- Tagline or brand promise (one sentence that captures your value)
- Elevator pitch (30 seconds, clear and compelling)
- Key messages (3-5 points you want every piece of content to reinforce)
- Tone guidelines (how your voice shifts across contexts, like social vs. email vs. sales decks)
This is what separates forgettable company branding from brands that feel like they have a real personality.
Good Brand Identity Examples Worth Studying
You don’t have to look far for inspiration. Here are a few brands that absolutely nail it.
Mailchimp went all in on quirky illustrations, a banana-yellow palette, and a playful voice. Every touchpoint feels unmistakably Mailchimp, from their landing pages to their error messages.
Stripe took the opposite route. Clean, developer-focused, with gradient-heavy visuals and precise, no-fluff copy. Their identity signals “we’re built for serious builders.”
Notion found a sweet spot between minimal and warm. Simple black-and-white design with hand-drawn illustrations that make a productivity tool feel approachable.
What do all three have in common? Consistency. You could strip the logos off their websites, and you’d still know who they are. That’s the benchmark.
Mistakes to Avoid When Developing a Brand Identity
Beginners tend to fall into the same traps. Dodge these:
- Copying competitors. Getting inspired is fine. Cloning someone else’s look means you’ll always be the knockoff version.
- Designing by committee. Too many opinions water everything down. Set a clear decision-maker early.
- Ignoring your audience. Your brand identity is for your customers, not for you. Test it with real people before you commit.
- Skipping brand guidelines. If your team doesn’t have a documented guide, your brand will drift within months. Every freelancer, new hire, and agency partner needs the same playbook.
- Chasing trends. A gradient logo might look fresh now, but will it hold up in three years? Build for longevity.
Important: A brand identity isn’t a one-time project. It’s a living system. Plan to revisit and refine it at least annually as your company and market evolve.
FAQs
1. What is brand identity in simple terms?
Brand identity is the set of visual and verbal elements a business uses to present itself to the world. It includes your logo, colors, fonts, voice, and messaging. Together, they shape how people recognize and remember your brand across every channel.
2. How long does it take to design a brand identity?
For most small to mid-size businesses, developing a brand identity takes four to eight weeks. That covers research, strategy, visual design, and documentation. Rushing the process usually leads to rework, so it’s worth taking the time to get it right.
3. Can a small business build a strong brand identity on a budget?
Absolutely. Start with the basics: a clean logo, a two-to-three color palette, one or two fonts, and a clear brand voice. You don’t need a massive budget. You need clarity and consistency across the few channels you actually use.
4. When should a company rebrand or refresh its identity?
Consider a refresh when your brand no longer reflects what you do, when you’re entering new markets, or when your visual system feels dated compared to competitors. A full rebrand makes sense after a merger, a major pivot, or when customer perception has drifted significantly from your intended positioning.


For many homeowners and landlords in London, the boiler is something that rarely gets much attention, until it stops working.
It’s easy to assume that if your heating and hot water are functioning normally, everything must be fine. However, boilers can develop hidden problems long before they show obvious signs of failure. Ignoring regular maintenance may save a small amount of money in the short term, but it can lead to expensive repairs, higher energy bills and even safety risks down the line.
A boiler is one of the most important systems in any property. It provides heating during the colder months and supplies hot water throughout the year. Keeping it in good condition is essential for comfort, efficiency and safety.
In this guide, we’ll explain why boiler servicing is so important, what happens during a service and how skipping maintenance could end up costing you thousands of pounds.
Let’s get started.
Understanding Boiler Servicing
A boiler service is a professional inspection and maintenance check carried out by a qualified Gas Safe registered engineer.
During the service, the engineer examines the boiler’s key components to ensure everything is operating safely and efficiently. They will also identify any developing issues before they become major problems.
A standard boiler service typically includes:
- Visual inspection of the boiler and pipework
- Checking for leaks and corrosion
- Testing safety devices
- Inspecting internal components
- Checking gas pressure
- Cleaning essential parts if required
- Ensuring proper ventilation
- Testing flue performance
- Confirming the boiler is operating safely
The process usually takes between 30 minutes and an hour, depending on the type and condition of the boiler.
Why Do Many Homeowners Skip Boiler Servicing?
Despite the benefits, many property owners postpone servicing because:
- The boiler appears to be working normally
- They want to save money
- They forget to book an appointment
- They underestimate the importance of maintenance
- They believe newer boilers don’t need servicing
Unfortunately, these assumptions can be costly.
Many serious boiler faults begin as small issues that could have been identified during a routine service. Left untreated, these problems often develop into expensive repairs or complete boiler breakdowns.
The Hidden Costs of Skipping Boiler Servicing
Some people view annual servicing as an unnecessary expense. In reality, neglecting maintenance can lead to far greater costs.
Expensive Emergency Repairs
A minor fault that might cost very little to fix during a service can quickly become a major repair if ignored. Components such as pumps, fans, heat exchangers, and valves can become damaged when small issues are left unresolved. Emergency repair callouts often cost significantly more than preventative maintenance.
Complete Boiler Replacement
One of the biggest financial risks of neglecting servicing is premature boiler failure. A replacement boiler installation can cost several thousand pounds, particularly when installation work, controls, and system upgrades are included. Regular servicing helps extend the lifespan of your boiler and reduce the likelihood of unexpected replacement costs.
Higher Energy Bills
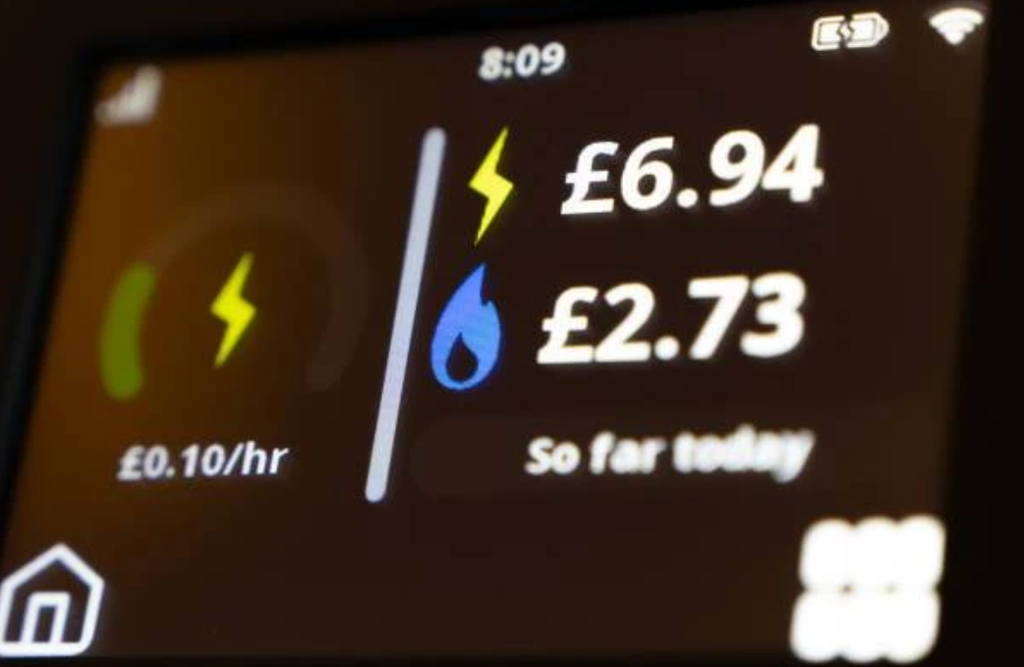
A poorly maintained boiler often works harder to produce the same level of heating and hot water. As efficiency decreases, energy consumption increases. Even a relatively small drop in efficiency can have a noticeable impact on annual heating costs, especially given rising energy prices.
Loss of Manufacturer Warranty
Many boiler manufacturers require annual servicing to keep warranties valid. Missing a scheduled service could result in warranty protection being withdrawn. If a major fault develops later, you may be responsible for the full repair or replacement cost.
Boiler Servicing Improves Energy Efficiency
Energy efficiency is becoming increasingly important for London homeowners looking to manage household costs.

Over time, dirt, debris and wear can reduce a boiler’s performance.
Regular servicing helps ensure that:
- Components operate efficiently
- Fuel is burned correctly
- Heat transfer remains effective
- System pressure stays within recommended levels
An efficient boiler uses less energy, helping to reduce monthly utility bills while maintaining comfort throughout the home.
Safety Should Never Be Overlooked
Beyond financial considerations, boiler servicing plays a crucial role in protecting household safety.
Gas appliances must be maintained correctly to operate safely.
Carbon Monoxide Risks
Carbon monoxide is a colourless, odourless gas that can be extremely dangerous.
Faulty boilers have the potential to produce carbon monoxide if combustion processes are compromised. During a service, engineers check that the boiler is burning fuel correctly and that harmful gases are safely expelled through the flue system.
Gas Leaks
Servicing can help identify small leaks or faults before they become serious safety concerns.
Ventilation Issues
Adequate ventilation is essential for safe boiler operation. An engineer will ensure that air supply and flue arrangements remain compliant and effective.
Why Boiler Servicing Is Important for Landlords
Landlords have additional responsibilities when it comes to gas safety.
In the UK, landlords must arrange annual gas safety inspections for rented properties containing gas appliances.
Regular boiler servicing can help:
- Maintain compliance
- Reduce the likelihood of tenant complaints
- Prevent unexpected breakdowns
- Protect rental income
- Improve tenant satisfaction
A boiler failure during winter can create significant disruption for tenants and often results in urgent repair costs for landlords.
Common Problems Found During Boiler Services
Many faults identified during servicing develop gradually and may not initially affect performance.

Common issues include:
- Worn seals
- Corroded components
- Low pressure problems
- Blocked condensate pipes
- Faulty thermostats
- Damaged heat exchangers
- Ignition issues
- Minor gas leaks
Identifying these problems early often results in quicker and more affordable repairs.
How Often Should a Boiler Be Serviced?
Most manufacturers and heating professionals recommend servicing a boiler once every year.
Annual servicing helps:
- Maintain efficiency
- Support warranty requirements
- Improve reliability
- Extend boiler lifespan
- Reduce safety risks
The best time to arrange a service is usually during the warmer months before winter demand increases.
This helps ensure your heating system is ready when temperatures begin to drop.
Signs Your Boiler May Need Immediate Attention
Even if a service is already scheduled, certain warning signs should never be ignored.
Contact a qualified engineer if you notice:
- Unusual noises
- Reduced heating performance
- Inconsistent hot water
- Frequent pressure loss
- Error codes
- Strange smells
- Pilot light issues
- Unexpected increases in energy bills
These symptoms may indicate underlying problems that require prompt investigation.
Choosing a Professional Boiler Service in London
Not all heating engineers provide the same level of service.
When selecting a provider, consider:
- Gas Safe registration
- Experience with your boiler type
- Positive customer reviews
- Transparent pricing
- Comprehensive inspections
- Emergency support availability
A reputable engineer will thoroughly inspect the system and provide clear recommendations if any issues are identified.
Final Words
A boiler is a major investment and like any important system, it requires regular maintenance to perform at its best.
Skipping annual servicing may seem like a way to save money, but the reality is often the opposite. Higher energy bills, unexpected repairs, invalid warranties and premature replacement costs can quickly add up.
Regular servicing helps keep your boiler safe, efficient, and reliable while reducing the likelihood of expensive problems in the future.
For homeowners and landlords across London, investing in annual boiler servicing is one of the simplest and most cost-effective ways to protect both your property and your finances.

7 Benefits of Using an Online Meeting Notetaker for Modern Business Teams

All I Need in This Life of Syn – Syna World, Central Cee und Streetwear-Kultur

The Metadata and Cataloging Layer Most Enterprises Forget When Preparing Data for AI

How to Make Your Paycheck Go Further in 2027: 5 Easy Steps

How to Get the Most Out of a London Event Venue Site Visit

How to get a better shower without a full bathroom renovation

How to Ensure Your Home is Valued Correctly for a Quick Sale

Christopher Dare: The Untold Story of Engineer and Former Husband of Angela Rippon

The 15 Highest-Paid Rugby Players in the World

What Is Fanquer? The Digital Creator Platform Transforming Direct-to-Fan Engagement

Dr Jared Ross: Missouri Appeals Court Upholds Protection Order Over Graphic Torture and Murder Threats

Who Is Azriel Crews? Inside the Life and Career of Terry Crews’ Daughter
How to Ensure Your Home is Valued Correctly for a Quick Sale
Christopher Dare: The Untold Story of Engineer and Former Husband of Angela Rippon
The 15 Highest-Paid Rugby Players in the World
What Is Fanquer? The Digital Creator Platform Transforming Direct-to-Fan Engagement
Dr Jared Ross: Missouri Appeals Court Upholds Protection Order Over Graphic Torture and Murder Threats
Who Is Azriel Crews? Inside the Life and Career of Terry Crews’ Daughter
-
 Real Estate10 months ago
How to Ensure Your Home is Valued Correctly for a Quick Sale
-
Celebrity12 months ago
Christopher Dare: The Untold Story of Engineer and Former Husband of Angela Rippon
-
 Sports6 months ago
The 15 Highest-Paid Rugby Players in the World
-
 Technology6 months ago
What Is Fanquer? The Digital Creator Platform Transforming Direct-to-Fan Engagement
-
 Celebrity6 months ago
Dr Jared Ross: Missouri Appeals Court Upholds Protection Order Over Graphic Torture and Murder Threats
-
 Celebrity9 months ago
Who Is Azriel Crews? Inside the Life and Career of Terry Crews’ Daughter
-
 Celebrity1 year ago
Nancy Hallam: The Inspiring Life, Career, and Success Story Behind Ian Wright’s Wife
-
 Celebrity1 year ago
Who Is Maisie Mae Roffey? The Private Life, Family Story, and Quiet Success of Julie Walters’ Daughter