
Business
How to Choose a Low Profile Antenna for GPS, LTE, and Multi-Band Applications: A No-Nonsense US Buyer’s Guide


Antenna selection rarely gets the attention it deserves until something goes wrong. A fleet vehicle loses reliable positioning data mid-route. A fixed industrial asset drops its cellular connection in a metal-heavy environment. A portable device designed for multi-band use performs inconsistently across regions. In each case, the antenna was treated as an afterthought rather than a core component of the system design.
For engineers, procurement specialists, and systems integrators working across transportation, utilities, defense adjacent applications, and connected infrastructure, the physical form of an antenna carries real operational weight. Low profile antennas, in particular, occupy a specific and increasingly important role in modern deployments — not because they are compact, but because their design constraints directly affect how they perform in demanding environments. Choosing the right one requires understanding what trade-offs you are actually making, and why those trade-offs matter to your specific application.
What Low Profile Antennas Actually Are and Why Form Factor Is Not Just About Size
A low profile antenna is one that has been engineered to minimize physical height above a mounting surface while still maintaining functional radio frequency performance across its intended band or bands. This is not simply a matter of making something smaller. Antenna performance is deeply connected to geometry — the shape, volume, and relationship of radiating elements to a ground plane all affect gain, radiation pattern, and bandwidth. When height is reduced, engineers must compensate through other design decisions, and those decisions have real consequences for how the antenna behaves in the field.
For buyers evaluating options, the Low Profile Antennas guide provides a structured look at how different antenna designs address the tension between form factor and performance across specific frequency applications including GPS, LTE, and multi-band configurations. Understanding this tension is the starting point for any informed purchasing decision.
What distinguishes a well-engineered low profile antenna from a poor one is not always visible in a specification sheet. It shows up in how consistently the antenna performs across installation environments, how resistant it is to detuning caused by nearby metal surfaces, and whether the radiation pattern remains stable under the physical conditions of actual deployment.
The Relationship Between Height Reduction and Ground Plane Dependency
Most low profile antennas rely on the mounting surface — typically a metal panel or vehicle body — as part of the antenna system itself. This ground plane forms the electrical counterpart to the radiating element, and its size and quality directly influence the antenna’s efficiency and pattern. When an antenna is installed on a surface that is too small, poorly grounded, or inconsistently metallic, the real-world performance will deviate significantly from what was measured in a controlled test environment.
This matters especially in retrofitted installations, where the ideal mounting location may not always be available. A system integrator choosing between two antennas with similar specifications should always consider where and how the antenna will be mounted in the field — not just what the data sheet describes in an anechoic chamber.
GPS Applications: What Accuracy Demands and What the Antenna Must Deliver
GPS reception is one of the more exacting use cases for low profile antennas. The signals arriving from GPS satellites are extremely weak by the time they reach ground level, and any inefficiency in the receiving antenna compounds the challenge. For GPS to perform reliably — whether in vehicle tracking, precision agriculture, survey-grade positioning, or timing applications — the antenna must receive signals from a wide arc of sky, reject interference from below the horizon, and do so consistently across temperature changes, vibration, and moisture.
Active Versus Passive GPS Elements in Low Profile Designs
GPS antennas in low profile form factors are typically active, meaning they incorporate a low-noise amplifier within the antenna housing. This amplification compensates for the signal losses introduced by cable runs between the antenna and the receiver. The gain of this amplifier, and the noise figure it introduces, will determine how well the system performs when satellite geometry is poor or when the antenna is partially obstructed — such as when a vehicle is near buildings or under elevated structures.
Passive GPS antennas are available in low profile configurations and are appropriate for applications where the cable run is short and the installation environment is relatively open. Using a passive antenna in a long-cable or obstructed environment, however, results in degraded acquisition performance that can appear intermittent and is difficult to diagnose after installation.
Multipath and Antenna Placement in GPS Systems
Multipath interference occurs when GPS signals reflect off surrounding surfaces and arrive at the antenna from multiple directions. In urban canyons, near large metal structures, or inside vehicles with complex roof geometry, multipath can cause positioning errors that appear random. The antenna’s ability to reject circularly polarized signals arriving at low elevation angles — a characteristic called axial ratio — plays a significant role in how well it handles multipath. Low profile antennas that compromise on axial ratio to achieve a flatter form factor will perform worse in these environments than taller designs with better polarization purity.
LTE Cellular Antennas: Consistency Across Bands and Environments
LTE connectivity has become infrastructure in a practical sense. Fleet management systems, remote monitoring devices, industrial controllers, and public safety communications all depend on cellular connectivity that remains stable across a wide range of physical environments. For low profile LTE antennas deployed on vehicles, enclosures, or fixed outdoor assets, the challenge is not just coverage — it is consistency of performance across the frequency bands used by US carriers, many of which span a broad range from low-band to mid-band spectrum.
As outlined by the Federal Communications Commission in its spectrum allocation framework, US cellular operators use a diverse set of frequency assignments that vary by carrier and region. An LTE antenna installed in a fleet vehicle traveling across multiple states must perform across this entire range without requiring reconfiguration or hardware changes. Antennas that are optimized for a narrow frequency range will show real performance degradation when the device connects to a band outside that range — a problem that often appears as reduced throughput or increased latency rather than a clean signal loss.
MIMO Configurations in Low Profile LTE Designs
Modern LTE systems frequently use multiple-input multiple-output antenna configurations to improve throughput and link reliability. In a MIMO setup, two or more antenna elements receive signals simultaneously, and the receiver combines these signals to improve overall performance. Implementing MIMO in a low profile antenna requires careful spatial separation and isolation between elements — two factors that become more difficult to achieve as the physical footprint shrinks.
Buyers evaluating low profile LTE antennas for MIMO applications should pay close attention to the isolation specification between antenna ports. Poor isolation means the two antenna paths interfere with each other, effectively reducing the benefit of MIMO and sometimes performing worse than a single well-designed antenna would. This is a common point of failure in low-cost low profile designs that prioritize visual compactness over electrical engineering discipline.
Multi-Band Antennas: When One Antenna Must Do Several Jobs
The demand for single-antenna solutions that cover GPS, LTE, Wi-Fi, GNSS, and sometimes additional bands like DSRC or FirstNet has grown steadily as connected devices have become more complex. Multi-band low profile antennas offer real installation and cost advantages — fewer penetrations through a vehicle roof, simplified cabling, and reduced maintenance complexity. However, they introduce engineering challenges that buyers need to understand before selecting them.
Trade-Offs in Combining Multiple Band Functions
When multiple antenna functions are combined into a single low profile housing, each radiating element must be designed to avoid influencing the others. GPS elements are particularly sensitive to desensitization from nearby LTE transmit elements, since GPS operates at receive-only frequencies that are close to some LTE transmit bands in the US spectrum plan. A multi-band antenna that does not adequately isolate its GPS path from its cellular transmit path can exhibit significant GPS performance degradation when LTE data is being actively transmitted.
This is not a theoretical concern. It has been documented in field deployments across transportation and public safety applications, and it is the reason that reputable manufacturers publish isolation figures between antenna ports as a standard part of their multi-band product specifications. Buyers who receive multi-band antenna proposals without isolation data between ports should treat that absence as a risk indicator.
Matching Multi-Band Antenna Performance to Real-World Operating Conditions
Multi-band antennas are often evaluated in lab conditions that do not reflect the installation environment. A rooftop antenna on a transit vehicle is exposed to road vibration, thermal cycling between cold winters and summer heat, pressure washing, and physical impacts. Each of these stresses can affect connector integrity, housing seal quality, and the mechanical stability of internal components. Selecting a multi-band low profile antenna based solely on its RF performance data without examining its environmental and mechanical ratings is a common procurement mistake that leads to early failures in the field.
Installation Considerations That Affect Long-Term Antenna Performance
The way an antenna is installed is often as important as which antenna is selected. Coaxial cable routing, connector quality, and mounting surface preparation all affect how the antenna performs over its operational life. Cable runs that are too long, bent too sharply, or use connectors that are not rated for the environment will introduce losses that degrade the antenna’s effective performance regardless of what the antenna itself is capable of delivering.
For permanent installations on vehicles or outdoor enclosures, the mounting surface should be clean, flat, and electrically continuous. Antennas mounted on painted or coated surfaces may exhibit detuning if the coating is thick enough to affect the ground plane relationship. In high-vibration environments, thread-locking compounds on mounting hardware and strain-relieved cable routing are practical requirements, not optional refinements.
Closing Considerations for US Buyers
Selecting a low profile antenna for GPS, LTE, or multi-band applications in the United States requires more than matching a frequency band to a product category. It requires understanding where the antenna will be installed, what environmental stresses it will face, what RF performance characteristics matter most to the application, and what can go wrong when those characteristics fall short.
The US market offers a wide range of low profile antennas at varying quality levels. The differences between them are not always visible in abbreviated specification data, and they are rarely apparent until a deployment runs into problems that take time and cost to diagnose. For procurement teams and systems integrators, the investment in understanding antenna selection at a technical level — before purchase rather than after installation — is consistently the more economical path. Operational reliability in connected systems does not begin at the software layer. It begins at the point where the device meets the signal, and that point is the antenna.


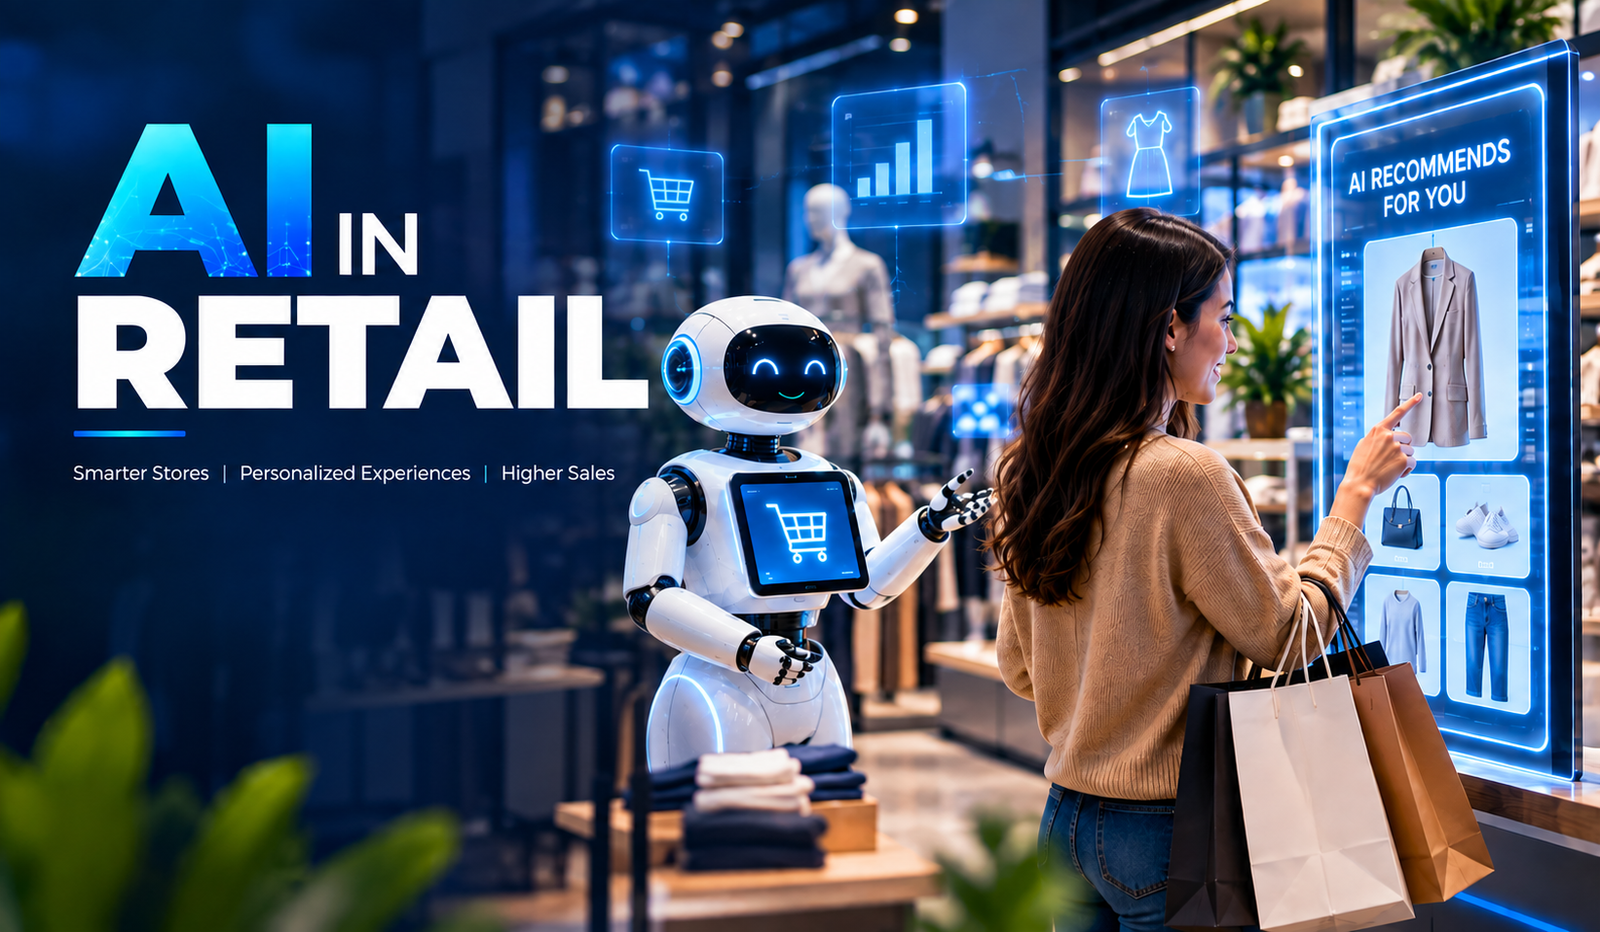
Artificial Intelligence is transforming retail by helping businesses understand customers, automate operations, and make faster, data-driven decisions. From personalized recommendations to inventory management, AI is becoming an important part of modern retail strategies.
Retailers generate large amounts of data through online purchases, physical stores, customer interactions, loyalty programs, and supply chains. AI can analyze this information to identify patterns, predict demand, and improve business processes.
As competition increases, businesses are adopting AI in Retail to create personalized experiences, optimize operations, reduce costs, and respond more effectively to changing customer expectations.
Understanding AI in Retail
AI in Retail refers to the use of artificial intelligence technologies to improve customer experiences, automate business operations, analyze retail data, and support decision-making. Retailers can use AI across different stages of the customer and operational journey.
Technologies such as Machine Learning, Natural Language Processing, Computer Vision, Generative AI, and predictive analytics can work together to create smarter retail solutions. These technologies help businesses turn large amounts of retail data into actionable insights.
Why Are Retail Businesses Adopting AI?
Retail businesses operate in a highly competitive environment where customer expectations, demand, and market trends can change quickly. Traditional processes may not always provide the speed and accuracy required to respond effectively.
AI helps retailers analyze data faster, automate repetitive activities, and identify opportunities that may be difficult to discover manually. This helps businesses improve operational efficiency while delivering more relevant customer experiences.
- Changing Customer Expectations
Customers increasingly expect personalized recommendations, quick support, convenient shopping experiences, and consistent interactions across different channels. AI helps retailers understand customer behavior and deliver more relevant experiences.
By analyzing purchase history, browsing activity, preferences, and interactions, AI systems can help businesses personalize product recommendations, promotions, and customer communications.
- Growing Retail Data
Retailers collect data from websites, mobile applications, point-of-sale systems, customer reviews, loyalty programs, and inventory systems. Managing and analyzing this information manually can be challenging.
AI can process large datasets and identify useful patterns. These insights can support decisions related to inventory, pricing, customer engagement, marketing, and sales.
- Need for Operational Efficiency
Retail businesses manage several repetitive processes, including inventory tracking, customer support, order processing, demand forecasting, and data analysis. Manual processes can consume time and increase the possibility of errors.
AI workflows automate many of these activities and help employees focus on higher-value responsibilities. This can improve productivity while supporting more consistent business operations.
Key Use Cases of AI in Retail
AI can be applied across almost every stage of the retail value chain. From customer acquisition and product discovery to inventory management and after-sales support, intelligent technologies can improve both front-end and back-end operations.
The following use cases show how retailers can use AI to build more efficient, customer-focused businesses.
- Personalized Product Recommendations
AI-powered recommendation systems analyze customer behavior, purchase history, browsing activity, and preferences to suggest relevant products. These systems can identify patterns across large customer datasets and generate personalized recommendations.
For example, an online retailer can recommend complementary products based on items a customer has viewed or purchased previously. Personalized recommendations can improve product discovery and create a more relevant shopping experience.
- AI-Powered Customer Support
Retailers can use AI chatbots and virtual assistants to handle common customer questions about products, orders, returns, delivery status, and store information. These systems can provide responses at any time without requiring continuous human intervention.
AI-powered support can also help customer service teams by summarizing conversations, identifying customer intent, and routing complex issues to the appropriate employee. This creates a more efficient support process.
- Demand Forecasting
Predicting customer demand is an important part of retail planning. AI and Machine Learning models can analyze historical sales, seasonal trends, customer behavior, promotions, and other relevant factors to estimate future demand.
Accurate forecasting can help retailers maintain appropriate inventory levels and reduce the risk of overstocking or stock shortages. It can also support purchasing and supply chain planning.
- Inventory Management
AI can help retailers monitor inventory levels and identify products that require replenishment. By analyzing sales patterns and demand forecasts, intelligent systems can recommend inventory plans.
Retailers can also use AI to identify slow-moving products and optimize stock allocation between different stores or warehouses. This can improve inventory utilization and reduce unnecessary storage costs.
- Fraud Detection
Retail transactions can involve risks such as payment fraud, account abuse, and suspicious purchasing patterns. Machine Learning models can analyze transaction behavior and identify unusual activities.
AI-powered fraud detection systems can flag potentially suspicious transactions for further review. This helps retailers strengthen transaction monitoring while reducing reliance on manual analysis.
- Customer Sentiment Analysis
AI can analyze customer reviews, surveys, social media comments, and support conversations to identify customer sentiment. Natural Language Processing helps classify feedback as positive, negative, or neutral and identify recurring themes.
Retailers can use these insights to understand customer satisfaction, identify product issues, and improve services. Sentiment analysis can also help businesses track changes in customer perception over time.
- Supply Chain Optimization
AI can analyze supply chain data to identify potential delays, demand changes, inventory issues, and transportation patterns. Retailers can use these insights to improve logistics planning and resource allocation.
Predictive analytics can also help businesses anticipate potential disruptions and evaluate alternative supply chain strategies. This can improve visibility across complex retail operations.
Benefits of AI in Retail
AI can benefit retailers across customer experience, operations, analytics, and decision-making. The value depends on how effectively AI solutions are integrated into existing business processes and supported by quality data.
- Improved Customer Experience
AI helps retailers understand individual customer preferences and deliver more personalized interactions. Recommendations, intelligent search, and automated support can make shopping more convenient.
- Better Decision-Making
AI can process large volumes of retail data and identify patterns that support business decisions. Retailers can use these insights for pricing, inventory, marketing, sales, and demand planning.
- Increased Operational Efficiency
Automating repetitive tasks can reduce manual workload and let employees focus on more strategic work. AI can support inventory management, customer service, data analysis, and other operational processes.
- Reduced Operational Costs
AI can help identify inefficiencies, optimize inventory, automate workflows, and improve resource utilization. When implemented effectively, these improvements can support better cost management.
- Improved Demand Planning
AI-powered forecasting can help retailers better understand future demand and plan inventory accordingly. This can reduce unnecessary stock while helping businesses respond to changing customer demand.
- Enhanced Marketing Personalization
Retailers can use AI to analyze customer behavior and create more targeted campaigns. Personalized recommendations, offers, and messaging can make marketing efforts more relevant to individual customers.
Challenges of Implementing AI in Retail
While AI offers several opportunities, retailers need to address technical, operational, and security challenges before deploying AI solutions at scale.
- Data Quality and Availability
AI systems depend on reliable data. Incomplete, inconsistent, outdated, or poorly structured information can reduce AI model accuracy and lead to unreliable insights.
Retailers should establish strong data management practices and ensure that relevant information is collected, cleaned, and organized before using it for AI applications.
- Data Privacy
Retailers often handle sensitive customer information, including purchase history, contact details, payment-related information, and behavioral data. Improper handling can create privacy and compliance risks.
Businesses should implement appropriate security controls, access management, encryption, and data governance practices.
- Integration With Existing Systems
Retailers often rely on multiple systems, including POS platforms, eCommerce applications, CRM systems, ERP solutions, inventory platforms, and payment systems.
Integrating AI with these existing technologies can require APIs, data pipelines, middleware, and application modernization. Proper integration planning is essential for reliable AI performance.
- Lack of Technical Expertise
Developing and maintaining AI solutions requires skills in data science, Machine Learning, software development, cloud computing, and AI governance.
Businesses without these capabilities may need to invest in training, hiring, or partnerships with experienced AI development providers.
- Implementation Costs
Building customized AI solutions can require investment in data infrastructure, cloud resources, development, integration, testing, and ongoing maintenance.
Retailers should clearly define business objectives and prioritize high-value use cases before making large AI investments.
How to Implement AI in Retail
Successful AI adoption requires a structured approach rather than implementing technology without a defined business objective. Retailers should start by identifying specific challenges where AI can provide measurable value.
- Identify the Business Use Case
Businesses should identify operational or customer-related problems that AI could address. Common starting points include demand forecasting, personalized recommendations, customer support, inventory management, and fraud detection.
- Prepare the Data
Collect, clean, organize, and secure relevant data before model development. Businesses should identify data sources and establish processes for maintaining data quality.
- Select the Right AI Technology
Different use cases require different technologies. Machine Learning may suit forecasting, Computer Vision for image-based applications, and Natural Language Processing for customer communication.
- Develop and Test the Solution
Develop and test AI solutions using relevant datasets and realistic business scenarios. Testing should evaluate accuracy, performance, security, usability, and integration.
- Deploy and Monitor
After deployment, businesses should continuously monitor model performance and system behavior. Regular monitoring helps identify accuracy issues, changing data patterns, and technical problems.
- Optimize Over Time
AI systems should be continuously improved as new data and business requirements emerge. Regular optimization helps maintain performance and ensures the solution continues to deliver business value.
Future of AI in Retail
The future of retail AI will increasingly involve intelligent assistants, generative AI, computer vision, predictive analytics, and autonomous workflows. Retailers may use AI to connect customer interactions, inventory, marketing, supply chains, and operational systems.
AI-powered shopping assistants can make product discovery more conversational, while advanced analytics can provide deeper insights into customer behavior and demand. As AI technology develops, responsible data usage, security, transparency, and human oversight will remain important.
How BigDataCentric Helps Businesses Leverage AI in Retail?
BigDataCentric helps businesses develop customized AI solutions designed around their operational and customer experience requirements. Its AI capabilities can support Machine Learning, predictive analytics, intelligent automation, recommendation systems, chatbots, and AI integration.
From identifying suitable AI use cases to developing, integrating, and optimizing intelligent applications, BigDataCentric can help retailers build technology solutions that support efficiency, personalization, and data-driven decision-making.
Conclusion
AI is changing the retail industry by helping businesses automate processes, understand customers, improve forecasting, and make data-driven decisions. From personalized recommendations and intelligent customer support to inventory management and fraud detection, AI can be applied across the retail ecosystem.
For retailers, successful AI adoption strategies depend on choosing relevant use cases, maintaining quality data, integrating solutions effectively, and continuously monitoring performance. With the right strategy and technology expertise, AI can become an important part of a modern retail business.

Business communication has changed dramatically over the past decade. Teams no longer depend entirely on desk phones, physical offices, or traditional telephone networks to stay connected. Employees work from different cities, customer support teams operate across time zones, and businesses increasingly expect communication tools to work alongside the digital applications they already use. In this environment, VoIP technology has become an important part of how modern organizations handle voice communication.
Voice over Internet Protocol, commonly known as VoIP, allows voice calls to travel over internet networks rather than traditional telephone infrastructure. That simple change opens the door to a much more flexible communication environment. Businesses can connect employees, customers, sales teams, support agents, and distributed teams through software-based phone systems accessible from computers, smartphones, IP phones, and other connected devices.
But VoIP is not simply about making cheaper phone calls. Modern VoIP solutions can include call routing, interactive voice response, call recording, analytics, conferencing, voicemail, CRM integration, mobile access, and automation. In other words, the business phone system is becoming less like a standalone appliance and more like a connected software platform.
What Is VoIP Technology and How Does It Work?
VoIP technology converts voice conversations into digital data and transmits that information through an internet connection. Instead of depending on a dedicated traditional telephone line for every conversation, VoIP systems use IP networks to establish and manage calls.
A typical business VoIP environment may include cloud infrastructure, SIP services, IP phones, computers, mobile applications, call management software, and business integrations. When these components are designed properly, employees can communicate through a unified system, whether they are working from an office, home, or another location.
- How VoIP Works
When a person speaks during a VoIP call, the system converts the audio into digital data packets. These packets travel through an IP network and are reconstructed as audio at the receiving end, allowing the conversation to happen in real time.
The process sounds technical, but the user experience can be remarkably simple. An employee can open a VoIP application, select a contact, and make a call much like they would with a conventional phone.
- VoIP vs Traditional Phone Systems
Traditional phone systems often depend on physical infrastructure, fixed lines, and hardware installed at specific locations. VoIP shifts much of that communication infrastructure into software and internet-based services.
This makes VoIP particularly useful for organizations that need flexibility. Instead of treating every new employee or office location as a major telephone infrastructure project, businesses can configure users and extensions through a software-based communication system.
You may also like: Top 10 VoIP Billing Solutions for Modern Businesses
Why VoIP Is Becoming Important for Modern Businesses
Modern companies need communication systems that can keep up with changing work patterns. Employees may move between offices, work remotely, travel frequently, or communicate with customers from mobile devices. A communication platform that is tied too closely to a physical location can become difficult to manage as the organization grows.
VoIP addresses this challenge by separating business communication from a specific physical phone line. Users can often access business calling features through compatible devices and applications, giving organizations greater flexibility in how they structure their communication workflows.
- Flexible and Remote Communication
One of the most useful aspects of VoIP is its support for distributed teams. Employees can use business communication tools from different locations while remaining connected to the organization’s phone system.
A sales representative working from home, a support agent in another city, and an employee working from the company office can all operate within the same communication environment. This flexibility is especially useful for businesses with hybrid and remote work models.
- Cost-Effective Business Calling
VoIP can also help businesses manage communication expenses by using internet connectivity instead of relying entirely on traditional telephone infrastructure. The overall cost depends on factors such as provider plans, call volume, features, infrastructure, and implementation requirements.
For businesses with multiple locations or significant calling requirements, consolidating communication through a VoIP platform can simplify management while potentially reducing certain telecommunication expenses.
Key Features of Modern VoIP Solutions
Modern business phone systems can do much more than connect two people on a voice call. VoIP platforms can combine calling, messaging, conferencing, call management, analytics, and integrations into a single communication environment.
This makes VoIP particularly valuable when communication needs to connect with broader business workflows. For example, a customer call can be associated with a CRM record, while a support interaction can be recorded and analyzed for quality management.
- Call Routing and IVR
Call routing and Interactive Voice Response (IVR) help businesses direct incoming calls to the right department or employee. Customers can select options from an automated menu, while routing rules can determine where calls should go based on business hours, availability, department, or other conditions.
A well-designed IVR system can reduce unnecessary transfers and help customers reach the appropriate team more efficiently. It can also provide basic information automatically without requiring an employee to handle every request.
- Call Recording and Analytics
Call recording can help businesses review conversations, train employees, maintain quality standards, and understand customer interactions. Depending on the system and applicable requirements, businesses can configure recording policies around specific users, departments, or call types.
VoIP analytics can provide additional visibility into communication activity. Metrics such as call volume, duration, missed calls, wait times, and agent activity can help managers understand how communication processes are performing.
- Video Calling and Team Collaboration
Many modern VoIP platforms extend beyond voice communication to include video meetings, conferencing, screen sharing, messaging, and collaboration features. This allows organizations to bring multiple communication methods into a connected environment.
Instead of switching between several unrelated applications, teams may be able to manage different forms of communication through a unified platform. That can simplify daily workflows, particularly for distributed teams.
Benefits of VoIP for Business Communication
The biggest advantage of VoIP is the flexibility it brings to business communication. Organizations can configure users, extensions, call flows, applications, and integrations according to their operational needs.
VoIP can also make it easier to connect with other digital systems. This is important because business conversations rarely happen in isolation. A customer call may involve a CRM record, a support ticket, an order, a sales opportunity, or a previous interaction.
- Easy Scalability
Traditional phone infrastructure can become complicated when a business adds employees, departments, or locations. VoIP systems can often make expansion more straightforward because users and extensions can be managed through software.
A growing company can add new employees, configure extensions, modify call routing, and introduce new communication features without necessarily redesigning its entire telephone infrastructure.
- Business Application Integration
VoIP can integrate with CRM, help desk, ERP, collaboration, and other business applications. With the right integration, employees can make calls directly from business software, access customer information during conversations, or automatically associate call activity with customer records.
This creates a more connected workflow. Instead of communication data remaining inside the phone system, it can become part of the broader digital customer and business experience.
How Businesses Are Using VoIP Technology
Businesses use VoIP across many functions because voice communication remains important as digital channels continue to expand. Sales teams use calls to communicate with prospects, support teams handle customer issues, and internal teams use voice and video for collaboration.
The technology is especially useful when organizations need communication across multiple locations while maintaining centralized control over users, call flows, and business numbers.
Customer Support and Call Centers
Customer service operations can use VoIP features such as IVR, call queues, call recording, agent routing, monitoring, and analytics. These capabilities help organizations structure large volumes of incoming and outgoing communication.
Call center managers can also use reporting features to understand call patterns and identify areas where customer communication processes may need adjustment.
Remote Teams and Distributed Workforces
VoIP makes it easier for remote employees to remain connected to the same business communication environment as office-based employees. Users can access calling features through supported desktop applications, mobile applications, or IP devices.
This can help businesses maintain consistent communication practices even when employees are distributed across different locations.
VoIP Security and Reliability Considerations
Because VoIP communication travels through digital networks, security must be an essential part of system design. Businesses should consider authentication, encryption, access controls, network security, fraud prevention, software updates, and monitoring when deploying a VoIP environment.
Reliability is equally important. Voice communication depends on network performance, bandwidth, latency, and system availability. Businesses should therefore evaluate their network infrastructure and consider appropriate redundancy, monitoring, backup connectivity, and disaster recovery strategies.
A reliable VoIP solution is not simply one that works when everything is normal. It should also have a plan for handling network disruptions, hardware failures, service interruptions, and unexpected traffic.
Challenges of Implementing VoIP
VoIP offers significant flexibility, but implementation still requires careful planning. Poor network quality can affect call performance, while incorrectly configured systems may create security or routing problems. Businesses also need to consider how the new communication platform will interact with existing applications and workflows.
Another challenge is user adoption. Employees need to understand how to use new calling features, applications, voicemail systems, conferencing tools, and collaboration capabilities. Proper configuration, testing, training, and ongoing support can make the transition much smoother.
For organizations with complex requirements, custom development may also be necessary. A business might need specialized call routing, custom dashboards, CRM integration, mobile applications, APIs, or unique automation workflows that are not available in an off-the-shelf platform.
How Moon Technolabs Can Help With VoIP Development
Moon Technolabs can help businesses develop custom VoIP solutions around their communication requirements. This can include VoIP application development, SIP integration, call management, IVR, call routing, conferencing, CRM integration, mobile communication, analytics, and other business communication capabilities.
The development approach can be tailored to the organization’s existing infrastructure and future growth plans. From designing the communication architecture to developing, integrating, testing, and maintaining the solution, a custom approach can help businesses create a VoIP environment that fits their workflows rather than forcing those workflows into a rigid communication platform.
Conclusion
VoIP technology is changing business communication by making voice services more flexible, software-driven, and connected. Businesses can move beyond traditional phone systems and introduce features such as intelligent call routing, IVR, analytics, recording, conferencing, mobile access, and business application integrations.
The real value of VoIP comes from how these features work together. A business can connect its phone system to customer data, support workflows, remote teams, and operational tools, making communication a more integrated part of the digital business environment.
As organizations continue adopting flexible and distributed working models, communication technology needs to support people wherever they work. VoIP provides a foundation for that while giving businesses greater control over how they manage, monitor, integrate, and scale calls.


Metal fabrication shops across the United States are under steady pressure to produce cleaner parts, faster, without adding headcount or tolerating inconsistency. Burrs — the small, sharp material remnants left on metal after cutting, stamping, drilling, or milling — are a persistent problem that most shops have learned to manage manually for decades. That approach worked when volumes were lower and tolerances were more forgiving. Today, it often does not.
Manual deburring is slow, physically demanding, and difficult to standardize. A technician working an eight-hour shift will not produce the same result at the end of the day as at the beginning. When parts move downstream with residual burrs, the consequences range from assembly failures to customer returns to safety incidents. For fabricators operating at scale or supplying industries with strict quality requirements, the question is no longer whether to automate deburring — it is how to do it correctly the first time.
This guide walks through the key decisions, system types, integration considerations, and operational trade-offs that metal fabricators should understand before committing to an automated deburring solution.
What Deburring Automation Actually Involves
Deburring automation refers to the use of mechanical, abrasive, or electrochemical systems that remove burrs from metal parts without requiring direct manual labor at each cycle. These systems vary widely in how they work, what materials they handle, and where they fit within a production line. Understanding this range is essential before evaluating any specific product or vendor.
The discipline covers a broad spectrum of technologies, from brush-based finishing machines and abrasive belt systems to robotic cells with force-controlled tooling and electrochemical deburring tanks. Each approach suits a different combination of part geometry, material type, production volume, and surface finish requirement. Shops that assume one system fits all use cases tend to either over-invest in capability they do not need or under-specify a machine that cannot handle their actual parts.
For fabricators who want a practical starting point for evaluating available technologies, resources covering deburring automation systems provide useful context on how different machine categories compare in real production environments.
Why the Definition Matters Before the Purchase
Many buyers approach deburring automation with a single reference point — usually a machine they saw at a trade show or a solution a peer recommended. The problem is that deburring requirements are highly specific to part geometry and edge condition. A flat sheet metal part with consistent laser-cut edges behaves completely differently than a machined aluminum housing with intersecting internal bores.
Misalignment between the system’s capability and the actual part profile leads to incomplete deburring, excessive cycle times, or part damage — all of which defeat the purpose of automating in the first place. Before contacting vendors, a fabricator should document the part families they produce, the typical burr height and location, the acceptable surface finish range, and the production volume per shift. That information drives every subsequent decision.
The Main Categories of Automated Deburring Systems
Automated deburring systems generally fall into a few broad categories, each suited to different operational contexts. Understanding these categories helps buyers narrow their evaluation to systems that are actually relevant to their production environment rather than spending time assessing technology that will never fit their workflow.
Flat Surface and Sheet Metal Deburring Machines
These systems are designed for parts with predominantly flat profiles — laser-cut, plasma-cut, or punched sheet metal being the most common applications. They typically use rotating abrasive brushes, abrasive belts, or combination heads to remove edge burrs and surface oxide simultaneously as parts pass through on a conveyor.
Their strength is throughput. A well-configured flat-bed deburring machine can process a high volume of parts per hour with consistent results, provided the parts fall within the machine’s dimensional tolerances. Their limitation is geometry — parts with significant depth, holes smaller than a certain diameter, or features that require edge treatment on vertical faces may not be handled adequately by a pass-through flat system alone.
Robotic Deburring Cells
Robotic deburring uses articulated arm robots equipped with force-controlled spindles and abrasive or cutting tools to follow complex part geometries in three dimensions. This approach is well suited to machined castings, die castings, and complex prismatic parts where burr locations vary across multiple surfaces and internal features.
The investment is higher than fixed-machine solutions, and the programming and integration work is substantial. However, for shops producing medium to high volumes of geometrically complex parts, a robotic cell can deliver consistency that manual labor simply cannot replicate. The key operational consideration is programming time per new part number — shops with high part-number diversity and short runs may find that changeover time erodes the throughput advantage.
Electrochemical and Thermal Deburring
Electrochemical deburring uses a controlled electrical current in a conductive solution to selectively dissolve burrs at exposed edges, particularly in cross-bores and internal passages where mechanical tools cannot reach. Thermal energy method, sometimes called explosive deburring, uses a controlled combustion event inside a sealed chamber to remove burrs simultaneously across all surfaces of a part.
Both methods address a genuine gap — burrs in locations that are physically inaccessible to brushes, belts, or robotic tooling. They are used in precision hydraulic components, fuel system parts, and medical device manufacturing where internal cleanliness is critical. They are not general-purpose solutions and require careful process control and operator training.
Integration with the Existing Production Line
A deburring system does not operate in isolation. How it connects to upstream and downstream processes determines whether it creates smooth workflow or becomes a production bottleneck. This is one of the most consistently underestimated factors in automated deburring purchases.
Cycle Time Matching
If a deburring machine processes parts significantly slower than the machine that produces them, it creates a queue that either requires buffer storage or forces the upstream process to slow down. The reverse problem — a deburring system that processes parts faster than they arrive — means the machine sits idle and the capital investment is underutilized.
Buyers should map the production rate of every process that feeds parts to the deburring step, then specify a deburring system that matches or slightly exceeds that rate under realistic conditions, not theoretical maximums. Vendors often quote peak throughput figures that do not account for loading, unloading, tool changes, or minor stoppages.
Part Handling and Fixturing
Automated deburring requires that parts be presented to the machine in a consistent orientation and position. For flat parts on a conveyor, this is relatively straightforward. For three-dimensional parts going into a robotic cell, fixturing becomes a significant engineering task. Poorly designed fixtures cause part movement during processing, leading to inconsistent results and potential tool crashes.
The fixturing design should be part of the system specification, not an afterthought addressed after installation. Shops that treat fixturing as a secondary concern often spend months after commissioning troubleshooting part quality issues that trace back to inconsistent part presentation rather than to the deburring process itself.
Dust, Coolant, and Waste Management
Abrasive deburring generates significant quantities of fine metallic and abrasive dust. Wet deburring systems produce contaminated coolant. Both require extraction, filtration, and disposal systems that meet applicable environmental and workplace safety standards. In the United States, OSHA’s general industry standards and EPA regulations governing metal particulate and fluid disposal apply to these processes and should be reviewed as part of the facility planning phase, as documented under OSHA’s metalworking fluids guidance.
Shops that do not account for these infrastructure requirements during the buying process often face unexpected costs after installation — costs that can be substantial depending on facility layout and local regulatory requirements.
Evaluating Vendors and System Reliability
The technical specification of a deburring system is important, but it is not the only factor that determines long-term performance. Vendor reliability, parts availability, and service support are equally consequential for operations that depend on consistent uptime.
Application Testing Before Commitment
Reputable deburring system vendors will run actual production parts through their machines before the sale. This is standard practice in the industry and should be treated as a non-negotiable step in the evaluation process. A vendor unwilling to demonstrate their system’s performance on a buyer’s specific parts is a meaningful red flag.
Application testing should include not just the best-case parts but also the most difficult parts in the family — the ones with the tightest tolerances, the most complex geometry, or the most variable burr condition. If the system cannot handle the difficult cases adequately, knowing that before purchase is far less costly than discovering it after installation.
Spare Parts and Service Infrastructure
Abrasive consumables — brushes, belts, wheels — wear and require regular replacement. The cost and availability of these consumables over the life of the machine should be factored into the total cost of ownership analysis, not just the initial capital price. For machines with proprietary consumables or components, buyers should evaluate the vendor’s supply chain reliability and what happens if the vendor’s business changes over time.
Local service capability also matters. A machine that requires a technician to fly in from another country for a breakdown creates unacceptable downtime risk for a shop running production schedules that cannot absorb multi-day outages.
Building a Sound Business Case
Automation investments require internal justification, and deburring automation is no exception. The business case typically centers on labor cost reduction, throughput improvement, quality consistency, and risk reduction — but the strength of each factor depends on the shop’s current situation.
A shop where manual deburring represents a genuine production constraint — where parts wait for deburring before they can move to the next step — will see a more immediate throughput benefit than a shop where deburring is a background task that keeps pace with production. Similarly, a shop supplying aerospace or medical customers with documented quality requirements has a stronger quality risk case than a general fabrication shop supplying less regulated markets.
Honest assessment of the current state, including actual labor hours spent on deburring, rework rates attributable to burr-related quality escapes, and documented customer complaints, produces a more credible business case than generic industry benchmarks. Finance and operations leadership make better decisions when the numbers reflect real conditions rather than optimistic projections.
Closing Considerations for U.S. Metal Fabricators
Automated deburring is not a simple plug-and-play purchase. It is a process decision that affects workflow, quality systems, facility infrastructure, and workforce deployment. Fabricators who approach it methodically — starting with a clear understanding of their part families and current deburring performance, evaluating system categories honestly against their requirements, planning integration carefully, and selecting vendors with demonstrated application experience — tend to achieve results that justify the investment.
Those who move quickly based on a trade show impression or a single vendor recommendation, without doing the foundational work, often find themselves managing a mismatch between what they bought and what their operation actually needs.
The technology available today is capable, reliable, and applicable across a wide range of fabrication environments. The challenge is not finding a system that works — it is finding the right system for the specific context of your shop, your parts, and your customers. That requires patience, internal data, and a willingness to ask vendors difficult questions before signing anything.

How to Explore Customer Service and Call Center Careers

Account Safety 101: How to Vet Any Instagram Growth Service

What Makes Underground Streetwear Hit? Breaking Down the MF DOOM Shirt and Parke Hoodie Hype

Unlocking Peak Performance with AMD Ryzen X3D: A Gamer’s Ultimate Guide

5 questions every Sydney homeowner should ask before hiring a plumber

Transforming Business Efficiency with Modern Workplace Solutions

The 15 Highest-Paid Rugby Players in the World

Christopher Dare: The Untold Story of Engineer and Former Husband of Angela Rippon

How to Ensure Your Home is Valued Correctly for a Quick Sale

What Is Fanquer? The Digital Creator Platform Transforming Direct-to-Fan Engagement

Dr Jared Ross: Missouri Appeals Court Upholds Protection Order Over Graphic Torture and Murder Threats

Nancy Hallam: The Inspiring Life, Career, and Success Story Behind Ian Wright’s Wife
The 15 Highest-Paid Rugby Players in the World
Christopher Dare: The Untold Story of Engineer and Former Husband of Angela Rippon
How to Ensure Your Home is Valued Correctly for a Quick Sale
What Is Fanquer? The Digital Creator Platform Transforming Direct-to-Fan Engagement
Dr Jared Ross: Missouri Appeals Court Upholds Protection Order Over Graphic Torture and Murder Threats
Nancy Hallam: The Inspiring Life, Career, and Success Story Behind Ian Wright’s Wife
-
 Sports5 months ago
The 15 Highest-Paid Rugby Players in the World
-
Celebrity10 months ago
Christopher Dare: The Untold Story of Engineer and Former Husband of Angela Rippon
-
 Real Estate8 months ago
How to Ensure Your Home is Valued Correctly for a Quick Sale
-
 Technology4 months ago
What Is Fanquer? The Digital Creator Platform Transforming Direct-to-Fan Engagement
-
 Celebrity4 months ago
Dr Jared Ross: Missouri Appeals Court Upholds Protection Order Over Graphic Torture and Murder Threats
-
Celebrity11 months ago
Nancy Hallam: The Inspiring Life, Career, and Success Story Behind Ian Wright’s Wife
-

 Health9 months ago
Enclomimed 25 (Enclomiphene) – Effective PCT Protocol
-
 Celebrity11 months ago
Who Is Maisie Mae Roffey? The Private Life, Family Story, and Quiet Success of Julie Walters’ Daughter