
Home Improvement
How to Design and Build a High-Security Safe Room in Your Existing Home

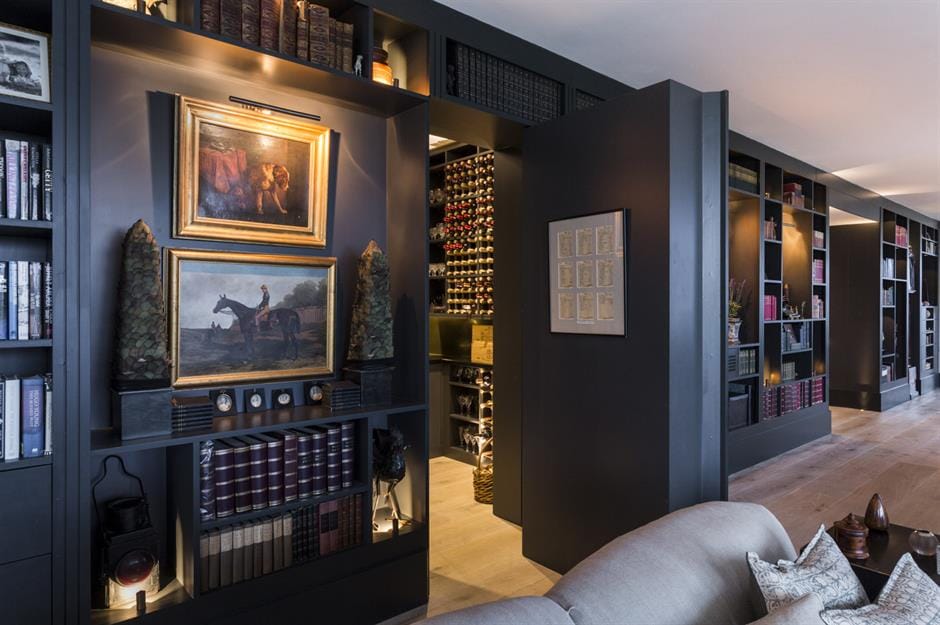
Most people designing a safe room get it backwards. They start shopping for gear and then try to fit it into whatever space is available. The right approach is the opposite – start with structural reality, then build your security layers from the ground up. A properly retrofitted safe room in an existing home is absolutely achievable without a contractor’s budget, but it demands honest thinking about physics, weight, and airflow before anything else.
Choosing The Right Space
The most critical choice you’ll need to make is the location. Ground-floor rooms and basements that have been built on concrete slabs will be your obvious first choice, and it all comes down to one simple reason: weight. Reinforced walls, steel sheeting, and a heavy security door can make a room weigh thousands of pounds. The standard residential floor joists in upper floors simply haven’t been engineered to carry such a heavy load, and re-engineering them is costly and intrusive work.
A walk-in closet from a master bedroom, the utility room in a basement, or a ground-floor spare bedroom are all possible and acceptable choices. Essentially, you are searching for a space that has at least one external wall if possible – but interior rooms are often satisfactory as well – and ideally large enough that two to four individuals could occupy it for 72 hours without things becoming really tense.
Stay away from rooms that have large windows. Every window in a safe room represents a vulnerability that is tough to neutralize without ripping the whole thing out and, even then, you are adding more complexity. You want a hardened box, and boxes with gaps are more complicated to construct.
Reinforcing Walls, Ceiling, And Floor
Once you’ve selected the room or closet, the work begins by looking at how to harden it from the inside out. You aren’t tearing out and replacing existing drywall but adding protection behind and over it.
For ballistic resistance, the most practical retrofit material for most homeowners is Kevlar wall panels. These lightweight synthetic fiber panels can be attached directly to existing stud framing before new drywall goes up, adding meaningful ballistic protection without the floor load problems that thick steel plating creates on upper floors. For ground-floor or basement installs, 12-gauge steel sheeting attached to the stud framing is more cost-effective and provides both ballistic and physical breach resistance.
If your budget and floor capacity allow, concrete masonry is the gold standard. Even a 4-inch concrete block infill between existing studs raises the protection level dramatically. Whatever material you choose, the standard to reference is UL 752, which rates materials against specific calibers and impact scenarios. UL 752 ratings give you a real performance benchmark instead of marketing language.
Don’t forget the ceiling. A threat can come from above, especially in a two-story home, and most DIY safe room builds neglect it entirely. At minimum, add a layer of steel sheeting or Kevlar panel material to the ceiling, secured to the joists. The floor under a ground-level room is usually fine as concrete, but on an upper floor you should add rubber-backed steel mats or equivalent material if ballistic protection through the floor is a concern.
FEMA’s P-361 guidelines for residential safe rooms specify that the structure must withstand wind speeds up to 250 mph – equivalent to an EF5 tornado – and absorb a 15-pound 2×4 traveling at 100 mph as a wind-borne missile. That’s a useful engineering reference point for wall construction even if your primary concern is home security rather than weather events.
The Door Is Your Most Critical Investment
Solid walls are meaningless if the door can easily give way. Typically, solid interior wood doors can easily be broken. Hollow-core doors are even easier to break through. A good quality residential exterior door along with a single-bolt lock can easily be opened by a shoulder push or using a crowbar, provided you have sufficient time and nobody to stop you.
It is important to solve the problem of the entrance separately from the problem posed by the walls. A Vault Door built specifically for a safe room is the solution that normal doors just can’t provide: full steel construction, frame engineered to resist pry attacks, and multi-point locking system that throws bolts at the top, bottom, and both sides of the door frame simultaneously. No single bolt to attack with a pry bar. A good safe room door swings inward which seems counterintuitive as outward swinging doors are more difficult to pry against weak home construction, but in a safe room an inward swinging door means debris or a fallen attacker or an obstruction doesn’t leave you trapped.
The safe room door should have a deadbolt as a secondary manual lock in addition to the primary locking system, ideally with a one-inch throw on the bolt. Just as important, the entire door frame needs to be anchored into structural framing rather than just drywall – for wood-frame construction that means through-bolting into the studs, and for anchoring into a concrete slab you’ll need concrete anchors. A door is only as strong as what it’s bolted to.
Ventilation And Air Quality
You can be sealed in your safe room and forget that air is finite. A properly sealed room with four occupants will be uncomfortable within an hour or so and potentially dangerous within several. You need dedicated, independent ventilation.
At a minimum, a battery-backed ventilation fan that pulls fresh air through a filtered intake and exhausts stale air out. Minimum particulate and smoke filtering on the intake – in a fire, you’ll suffocate from smoke inhalation long before the fire gets you.
For a higher-threat scenario, you want a CBRN filter that also protects against chemical, biological, radiological, and nuclear contaminants in the air. These are more expensive and need more maintenance, but on a room intended to protect against all threats, they’re worth including. This system should also keep the room at a slightly positive pressure – air should flow out through any gaps rather than in, keeping any contaminants on the outside.
Size these systems to the volume of your room and the likely number of occupants. Ventilation equipment should be on a circuit independent of your home’s main electrical supply, which brings us to the next point.
Power, Communications, And Surveillance
Your security system, your lights, your phone chargers – all die when the grid goes down or when someone cuts power to the house. Your safe room can’t share that dependency.
Put a dedicated backup power supply inside the room. A solar-charged lithium battery generator is a solid option: it recharges during normal times, has a manageable footprint, and can run lighting, ventilation fans, and monitors for several days off the grid. Wire the lighting circuit of the room to this supply, not to your home’s main panel.
Communication is a big problem you don’t know you have in a reinforced room. Steel and concrete walls will RF shield you, blocking cellular signals the same way a Faraday cage does. Don’t assume your phone will work inside. Run a coaxial cable from inside the room to an external antenna that you position outside the home before construction is completed. Store a pair of two-way emergency radios inside the room as well, and if you can swing it, run a dedicated hardwired landline connection to the room that doesn’t rely on power.
For surveillance, set up a closed-loop CCTV system with cameras covering the entryways and hallways of the home, wired to a dedicated monitor inside the safe room. Closed-loop means the system runs locally and isn’t dependent on the internet – no cloud account to get hacked, no router to go down. This lets you track movement through the home in real time without opening the door to check.
Stocking For Extended Occupancy
Make sure you can hold out in the safe room for at least 3 days. Water is the big one – plan on a gallon per person per day. After that, non-perishable food that’s calorie-dense should be next on your list. For first aid, don’t just grab a standard home kit – go trauma-focused instead.
Tourniquets, wound packing gauze, and pressure bandages will actually help in a forced-entry situation, whereas the antiseptic wipes and small bandages in a normal kit won’t do much good. Also think about how you’ll handle human waste – it’s easy to overlook but more important than a lot of what’s in a typical kit. And grab a light source that doesn’t rely on the room’s own power, like a flashlight or headlamp.
Set a schedule to check and rotate the perishables. Water in sealed containers lasts a while, but rotate it at least once a year anyway. Food needs checking every 6 months. Batteries should get swapped out too, so it’s simplest to just check everything on the same 6-month cycle.
Planning Your Egress Route
There’s one facet of safe room design that never gets discussed: what if you can’t get out the front door? A blocked exit in a sealed room will kill you. Design a secondary egress before construction is complete.
A secondary egress doesn’t have to be pretty. In fact, reinforcing a large window so it can’t be opened from outside but can still be opened from inside can be the easiest way. You can also simply design one of the walls surrounding your safe room to be a partition – a removable section of drywall, for instance – that leads directly to an accessible crawlspace. Or you can install a hatch in the ceiling.
The point of the egress isn’t that it’s obvious and easy to use. The point is that there always is one. A room with one way in and no ways out constitutes a single point of failure.
A well-built safe room isn’t a bunker fantasy. It’s a practical, engineered answer to real home security threats, built inside the home you already have. The work takes planning, the materials take budget, and the construction takes time – but each layer you add compounds the protection, and the result is a room that can handle scenarios your existing home simply isn’t built for.



When it comes to preserving and showcasing posters, the choice of framing can make a significant difference in both appearance and longevity. A professional picture framer offers expertise and customisation options that far surpass the capabilities of cheap ready-made poster frames. Understanding why professional framing is superior helps poster owners make informed decisions that protect and enhance their prized prints.
Understanding the Limitations of Ready-Made Poster Frames
Ready-made poster frames are widely available and relatively inexpensive. They offer a quick solution for those looking to display a poster without much investment. However, these frames are mass-produced with standard dimensions and materials, often compromising the aesthetics and protection necessary for valuable prints.
Such frames tend to use lower-quality materials that can degrade over time, leading to potential damage. The glass or acrylic used may not provide UV protection, which can result in colour fading of the poster when exposed to sunlight. Additionally, the backing materials may contain acids that, over time, deteriorate the paper.
Advantages of Professional Custom Framing
In contrast, a professional picture framer offers custom framing solutions tailored to the specific dimensions, condition, and requirements of each poster. Through specialised knowledge and access to premium materials, professionals ensure that every frame complements and safeguards the print.
One of the key benefits of professional framing is the use of acid-free and archival-quality materials. These substances prevent yellowing and decay, preserving the poster’s integrity. Moreover, professional framers often incorporate UV-protective glazing options that block a significant amount of ultraviolet light, reducing the risk of fading.
Custom Design and Aesthetic Enhancement
Another aspect where custom framing excels is design. Professional framers work closely with clients to select mouldings, mats, and glazing types that enhance the visual appeal of the poster. This bespoke approach ensures that the frame complements the artwork’s style, colours, and the room’s decor where it will be displayed.
Unlike ready-made frames, which restrict choice to fixed designs and sizes, custom frames offer flexibility in colour, texture, and width. Matting options also allow for an elegant visual border that can add depth and focus to the print while preventing direct contact between the poster and glazing.
Precision and Craftsmanship
A professional frame poster frames with precision cutting and expert assembly ensures a perfect fit. This attention to detail helps to protect the print from shifting or warping within the frame. Skilled framers inspect the print and handle it with care during the process, reducing the risk of damage.
Additionally, professional framing includes quality hanging hardware, helping to secure the frame on walls safely and evenly. This level of workmanship and finish is rarely achievable with inexpensive ready-made alternatives.
Longevity and Value Preservation
Investing in custom-framed posters protects their value, especially for limited editions, vintage prints, or posters with sentimental importance. The use of archival materials and UV protection dramatically extends the life of the print, maintaining its colours and preventing deterioration.
Furthermore, well-framed posters add to the aesthetic and monetary value of a collection. Collectors and enthusiasts who choose professional framing signal a commitment to preservation, which can be advantageous if the print is ever sold or loaned to exhibitions.
Consultation and Expert Advice
Clients who utilise services like those provided by fantastic framing benefit from personalised consultations. Professional framers assess the type and condition of the poster, recommend suitable framing approaches, and address client preferences and budget considerations.
This advisory role is critical: it ensures that framing decisions are informed by industry knowledge and the specific needs of the print, rather than being based purely on cost or convenience.
Conclusion
In summary, choosing a professional picture framer over cheap ready-made options offers a multitude of benefits for poster owners. From superior protection against environmental damage to bespoke design and expert craftsmanship, custom framing elevates both the aesthetic and longevity of posters.
Those who value their prints, whether for personal enjoyment or investment, should consider engaging a reputable service to frame poster frames with the highest standards in mind. Such an approach provides not only visual enhancement but ensures the preservation of treasured prints for many years to come.
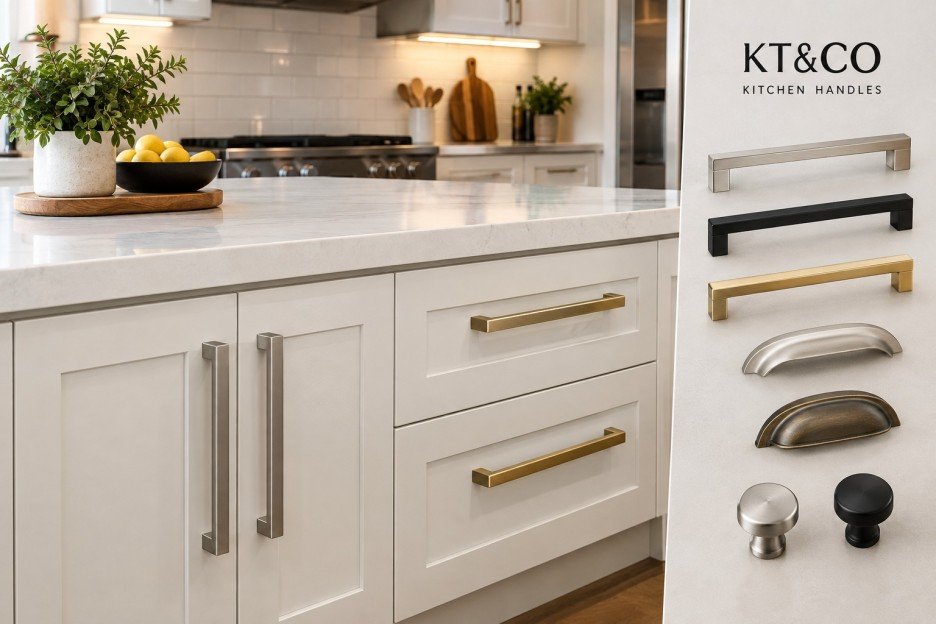
Kitchen handles, often seen as minor details, play a crucial role in defining the overall aesthetic and functionality of kitchen cabinetry. KT&CO Kitchen Handles provide a perfect combination of style and durability, making them an excellent choice for anyone looking to upgrade their kitchen space in Australia.
Importance of Quality Kitchen Handles
Kitchen handles are subjected to daily use and must withstand frequent handling, exposure to moisture, and varying temperatures. Selecting durable handles ensures longevity and preserves the kitchen’s look for years to come. KT&CO understands these demands and offers handles that maintain their finish and structural integrity even under heavy use.
Designs That Complement Every Kitchen Style
The design of kitchen handles can either enhance or detract from the kitchen environment. KT&CO Kitchen Handles come in a variety of designs and finishes, from modern minimalist to classic styles, enabling homeowners to personalise their kitchen aesthetics. Whether the kitchen features sleek contemporary cabinetry or traditional wood finishes, there are handles available to perfectly complement the chosen style.
Modern and Minimalist Options
For kitchens that embody modern design, KT&CO provides sleek and streamlined handles with clean lines. These handles not only add to the visual appeal but also provide ergonomic advantages with their smooth grip.
Traditional and Vintage Styles
In kitchens seeking a timeless feel, classic and ornate handles from KT&CO invoke a sense of heritage and craftsmanship. These handles bring character and warmth, aligning beautifully with timber cabinetry and vintage-inspired interiors.
Materials and Finishes for Longevity and Style
The material selection for kitchen handles directly influences both durability and style. KT&CO offers handles crafted from premium materials such as stainless steel, aluminium, and zinc alloy. These materials resist corrosion and wear, ensuring that handles retain their appearance in the demanding kitchen environment.
Furthermore, KT&CO’s finishes include polished chrome, brushed nickel, matte black, and antique bronze. These options provide flexibility for matching handles with other kitchen hardware and fixtures.
Enhancing Kitchen Functionality
Functionality is as critical as design in kitchen handles. Ergonomic considerations ensure handles are comfortable to grip and operate, improving the user experience during cooking and cleaning. KT&CO Kitchen Handles excel in combining aesthetic appeal with practical usability.
This balance between function and form is a hallmark of KT&CO’s product range, supporting ease of use without compromising on style.
Easy Installation and Versatility
KT&CO Kitchen Handles are designed with standard fitting dimensions, simplifying installation and replacement processes. This makes them suitable not only for new kitchen projects but also for renovating and refreshing existing cabinetry.
The availability of various sizes and types, including bar handles, cup handles, and knob designs, further supports versatile applications across different kitchen layouts.
Environmentally Conscious Manufacturing
Recognising the importance of sustainability, KT&CO employs responsible production methods, reducing waste and utilising recyclable materials where possible. Customers can confidently choose KT&CO Kitchen Handles knowing they are supporting environmentally friendly practices.
Customer Support and Assurance
KT&CO provides excellent customer service to assist with selection, installation advice, and after-sales support. This ensures a seamless experience from purchase to product integration, enhancing customer satisfaction.
Conclusion
Choosing KT&CO Kitchen Handles is an investment in quality, style, and durability for any kitchen. Their extensive range of designs, premium materials, and functional excellence make them a preferred option in the Australian market. Upgrading kitchen handles with KT&CO transforms kitchen cabinetry, offering a refreshed look and improved usability that lasts.

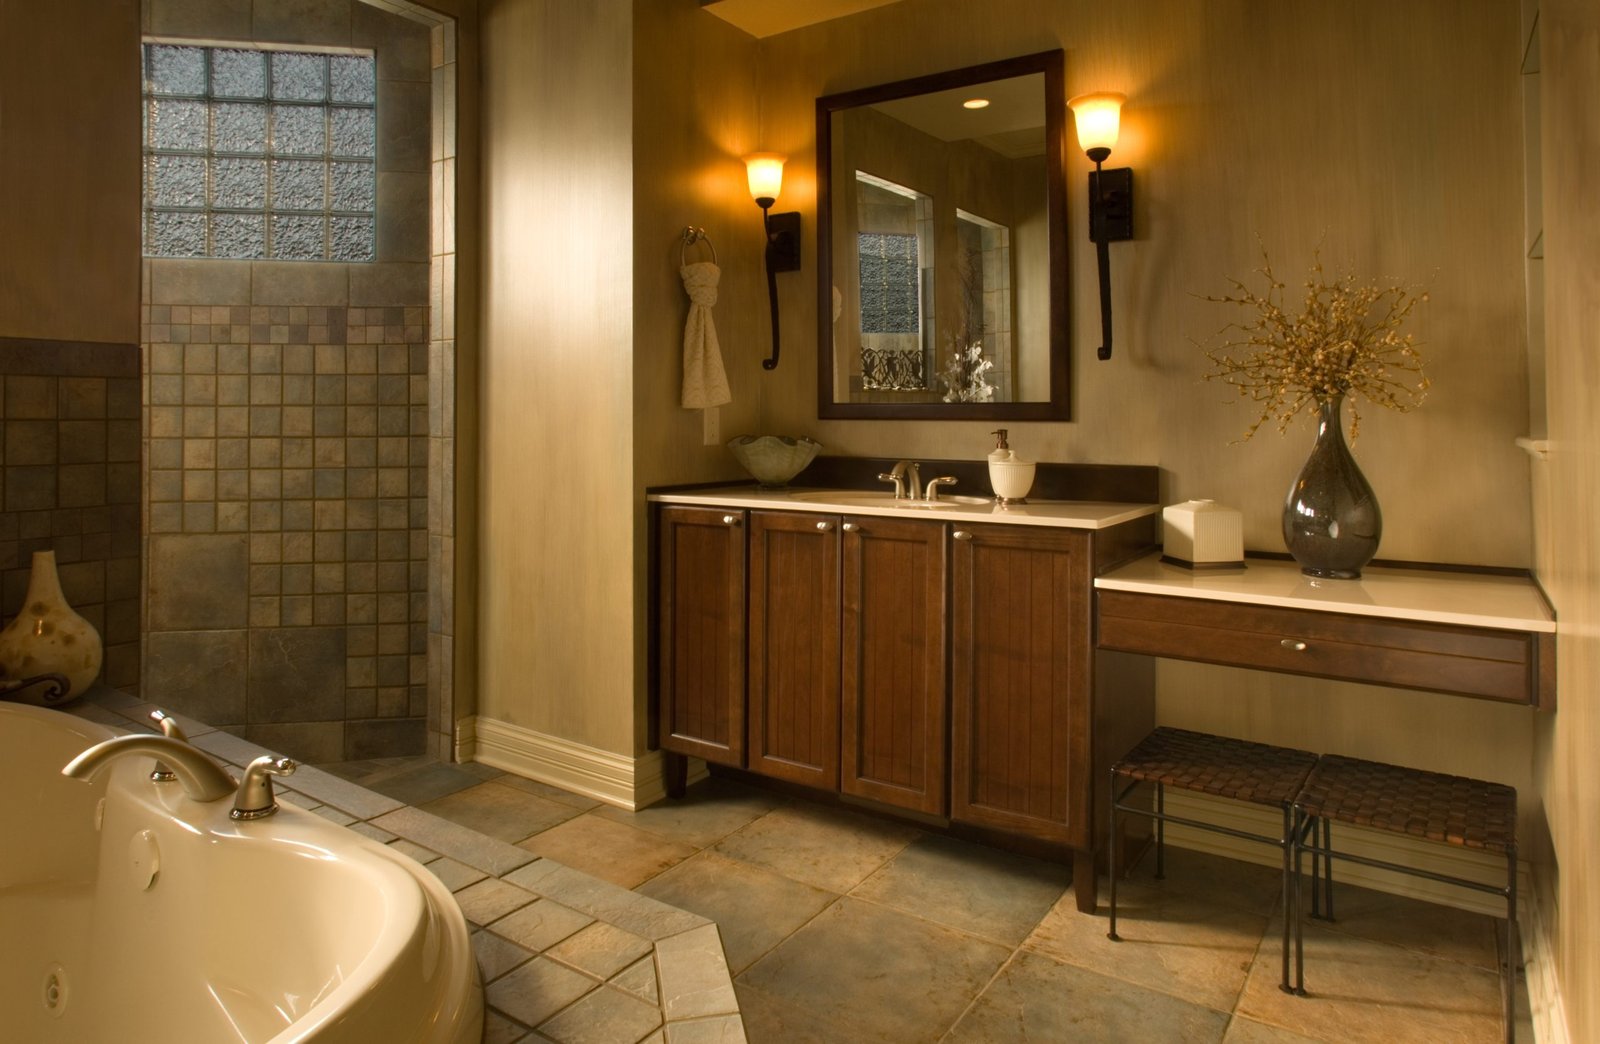
A bathroom renovation affects more than the room being rebuilt. People still need to wash, get ready for work and move through the house while materials arrive and tradespeople come and go. Dust, noise and interruptions to water can also reach beyond the bathroom door. Preparing for that disruption is less about predicting every detail than arranging a workable routine, clearing access and agreeing on how changes will be communicated.
Start with the sequence, not the finish date
Before work begins, ask the renovation team to walk you through the likely order of tasks. Removal and assessment usually come before plumbing or electrical work, followed by preparation of surfaces, waterproofing, tiling, fitting fixtures and final checks. The precise sequence depends on the existing bathroom and the work being done. A schedule is useful, but it should be treated as a plan that may need updating once concealed areas are exposed.
Find out which stages are likely to make the bathroom unusable and whether there may be periods when water or power needs to be isolated. Ask who will give notice of an interruption, how much notice is practical and whom to contact if the household’s circumstances change. These questions matter especially if anyone at home has limited mobility, works shifts or relies on a predictable morning routine.
Make a realistic bathroom plan for the household
If there is another bathroom, check whether it can comfortably serve everyone for the duration of the work. Move everyday items there before demolition starts: toiletries, towels, medication kept in the bathroom and children’s bath supplies. Avoid storing essential items in a room that may become difficult to access. If there is only one bathroom, discuss the expected periods without a toilet or shower before committing to a start date. Alternative arrangements may be needed, and their practicality will vary between households.
Think through the busiest parts of the day rather than assuming people will simply adapt. A shared shower may require a roster; an early departure may require items to be packed the night before. If pets or young children live in the home, decide how they will be kept away from the work area without obstructing access for tradespeople.
Clear the route as well as the room
Empty cabinets, shelves and drawers, then remove mirrors, pictures or loose items near the bathroom that could be knocked during movement through the house. Ask which entrance tradespeople expect to use and where materials and waste will be placed. A clear route helps people move without stepping around boxes, tools or household belongings. It also makes it easier to keep a defined boundary between the work area and the rest of the home.
Discuss dust containment and cleaning expectations in advance, particularly where the bathroom opens onto a frequently used hallway or bedroom. Close doors to adjacent rooms when practical and move vulnerable belongings away from the route. Do not assume a sealed doorway will keep every surface clean: plan for some extra household cleaning, while leaving worksite cleaning and any hazardous-material concerns to appropriately qualified people.
Confirm decisions before they hold up the work
Fixtures and finishes need to be chosen early enough for their availability and dimensions to be checked against the plan. A tap, vanity or tile change can affect more than appearance; it may alter fittings, layout details or the order of tasks. Keep a simple record of the selected items and any agreed substitutions so that household members and the renovation team are working from the same decisions.
Budget discussions belong here too. A quote for a cheap bathroom renovation should still be read for its scope, exclusions and assumptions, particularly where existing plumbing, damaged surfaces or fixture supply could affect the work. The lowest initial figure is not necessarily the clearest picture of what a household will need to organise. Ask how proposed changes will be described, approved and priced before extra work proceeds.
Expect decisions when the old bathroom comes apart
Removing finishes can reveal conditions that were not visible during planning. That does not mean every discovery is serious, but it can change the conversation about timing, cost or materials. Agree on a process for receiving updates: who should be contacted, whether decisions need to be confirmed in writing and what happens if the main contact is unavailable during the day.
When a change is proposed, ask what has been found, which options are practical, how each option affects the agreed scope and whether there are implications for the schedule. Take time to understand the answer rather than approving work simply because the household wants the bathroom back. Questions involving structural conditions, waterproofing, plumbing or electrical work should be addressed by suitably qualified people, not solved through household guesswork.
Plan for the final stretch, not just demolition
The most visible mess may happen early, but a bathroom can remain inconvenient while finishes are completed, fixtures are fitted and final checks take place. Ask when the room can be used normally, rather than assuming that the last trade visit marks that point. Keep the temporary bathroom arrangement in place until use has been confirmed.
Before packing away the spare toiletries, walk through the finished room and note any questions about fixtures, surfaces or agreed work. Find out what information will be provided about caring for the installed materials. A renovation is easier to live through when the household knows what is happening next, what may change and which parts of daily life need a backup plan.

Posters Deserve Better: What a Professional Picture Framer Can Do for Your Prints

Plastic Surgery Abroad: How To Prepare For Your First Consultation – A Practical Guide

7 jewellery schools that take complete beginners

9 Most Popular AI Courses Professionals Are Choosing This Year, and What Sets Them Apart

Football Statistics That Matter When Analysing an Upcoming Match

Understanding Homecare Services: A Guide for Bromley Families

How to Ensure Your Home is Valued Correctly for a Quick Sale

Christopher Dare: The Untold Story of Engineer and Former Husband of Angela Rippon

The 15 Highest-Paid Rugby Players in the World

What Is Fanquer? The Digital Creator Platform Transforming Direct-to-Fan Engagement

Dr Jared Ross: Missouri Appeals Court Upholds Protection Order Over Graphic Torture and Murder Threats

Nancy Hallam: The Inspiring Life, Career, and Success Story Behind Ian Wright’s Wife
How to Ensure Your Home is Valued Correctly for a Quick Sale
Christopher Dare: The Untold Story of Engineer and Former Husband of Angela Rippon
The 15 Highest-Paid Rugby Players in the World
What Is Fanquer? The Digital Creator Platform Transforming Direct-to-Fan Engagement
Dr Jared Ross: Missouri Appeals Court Upholds Protection Order Over Graphic Torture and Murder Threats
Nancy Hallam: The Inspiring Life, Career, and Success Story Behind Ian Wright’s Wife
-
 Real Estate9 months ago
How to Ensure Your Home is Valued Correctly for a Quick Sale
-
Celebrity12 months ago
Christopher Dare: The Untold Story of Engineer and Former Husband of Angela Rippon
-
 Sports6 months ago
The 15 Highest-Paid Rugby Players in the World
-
 Technology5 months ago
What Is Fanquer? The Digital Creator Platform Transforming Direct-to-Fan Engagement
-
 Celebrity5 months ago
Dr Jared Ross: Missouri Appeals Court Upholds Protection Order Over Graphic Torture and Murder Threats
-
Celebrity1 year ago
Nancy Hallam: The Inspiring Life, Career, and Success Story Behind Ian Wright’s Wife
-

 Celebrity8 months ago
Who Is Azriel Crews? Inside the Life and Career of Terry Crews’ Daughter
-
 Celebrity12 months ago
Who Is Maisie Mae Roffey? The Private Life, Family Story, and Quiet Success of Julie Walters’ Daughter