Technology
How Abrasive Blasting Restores Metal Surfaces

Over time, metal surfaces can rust, peel, and accumulate grime, creating serious liabilities for industries that depend on steel beams, pipelines, and heavy machinery. Abrasive blasting is a powerful method for stripping these surfaces back to bare metal, preparing them for new, durable coatings.
What Is Abrasive Blasting?
Abrasive blasting is the process of propelling abrasive media at high velocity against a surface to remove contaminants, old coatings, rust, or scale. Think of it as a highly controlled form of erosion—aggressive enough to strip corrosion, precise enough to preserve the base metal.
It’s widely used across industries including construction, shipbuilding, automotive, oil and gas, and manufacturing. Regardless of the sector, the goal is usually the same: prepare the surface for a protective coating that will extend the life of the metal beneath it.
The term is often used interchangeably with sandblasting, but modern blasting encompasses a much broader range of techniques—each suited to different surface types, contamination levels, and finish requirements.
Common Blasting Techniques
Sandblasting
Sandblasting uses silica sand or similar granular media propelled by compressed air to strip surfaces. It’s one of the most aggressive methods available and works well on heavily corroded or heavily scaled steel.
However, silica sand has fallen out of favor in many regions due to the risk of silicosis—a serious lung disease caused by inhaling fine silica particles. Many operators now use alternatives like garnet or coal slag, which offer similar performance with a better safety profile.
Bead Blasting
Bead blasting uses spherical glass beads as the abrasive media. Rather than cutting into the surface, the beads peen it—producing a smooth, matte finish without removing significant material. This technique is popular for cleaning rather than profiling, and it’s commonly used in automotive restoration, aerospace components, and medical equipment where surface integrity is critical.
Steel Shot and Grit Blasting
Steel shot (rounded) and steel grit (angular) are recyclable metallic abrasives used in wheel blast systems. They’re cost-effective for high-volume operations and produce consistent surface profiles. Steel grit is preferred when a rough anchor profile is needed for coatings; steel shot is better for descaling and smoothing.
Wet Blasting
Wet blasting, also called vapor blasting, mixes water with the abrasive media to reduce dust and heat. It’s gentler on surfaces and significantly reduces airborne particulate—making it a preferred option in enclosed environments or where dust suppression is a priority.
Key Benefits of Metal Surface Restoration
Rust and Contamination Removal
Surface rust, mill scale, and chemical residue compromise the adhesion of any coating applied on top. Blasting removes these contaminants down to clean metal, ensuring the surface is chemically and mechanically ready to bond with primers and protective finishes.
Surface Profiling
A properly blasted surface isn’t just clean—it has texture. The microscopic peaks and valleys created by abrasive blasting, known as an anchor profile, dramatically increase the surface area available for coatings to grip. Without it, even the best paint or epoxy system can delaminate prematurely.
Extended Asset Life
Protective coatings applied to a correctly blasted surface can last decades. In infrastructure applications—bridges, storage tanks, marine vessels—this translates directly into lower maintenance costs and fewer premature replacements.
Versatility
Abrasive blasting works on metals of all types and shapes, from flat sheet steel to intricate cast iron components. With the right media and technique, surfaces can be cleaned without distortion.
Safety Considerations and Environmental Impact
Abrasive blasting is not without its hazards. Operators must wear appropriate PPE—including respirators, full-face shields, hearing protection, and blast suits—to guard against inhalation of dust, flying debris, and noise-induced hearing loss.
Containment is equally important. Blasting operations should be conducted in enclosed blast rooms or behind containment barriers to prevent spent abrasive and dislodged coating particles from spreading into the surrounding environment. When lead-based or hazardous paints are involved, strict containment and waste disposal protocols become a regulatory requirement, not just a best practice.
From an environmental standpoint, the choice of abrasive media matters. Single-use media like garnet and coal slag produce significant waste volumes. Recyclable options such as steel shot and grit reduce material consumption, while wet blasting systems help control airborne dust. Operators increasingly look for abrasive media with low heavy metal content to minimize contamination of collected waste.
How to Prepare Metal Surfaces for Coating: A Step-by-Step Guide
Step 1: Assess the Surface Condition
Start by evaluating the extent of corrosion, existing coating thickness, and the type of metal substrate. This determines which blasting technique and abrasive media will be most appropriate.
Step 2: Select the Right Abrasive
Match the abrasive to the application. Aggressive angular media like steel grit or garnet suits industrial surface preparation where a strong anchor profile is required. Finer media like glass beads suit delicate components where dimensional accuracy must be maintained.
Step 3: Set Up Containment
Establish a containment perimeter appropriate for the scale of the job. For small components, a blast cabinet is sufficient. Larger projects may require tarps, blast rooms, or temporary enclosures.
Step 4: Blast the Surface
Work systematically across the surface, maintaining consistent distance and angle to achieve uniform coverage. Reference surface preparation standards (such as SSPC or ISO 8501) to confirm the required cleanliness grade has been met.
Step 5: Remove Residual Dust and Debris
After blasting, remove all surface dust using dry compressed air or a vacuum. Any residual contamination left on the surface will compromise coating adhesion.
Step 6: Apply Coating Promptly
Freshly blasted metal oxidizes quickly. Apply the primer or protective coating as soon as possible after blasting—typically within four hours—to prevent flash rust from forming.
Conclusion
Now that you have learned the basics of abrasive blasting, you can confidently tackle your next project. Remember to always prioritize safety and follow proper precautions, including using appropriate protective gear and adequately ventilating the area.
Technology
Total Sportek Exposed: Why Millions of Football Fans Are Switching to This Sports Platform

Sports fans no longer wait for television highlights or next-day newspapers to follow their favorite teams. They want instant scores, live match details, updated standings, and player statistics in one place. Total Sportek has become a familiar name among football followers who need quick access to match information, tournament updates, and sports data. With web and mobile accessibility, it serves fans who want to stay connected to football action from anywhere.
Quick Facts
| Detail | Information |
|---|---|
| Platform Name | Total Sportek |
| Category | Sports tracking and match update platform |
| Main Focus | Football scores, fixtures, standings, and statistics |
| Content Type | Live scores, rankings, schedules, and player data |
| Popular Sport | Football |
| Additional Coverage | Major sports events and tournaments |
| App Availability | Android and iOS support |
| Real Time Scores | Available |
| League Tables | Available |
| Player Stats | Available |
| Favorites Feature | Available |
| Match Fixtures | Available |
| Target Audience | Football fans and sports followers |
| Main Benefit | Fast access to sports information |
| User Experience | Simple, mobile friendly, and data focused |
| Global Reach | International sports audience |
| Registration | May depend on platform or app version |
| Best Known For | Football match tracking and live updates |
| Suitable For | Casual fans, analysts, and regular sports viewers |
| Overall Purpose | Helping users follow matches, teams, and tournaments easily |
What Is Total Sportek?
Total Sportek is widely recognized as a sports information platform that helps users follow live football scores, match schedules, league tables, and team updates. It is especially popular among football fans who want a quick way to check what is happening during matches without searching through multiple sources.
The platform became known online because of its association with live sports coverage and match related updates. Over time, many users began using it as a sports tracking destination where they could find fixture information, standings, and key football data. Its value comes from convenience, speed, and broad coverage.
For modern fans, the biggest attraction is simple access. Instead of opening several apps or browsing different sports pages, users can find match details in one organized environment. That makes the platform useful during busy football weekends, international tournaments, and major league fixtures.
Why Digital Sports Tracking Matters Today?
The way people follow sports has changed dramatically. In the past, fans depended on television, radio, newspapers, and post match analysis. Today, smartphones and sports apps have made real time updates part of everyday fan culture. A supporter can now track a match while traveling, working, studying, or attending another event.
This change has increased demand for fast, mobile friendly sports platforms. Fans want more than final scores. They want lineups, match timing, goal alerts, league rankings, player statistics, and upcoming fixture details. TotalSportek fits into this digital shift by offering information that football followers can access quickly.
Sports tracking also helps fans understand the bigger picture. A single goal can change a league table, a red card can influence a title race, and a draw can affect qualification battles. Real time platforms allow supporters to follow these developments as they happen.
Core Features of the Platform
The main appeal of TotalSportek comes from its practical sports features. Users commonly look for live scores, match fixtures, team standings, tournament updates, and player performance information. These features help fans stay informed before, during, and after matches.
Live score tracking remains one of the most important functions. Fans can check current results without waiting for a broadcast update. Fixture listings also help users plan which matches to follow, especially when multiple competitions take place on the same day.
Another useful feature is competition organization. Football fans often follow several leagues at once, including domestic competitions, continental tournaments, and international events. A platform that organizes this information clearly saves time and improves the user experience.
Live Football Scores and Match Updates
Football is a fast moving sport, and fans want instant updates when goals, cards, substitutions, and major incidents happen. TotalSportek is commonly associated with real time football score tracking, making it useful for people who cannot watch every game live.
Live score features are valuable because football schedules often overlap. A fan may want to follow an English Premier League match, a La Liga game, and a Major League Soccer fixture on the same day. Real time updates allow users to monitor several games without switching between many sources.
This type of match tracking also supports fantasy football players, sports writers, analysts, and casual fans. Quick updates help them understand match flow, player involvement, and competition impact. For many users, speed is the biggest reason they return to sports tracking platforms.
Coverage of Major Football Leagues
One reason TotalSportek attracts attention is its focus on major football competitions. Fans often search for updates from the English Premier League, La Liga, Serie A, Bundesliga, Ligue 1, Major League Soccer, and other popular tournaments. Broad league coverage gives the platform wider appeal.
Football is global, and supporters do not always follow only their local clubs. A fan in one country may support a club in England, follow a Spanish title race, and track international competitions at the same time. This makes multi league coverage important.
Major tournaments also increase user demand. During events such as continental cups, international qualifiers, and summer tournaments, fans look for fixture updates, group standings, and match results more frequently. A centralized sports update platform becomes especially useful during these periods.
Match Schedules and Fixtures
Fixtures are essential for football fans because they help users know when teams are playing, who they are facing, and how upcoming matches may affect a league or tournament. TotalSportek provides value by helping users follow match schedules in an organized way.
A good fixture section does more than show dates. It helps fans prepare for upcoming games, understand competition timing, and compare matches across different leagues. This becomes important when several important matches happen on the same day.
Schedules are also helpful for international users because football matches take place across different time zones. A mobile friendly sports platform can make it easier for fans to check match timing and avoid missing important fixtures. This practical benefit supports the platform’s continued popularity.
League Standings and Rankings
League tables are among the most checked sections on any football platform. Fans want to know where their club stands, how many points separate teams, and how results affect title races, relegation battles, and European qualification spots. TotalSportek offers this type of competition context for football followers.
Standings help fans interpret results properly. A win is not just a win when it moves a club into first place or saves a team from the relegation zone. Updated rankings make each result more meaningful and help users understand the larger story behind every match.
Rankings also support analysis. Fans compare goal difference, wins, draws, losses, form, and points. These details create discussion and debate, which are central parts of football culture. A platform that updates tables clearly can become part of a fan’s regular matchday routine.
Player Statistics and Leaderboards
Modern football fans care deeply about individual performance. They follow top goalscorers, assist leaders, clean sheet records, disciplinary stats, and player form throughout the season. TotalSportek includes player statistics as part of its sports information appeal.
Player stats help fans compare performance across clubs and competitions. A striker’s goal count, a midfielder’s assists, or a goalkeeper’s clean sheets can shape debates about awards, transfers, and team success. Statistics add depth beyond the final result.
Leaderboards also make football more engaging between matches. Fans may check who leads the scoring race, which players are creating the most chances, or how individual performances affect a club’s season. This data focused experience matches the expectations of today’s football audience.
Mobile App Experience
Mobile access is now one of the most important parts of sports media. Fans want match updates in their pockets, not only on desktop screens. TotalSportek is associated with mobile application access that helps users follow football scores, standings, and fixtures on Android and iOS devices.
A strong mobile experience matters because sports do not wait for users to sit at a computer. Supporters may check scores during travel, lunch breaks, social events, or work hours. A mobile platform allows them to stay updated without effort.
The best sports apps focus on speed, clarity, and simple navigation. Users want to open the app and immediately find the match, team, or tournament they care about. A smooth mobile experience can turn occasional visitors into regular users.
Personalization and Favorites
Personalization improves how fans use sports platforms. Not every user wants to follow every match or league. Many people care most about one club, one national team, or a small group of competitions. TotalSportek offers a more focused experience when users can follow favorites.
A favorites section helps users save preferred teams, players, or tournaments. This makes it easier to access relevant updates without searching every time. Personalization also supports faster notifications and a cleaner user journey.
For serious football fans, this feature can be especially useful during busy seasons. A supporter may follow domestic league matches, cup competitions, and international fixtures involving the same club or players. Favorites help keep that information organized.
User Experience and Website Design
User experience plays a major role in whether a sports platform succeeds. Fans want information quickly, especially during live matches. If a page is confusing, slow, or cluttered, users often leave and search elsewhere. TotalSportek remains relevant because its concept focuses on simple sports access.
A good sports interface should make scores, fixtures, standings, and statistics easy to find. Clear menus, readable tables, and mobile friendly layouts improve the experience. Fans should not need several clicks to reach the most important match information.
Design also affects trust. A professional layout gives users more confidence when checking scores and rankings. Clean presentation helps make sports data feel reliable and accessible, especially for casual users who want quick updates without technical complications.
Benefits for Football Fans
The biggest benefit of TotalSportek is convenience. It gives users a way to follow football information from multiple competitions in one place. This saves time and makes match tracking easier for fans with busy schedules.
Another advantage is speed. Real time sports updates allow supporters to react quickly to goals, results, and table changes. This is especially useful during important fixtures, derby matches, title races, and knockout tournaments.
The platform also helps fans stay connected beyond live matches. Fixtures, standings, player statistics, and rankings provide context before and after games. That complete experience makes sports tracking more useful than simply checking a final score.
Things Users Should Keep in Mind
While TotalSportek is known among sports fans, users should always be careful when using any online sports platform. Sports coverage, live data, app availability, and features can change over time. It is important to use trusted versions of apps and avoid unsafe third party pages that may imitate popular names.
Users should also understand the difference between sports information and official broadcasting. Live scores, standings, and statistics are useful, but viewing live matches may depend on licensed broadcasters in each country. Fans should choose legal and secure options when watching games.
Data accuracy is another important factor. Even strong sports platforms may experience delays or temporary errors during high traffic events. For major decisions, users often compare information with official league, club, or broadcaster updates.
How It Compares With Traditional Sports Media?
Traditional sports media still plays an important role, especially for expert analysis, interviews, documentaries, and post match commentary. However, digital tracking platforms offer something different. They focus on speed, accessibility, and real time data.
TotalSportek appeals to fans who want quick information rather than long form coverage. A user may visit a sports app to check the score instantly, then watch analysis later through television, podcasts, or sports news programs. Both formats serve different needs.
The rise of digital platforms shows that fans now expect layered coverage. They want instant updates during the match, detailed statistics after the match, and expert opinions later. Sports tracking platforms fill the first part of that demand effectively.
The Future of TotalSportek and Sports Tracking
The future of sports tracking will likely become more personalized, data rich, and mobile focused. Fans may expect smarter alerts, deeper statistics, artificial intelligence driven match insights, and better integration between scores, schedules, and player performance.
TotalSportek could remain relevant if it continues to focus on speed, usability, and broad football coverage. The sports audience is growing globally, and football remains one of the most followed games in the world. This creates continued demand for platforms that help users follow matches easily.
As technology improves, fans may also expect more visual dashboards, predictive stats, and customized match centers. Platforms that adapt to these expectations can build stronger loyalty and attract new users.
FAQs
What is TotalSportek used for?
TotalSportek is used for following football scores, match schedules, league tables, player statistics, and tournament updates. Many fans use it to stay informed about live match activity and competition progress.
Is TotalSportek mainly focused on football?
Yes, football is the main focus. The platform is commonly associated with football fixtures, live scores, standings, and player leaderboards, although users may also find information related to other major sports events.
Does TotalSportek have mobile app access?
TotalSportek is associated with mobile app availability for Android and iOS users. Mobile access helps fans check scores, fixtures, standings, and match information while they are away from a desktop device.
Why do fans search for TotalSportek?
Fans search for TotalSportek because they want quick sports updates in one place. The platform is popular among users who follow multiple football leagues, teams, tournaments, and player statistics.
Is TotalSportek a good option for live match tracking?
TotalSportek can be useful for live match tracking because it focuses on scores, fixtures, standings, and sports data. Users should still rely on official broadcasters or licensed services when they want to watch live matches legally and safely.

51cg is commonly associated with a Chinese online gossip and viral-content platform linked to the phrase “吃瓜,” which translates literally as “eating melon” but means watching internet drama from the sidelines. In modern online culture, the phrase describes users who follow scandals, rumors, influencer disputes, celebrity updates, and fast-moving social media controversies without directly participating in the events.
Quick Facts
| Category | Details |
|---|---|
| Common name | 51cg |
| Associated Chinese name | 51吃瓜 |
| Main meaning | Online gossip, trending drama, and viral controversy platform |
| Language focus | Primarily Chinese-language content |
| Content style | Fast updates, gossip posts, influencer rumors, celebrity discussions, social hot topics |
| Primary audience | Users interested in internet trends, scandals, entertainment gossip, and viral debates |
| Platform type | Web-based gossip and trend-discussion site |
| Common theme | “Eating melon,” meaning watching public drama unfold |
| Login requirement | Varies by domain or version, but many users search for public access pages |
| App mentions | Some related pages reference app-style access or download notices |
| Domain behavior | Often associated with multiple entrances, backup pages, and mirror-style access |
| Content reliability | Mixed and should be verified through trusted sources |
| Safety level | Requires caution because of privacy, adult content, ads, clones, and malware risks |
| Best use case | Studying online trend culture and understanding viral gossip behavior |
| Not ideal for | Verified journalism, private research, legal evidence, or personal reputation claims |
| User warning | Avoid downloads, suspicious pop-ups, and claims involving private individuals |
| SEO category | Informational, digital culture, online safety, media literacy |
| Better alternatives | Verified news sources, official social accounts, trusted entertainment outlets |
| Editorial angle | Explain the platform, risks, culture, and safer browsing practices |
Why 51cg Became a Search Trend?
The platform gained search interest because gossip platforms often grow through curiosity. When people see a name mentioned in comment sections, short videos, forum posts, or private group chats, they search for it to understand what everyone else is discussing. This curiosity loop can make a platform appear more popular, especially when the content connects to viral personalities or controversial events.
Another reason for its visibility is the emotional nature of gossip. Stories about public figures, influencers, relationships, school incidents, livestreaming drama, and online disputes can move quickly because they trigger strong reactions. People want updates, timelines, screenshots, and summaries. A platform that promises fast access to these stories naturally attracts repeat visits.
Search behavior also plays a big role. Users often type short terms when they are trying to locate a specific site, mirror page, or latest entry point. That makes the term easy to trend across search engines, social platforms, and browser suggestions. Even people who do not regularly visit gossip websites may search once after seeing the name in a viral conversation.
The Meaning of “Eating Melon” Culture
To understand 51cg, readers first need to understand “eating melon” culture. In Chinese internet slang, “吃瓜群众” means the crowd watching drama while staying outside the conflict. It is similar to saying “spectators watching the mess unfold.” The phrase can be humorous, but it also reflects a serious part of modern digital behavior.
People follow scandals because they want entertainment, social context, and a sense of being informed. When a controversy spreads, users compare evidence, debate motives, and share opinions. This can feel like collective investigation, but it can also turn into rumor amplification when people treat screenshots, anonymous posts, or edited clips as confirmed truth.
The culture around online drama is not limited to China. Every major internet region has similar behavior, from celebrity gossip forums to influencer callout pages and viral thread accounts. The difference is language, platform ecosystem, and slang. In this context, the site represents one example of how digital audiences gather around controversy and make gossip part of daily online entertainment.
Main Types of Content Users Associate With the Platform
Users commonly associate the platform with influencer gossip, celebrity rumors, viral social incidents, and online disputes. These topics can include relationship claims, livestreaming controversies, leaked conversations, public apologies, accusations, fan conflicts, and trending entertainment discussions. The content is often designed to feel immediate and dramatic.
Another category involves social hot topics. These can be broader than celebrity news and may include school controversies, workplace disputes, local incidents, or public behavior caught on camera. Such posts spread because they offer a story that feels personal, emotional, and easy to debate.
However, this kind of content also creates risk. Posts may involve private individuals rather than public figures. They may include claims that lack confirmation. Some material may contain adult themes or sensitive personal details. Readers should not assume that every viral post is accurate, fair, or legally safe to share.
How It Differs From Traditional News Websites?
The platform differs from traditional news outlets because its core appeal comes from speed, controversy, and user curiosity rather than formal reporting. A professional newsroom usually follows editorial rules, checks facts, names sources when possible, issues corrections, and separates opinion from verified reporting. Gossip platforms often operate with looser standards.
That does not mean every post is false, but it does mean users need a different reading strategy. A viral post may be based on a real conversation, but the context may be missing. A screenshot may be genuine, edited, selectively cropped, or wrongly attributed. A video clip may show an incident but not the events before or after it.
The biggest difference is accountability. Traditional publishers can face reputational and legal consequences for inaccurate reporting. Anonymous or mirror-based gossip spaces may be harder to evaluate. Readers should treat posts as leads or claims, not as final facts, until they see confirmation from reliable sources.
Website Access, Mirror Domains, and App Mentions
One noticeable feature around 51cg is the appearance of multiple domains, backup pages, and access notices. This can happen for many reasons, including traffic management, regional restrictions, domain instability, platform moderation pressure, or attempts to keep users connected when one address stops working. For users, it creates confusion because official pages, mirrors, clones, and fake copies can look similar.
Mirror-style access also raises safety concerns. A user searching for the latest address may click a harmful copycat page, download an unsafe file, or interact with aggressive advertising. Some sites in this category promote app downloads or browser-based viewing tools, but users should approach those offers carefully.
The safest practice is simple: avoid downloading unknown apps, APK files, browser extensions, media players, or “unlock” tools. If a page asks for unnecessary permissions, pushes redirects, or displays suspicious pop-ups, leave immediately. Curiosity is not worth exposing a phone, browser, or personal account to security threats.
User Experience and Navigation Style
The user experience of a gossip platform usually favors fast consumption. Headlines are direct, emotional, and curiosity-driven. Categories often group posts by recent drama, trending personalities, or must-read topics. This design encourages visitors to keep clicking because every story feels like part of a larger chain of updates.
The site is often discussed in connection with rapid updates and categorized gossip pages, which makes the browsing experience feel closer to a feed than a newspaper. Users may move from one post to another without checking whether the information is verified. That quick scrolling behavior is one reason misinformation can spread so easily.
A smarter user experience starts with self-control. Readers should pause before sharing, screenshotting, or commenting on sensitive claims. They should ask whether the post includes credible evidence, whether the people involved are public figures, and whether reposting the content could harm someone who has not consented to public exposure.
Privacy Issues Every User Should Consider
Privacy is one of the biggest concerns linked to platforms that collect gossip and alleged leaks. Some stories may involve private chats, personal photos, workplace disputes, school incidents, family conflicts, or content that was never intended for wide distribution. Even when users visit only to look, they still participate in the attention economy around that material.
The platform attracts interest because people want to see what is being discussed, but users should remember that a trending post can affect real lives. Private individuals may face harassment, reputational damage, job consequences, or emotional harm after becoming part of online drama. Public curiosity does not automatically make private details ethical to spread.
Visitors should also think about their own privacy. Sites with heavy ads, pop-ups, redirects, or unknown scripts may track behavior or push unsafe pages. Using a secure browser, avoiding downloads, clearing suspicious permissions, and never entering personal login details are basic precautions. The best privacy habit is to avoid interacting with any page that asks for more access than it needs.
Verification Challenges and Rumor Risks
The biggest weakness of gossip-centered platforms is verification. Viral stories often spread faster than facts. A single anonymous post can become a major controversy if users repeat it across social media. Once enough people discuss a claim, it can feel true even when no reliable evidence supports it.
The site should therefore be approached with a media-literacy mindset. Readers can ask a few simple questions before believing a story. Who is making the claim? Is there original evidence? Has a trusted source confirmed it? Could the screenshot be edited? Is the headline using emotional language to push a reaction? Does the post show the full context?
Rumor risks become more serious when posts involve accusations, relationships, minors, schools, workplaces, or intimate content. Sharing unverified claims can create legal and ethical problems. A responsible reader should separate curiosity from certainty and avoid turning gossip into a personal attack.
Safety Concerns Around Ads, Pop-Ups, and Downloads
Many gossip and adult-adjacent platforms rely on aggressive advertising, redirects, and promotional banners. Some ads may lead to gambling pages, adult services, fake chat tools, suspicious apps, or misleading download prompts. This does not mean every page is harmful, but it does mean users should browse cautiously.
The platform has been associated in public search results with multiple access paths and app references, which makes safe browsing even more important. Users should avoid clicking “play,” “download,” “verify,” or “install” buttons unless they are completely certain about the source. Fake buttons are common on entertainment and viral-content sites because they exploit urgency and curiosity.
Good safety habits include keeping the browser updated, using built-in security protection, avoiding unknown files, and never entering passwords on clone pages. Users should also be careful on shared devices. Gossip sites may contain sensitive or adult material that is not appropriate for work, school, or family environments.
Legal and Ethical Issues Around Leaked Content
Leaked content can create serious legal and ethical concerns. A post may include private images, conversations, accusations, or identifying information. Even if a page has already published something, users can still contribute to harm by saving, reposting, or spreading it further. In many situations, “everyone is sharing it” is not a defense.
The site belongs to a broader online category where leaked or controversial material can become entertainment. That creates a difficult tension between public curiosity and personal rights. Some stories may involve public figures and legitimate public interest, while others may involve ordinary people who never agreed to become part of a viral discussion.
A safer approach is to focus on the public conversation rather than the private material. Readers can discuss media literacy, platform behavior, online harassment, and misinformation without repeating sensitive claims or sharing private files. Ethical browsing means knowing when not to click.
Why Marketers and Researchers Study Platforms Like This?
Digital marketers, SEO analysts, media researchers, and trend watchers may study the platform because it reveals how online attention works. Gossip platforms show what kinds of headlines attract clicks, how quickly stories move, which topics trigger audience reactions, and how communities build around shared curiosity.
For marketers, the lesson is not to copy harmful gossip tactics. The better lesson is to understand audience psychology. People respond to fresh information, emotional stakes, clear narratives, and social proof. Responsible publishers can use those insights to create useful, accurate, and engaging content without spreading private or unverified material.
Researchers may also examine these platforms to understand misinformation, digital reputation, influencer culture, and cross-platform virality. A rumor can begin in one space, move to short-video platforms, appear in search results, and then become part of public conversation. Studying that path helps explain why online narratives can become powerful even before facts are clear.
Safer Ways to Follow Online Trends
Users who want to follow internet culture without exposing themselves to unnecessary risk can choose safer habits. Start with reliable entertainment outlets, official social media accounts, creator statements, and verified news coverage. These sources may not move as fast as gossip pages, but they reduce the chance of believing false or harmful claims.
When using 51cg or similar platforms for general awareness, avoid treating posts as confirmed facts. Read with skepticism, do not download files, and do not share sensitive material. If a story involves a serious accusation, wait for confirmation from credible sources. If the post targets a private person, consider whether your attention contributes to harassment.
A healthier trend-following routine also includes stepping back. Constant drama can shape mood, attention, and judgment. Not every controversy deserves your time. Choosing reliable sources and limiting exposure can make online life calmer and more informed.
Final Thoughts
51cg is best understood as a Chinese-language gossip and viral-content platform connected to “eating melon” culture. Its popularity comes from speed, controversy, curiosity, and the public appetite for online drama. For some users, it is a place to follow trending stories. For others, it is a case study in how internet rumors, mirror domains, and attention-driven content spread.
The platform can be interesting from a digital culture perspective, but it requires caution. Users should think carefully about privacy, verification, security, and ethics before trusting or sharing anything they find. Gossip may feel harmless, yet it can affect real people when private details or unverified accusations go viral.
The best way to approach the platform is with awareness rather than blind curiosity. Treat it as a trend signal, not a confirmed news source. Verify claims elsewhere, avoid suspicious downloads, and remember that responsible internet use includes knowing when to stop watching the drama.
FAQs
What is 51cg used for?
It is commonly used to follow Chinese-language online gossip, influencer controversies, celebrity rumors, social hot topics, and viral internet drama. Users often search for it when they want quick updates about trending discussions or when they see the name mentioned in online communities.
Is 51cg a reliable news source?
It should not be treated as a fully reliable news source. The platform is more closely connected with gossip, leaks, and viral claims than formal journalism. Readers should verify important information through trusted outlets, official statements, or multiple credible sources before believing or sharing it.
Why does 51cg appear with different domains?
Sites in this category often use multiple domains, backup entrances, or mirror-style pages because access can change over time. This can help users find the platform, but it also increases the risk of fake copies, unsafe redirects, and confusing search results.
Is it safe to download apps connected with 51cg?
Users should be very careful with any app, APK, browser extension, or media tool promoted by unknown pages. Downloading files from unverified sources can create security risks. It is safer to avoid downloads, especially when a page uses pop-ups, urgent prompts, or unclear permissions.
How should readers use 51cg responsibly?
Readers should use it cautiously, avoid sharing private or unverified material, and remember that viral posts can affect real people. The responsible approach is to treat the platform as a source of online trend awareness, not as proof. Verify claims, protect your privacy, and avoid content that seems exploitative or harmful
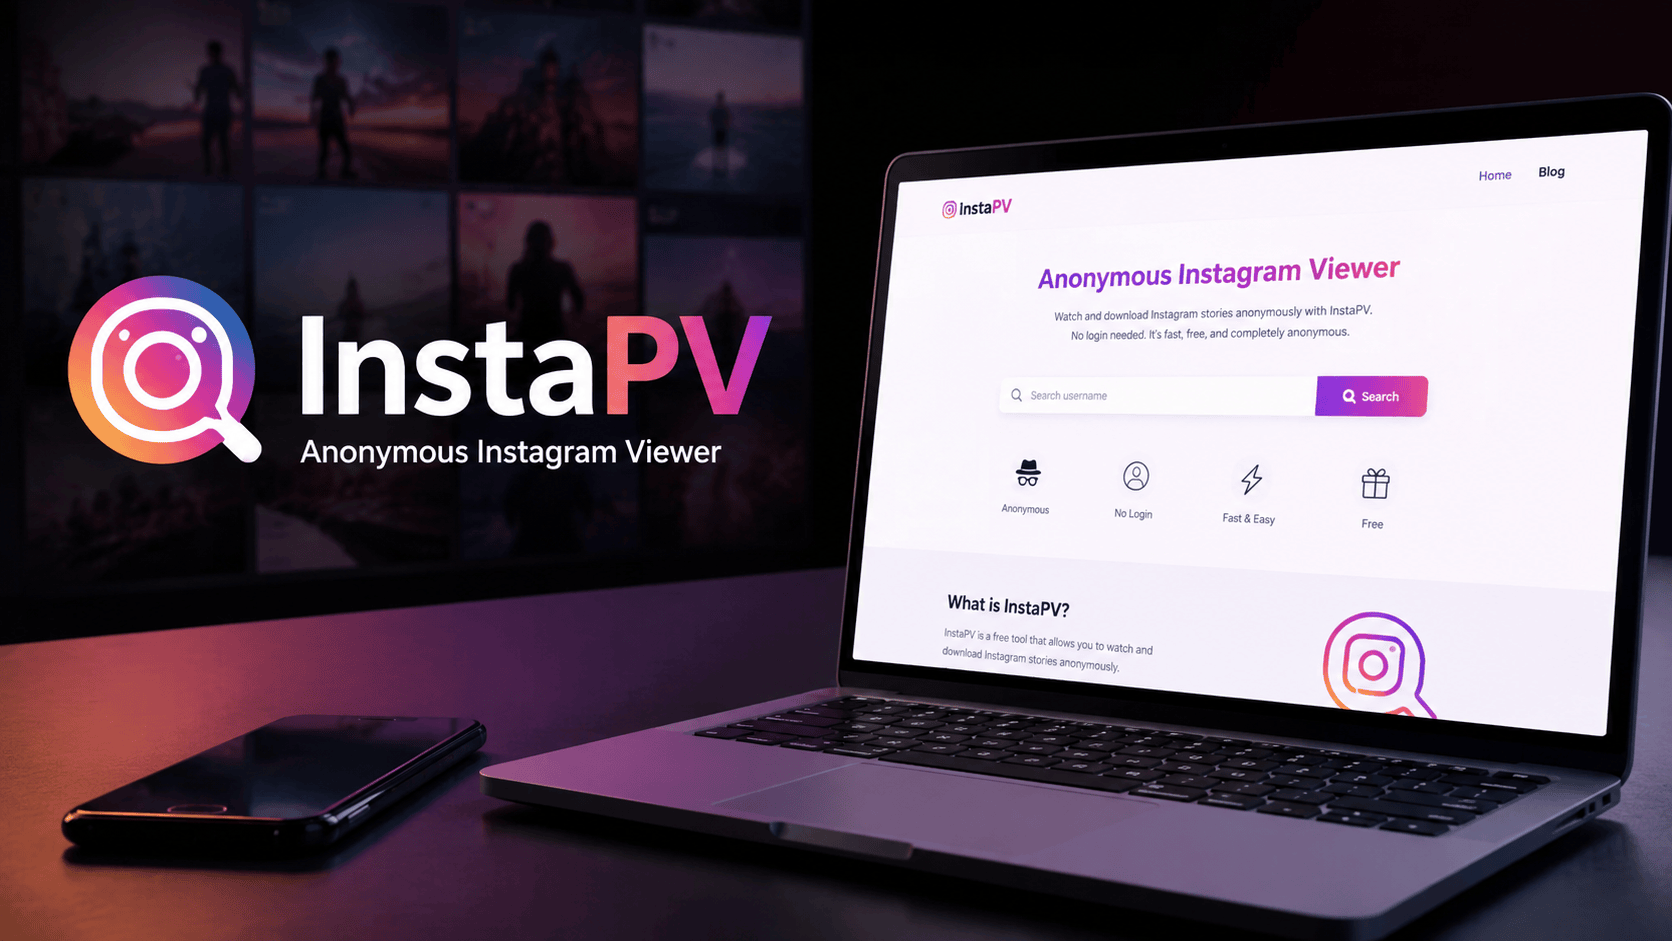
Instagram has changed the way people discover trends, follow creators, study brands, and interact with public content. Yet many users want to browse without leaving a visible trace on story viewer lists or connecting their personal accounts to third-party searches. InstaPV has gained attention because it offers a simple way to view public Instagram profiles, stories, highlights, and tagged posts anonymously. While the tool attracts casual users and digital marketers, it also comes with privacy, advertising, reliability, and ethical considerations that every user should understand before relying on it.
Quick Facts
| Profile Detail | Information |
|---|---|
| Name | InstaPV |
| Category | Anonymous Instagram viewer |
| Platform Type | Free web-based tool |
| Main Use | Viewing public Instagram content anonymously |
| Login Required | No |
| Account Needed | No personal Instagram account required for public browsing |
| Main Audience | Casual users, digital marketers, influencers, researchers, and brand analysts |
| Content Access | Public stories, profiles, highlights, tagged posts, comments, and engagement data |
| Private Account Access | Not supported |
| Popular Feature | Anonymous story viewing |
| Marketing Use | Competitor research and influencer authenticity checks |
| Cost | Free to use |
| Advertising Model | Ad-supported |
| Main Concern | Privacy risk from intrusive ads and tracking networks |
| Technical Concern | Frequent downtime due to Instagram security updates |
| Data Type | Publicly available Instagram information |
| Best Use Case | Viewing and studying public content discreetly |
| Risk Level | Moderate if users avoid sharing personal data |
| Recommended Practice | Never enter Instagram login details on third-party tools |
| Ethical Limit | Use only for public content and lawful research |
What Is InstaPV and Why Is It Popular?
InstaPV is a free web-based Instagram viewer designed for people who want to view public Instagram content without logging into a personal account. It is often used to browse stories, profiles, highlights, tagged posts, and other visible public content while keeping the viewer’s identity hidden from the account owner’s story viewer list. This simple promise has made it attractive to people who value privacy, want to avoid unnecessary social interaction, or need to study public social media activity for research.
The tool’s popularity comes from a mix of convenience and curiosity. Many Instagram users do not want to create a second account just to check public pages. Others prefer not to appear on a story view list, especially when researching competitors, influencers, creators, or public figures. For digital marketers, anonymous browsing can help monitor brand activity without alerting competitors. For casual users, it provides a private way to look at public profiles without signing in.
However, its appeal should not hide its limitations. The platform cannot access private Instagram accounts, bypass privacy settings, or unlock hidden content. It only works with content already visible to the public. Users who understand this boundary can use the tool more responsibly and avoid unrealistic expectations.
Why Anonymous Instagram Viewing Matters?
Anonymous viewing matters because social platforms make many interactions visible. When someone watches an Instagram story from their own account, the uploader can usually see that name in the viewer list. This creates a record of attention, even when the viewer only wants to browse casually. For people who prefer privacy, that visibility can feel uncomfortable.
The same need also exists in professional settings. Marketers, journalists, creators, and small business owners often review public social activity to understand trends, audience behavior, and competitor strategy. They may not want their personal or business account to appear while they study another profile. Anonymous viewing tools make that research easier by separating observation from identity.
At the same time, anonymity does not remove responsibility. Public content still belongs to the person or brand that posted it. Users should avoid harassment, stalking, impersonation, data misuse, or repeated monitoring that crosses ethical lines. A tool can make browsing private, but it cannot make harmful behavior acceptable.
Core Features and User Experience
The biggest feature of InstaPV is anonymous story viewing. Users can watch public Instagram stories without their names appearing in the uploader’s viewer list. This makes the tool useful for people who want to check updates quietly. It also helps marketers review campaign stories, influencer promotions, or brand announcements without making their research visible.
Another important feature is the no-login experience. Many third-party platforms ask users to connect an Instagram account, but that creates security concerns. A no-login model reduces the need to share personal credentials. Users can usually search for a public username and access available content without creating an account or linking a profile.
The tool also supports public profile browsing, highlights, tagged posts, and visible engagement details. Some versions or similar services organize likes, comments, and follower changes in chronological order, which helps users study engagement patterns over time. This can be valuable for identifying sudden spikes in activity, unusual audience behavior, or the timing of successful posts.
How Public Profile Browsing Works?
Public profile browsing depends on information that Instagram makes visible to anyone. When an Instagram account is public, its posts, bio details, profile image, tagged photos, and some engagement signals may be accessible without an accepted follow request. Anonymous viewers collect and display this public information in a separate web interface.
InstaPV does not change Instagram’s privacy rules. It does not make private content public, and it does not open locked accounts. If a profile owner has set the account to private, outside viewers cannot legally or reliably access stories, posts, or highlights without permission. Any website claiming to bypass private Instagram accounts should be treated with caution because such claims often lead to scams, fake surveys, malware, or credential theft.
This clear limit protects both users and profile owners. It reminds people that anonymous viewing should stay within public boundaries. If content is not publicly available, the respectful answer is to leave it private.
Stories, Highlights, Profiles, and Tagged Posts
Instagram stories create a strong demand for anonymous viewing because they normally show the uploader who watched them. Public stories often include daily updates, promotions, event coverage, personal moments, and behind-the-scenes content. A viewer tool lets users watch that public story content without appearing in the normal viewer list.
InstaPV can also be useful for highlights because highlights preserve selected stories beyond the usual temporary window. Brands use highlights to showcase products, customer feedback, menus, travel guides, services, events, and frequently asked questions. A marketer can study these sections to understand how a competitor organizes public information and builds trust with followers.
Tagged posts add another layer of insight. A tagged section may reveal customer photos, influencer partnerships, brand mentions, event participation, or public collaborations. For someone researching authenticity, tagged content often tells a broader story than the profile’s own posts. It can show how other users interact with the account and whether public engagement looks natural.
Chronological Tracking and Engagement Insights
Chronological tracking helps users understand the order and timing of social activity. When comments, likes, follower updates, or content changes appear in sequence, researchers can see how engagement develops. This matters because timing often explains performance. A post that gains comments quickly may have strong audience interest, while a sudden burst of likes can suggest paid promotion, viral reach, or coordinated activity.
InstaPV is often described as helpful for analyzing engagement patterns on public accounts. Marketers can compare story posting habits, campaign timing, comment volume, and audience reactions. Influencer managers may use these observations to evaluate whether a creator has consistent engagement or only occasional spikes.
Still, public engagement data has limits. A viewer tool can show what is visible, but it cannot fully explain why people interact. A spike in comments might come from a giveaway, controversy, viral mention, paid traffic, or loyal fans. Users should treat these signals as clues, not final proof. Strong analysis requires context, patience, and careful comparison.
Competitor Research for Digital Marketers
Digital marketers often use anonymous viewing tools to study competitors without revealing interest. A restaurant may observe another restaurant’s public promotions. A fashion brand may review influencer collaborations. A local business may track seasonal campaigns, posting frequency, hashtag choices, customer reactions, and offer styles.
InstaPV supports this kind of research by allowing discreet access to public content. A marketer can review stories, public posts, tagged content, and engagement changes without using a branded account. This helps businesses learn from the market while keeping their strategy private.
Competitor research should focus on learning, not copying. A smart marketer studies what works, then adapts insights to fit their own brand voice, audience, and offer. Copying captions, designs, or campaign ideas can damage credibility and create legal or reputational problems. Ethical research looks for patterns, not shortcuts.
Influencer Authenticity and Brand Partnership Checks
Influencer marketing depends on trust. Brands need to know whether a creator has real audience interest, consistent engagement, and a public image that matches the campaign. Anonymous viewing tools can help brands review public content before starting a partnership.
A brand may look at story activity, highlight organization, tagged posts, comment quality, and previous sponsored content. If an influencer promotes too many unrelated products, the audience may not trust new recommendations. If comments look repetitive or generic, engagement may not be as strong as it appears. If tagged posts show real customer interactions, that can support authenticity.
InstaPV can help with this early review process, but it should not replace proper due diligence. Brands should still request media kits, performance screenshots, audience demographics, and campaign history directly from the creator. Public viewing offers a first impression, while professional verification gives a fuller picture.
Privacy, Ads, and Safety Concerns
Privacy is one of the biggest concerns with free viewer tools. Many platforms stay free by relying on advertising networks, pop-ups, redirects, and tracking scripts. These ads can feel intrusive, and some may collect browsing behavior or push users toward questionable pages. A tool that promises privacy on one side may still expose users to ad-related tracking on the other.
InstaPV has been associated with aggressive advertising, which means users should stay cautious. They should avoid clicking suspicious pop-ups, downloading unknown files, accepting browser notifications, or entering personal information. A privacy-focused user should also use updated browser protections and avoid interacting with ads that appear too aggressive or misleading.
The most important safety rule is simple: never enter Instagram login credentials into a third-party viewer. A no-login tool should not need your password. Any page that suddenly asks for credentials, verification payments, app installs, or human verification loops deserves suspicion. Protecting your account should always come before viewing public content.
Stability Issues and Platform Limitations
Anonymous Instagram viewers depend on access to public content, but Instagram frequently updates its security systems, layout, and anti-scraping protections. These changes can break third-party tools, slow them down, or limit what they can display. As a result, downtime and inconsistent performance are common across this category.
InstaPV may work well one day and show errors another day. A profile may load slowly, a story may fail to appear, or certain engagement details may stop updating. These issues usually do not mean the public account changed. They may simply reflect technical problems caused by platform updates.
Users should avoid relying on any free third-party viewer as a guaranteed research system. For casual browsing, occasional downtime may not matter. For business research, marketers should keep backup methods, take notes, and avoid building important decisions on one tool alone.
Ethical Use and Responsible Viewing
Ethical use starts with respecting public and private boundaries. Public content can be viewed, studied, and discussed, but that does not mean it should be misused. Users should avoid saving or reposting someone’s content without permission. They should not use viewer tools for harassment, obsessive monitoring, impersonation, or attempts to pressure account owners.
InstaPV should be used as a browsing and research aid, not as a way to invade privacy. The healthiest approach is to treat public Instagram content as information shared for public visibility, while still recognizing that creators and individuals deserve respect. Anonymous viewing should reduce unnecessary exposure for the viewer, not create harm for the person being viewed.
For marketers, responsible use also means keeping research professional. Studying public campaigns, content formats, posting schedules, and engagement trends is reasonable. Spreading rumors, collecting personal details, or misrepresenting another brand is not. The difference comes down to intent and action.
Benefits for Casual Users and Researchers
For casual users, the main benefit is quiet browsing. Someone may want to view a public profile without logging in, avoid appearing in a story list, or check a public update without using their own Instagram account. The tool offers convenience, especially for people who do not use Instagram regularly.
For researchers, the benefits are more strategic. Public content can reveal trends, creator behavior, brand positioning, local business activity, and audience response. InstaPV gives researchers a simple interface for observing public Instagram material without making their viewing activity obvious.
The best users are those who understand both the power and the limits of the tool. It can help with discovery, monitoring, and early analysis, but it cannot replace official analytics, direct communication, or verified data. Used correctly, it supports smarter browsing. Used carelessly, it can create privacy and security risks.
Practical Tips Before Using the Tool
Before using any anonymous viewer, users should take a cautious approach. Start by confirming that the profile is public. If the profile is private, the tool should not be expected to work. Any promise to unlock private stories or hidden posts is a major warning sign.
It also helps to use a secure browser, keep ad blockers or tracking protections active where appropriate, and avoid downloading files from pop-ups. Users should never allow suspicious notifications, install unknown extensions, or provide login credentials. These simple habits reduce risk when browsing ad-supported websites.
InstaPV is most useful when treated as a lightweight viewer rather than a secure professional analytics platform. It can help people browse public content anonymously, but users should not assume that every page, ad, or tracking script respects their privacy. Careful browsing protects both personal data and device security.
Final Thoughts
InstaPV fills a clear demand in today’s social media environment. People want privacy, marketers want discreet research, and casual users want simple access to public Instagram content without logging in. The platform’s strengths include anonymous story viewing, public profile access, no-login browsing, tagged post visibility, and practical engagement observation.
At the same time, users must stay realistic. The tool cannot view private accounts, cannot guarantee perfect uptime, and may expose visitors to intrusive ads or tracking networks. Instagram’s frequent security updates can also affect performance. For that reason, the platform works best for light research, casual public browsing, and early competitor observation.
The smartest approach is balanced. Use it only for public content, avoid entering personal details, stay away from suspicious ads, and respect the privacy of account owners. When used responsibly, this tool can be helpful. When used without caution, it can create unnecessary privacy and security concerns.
FAQs
Is InstaPV free to use?
Yes, InstaPV is generally described as a free web-based tool. Its free model usually depends on advertising, which may include pop-ups, redirects, or tracking-based ad networks. Users should be careful while browsing and avoid clicking suspicious ads.
Does InstaPV require an Instagram login?
No, InstaPV does not usually require users to log into an Instagram account to view public profiles or stories. This no-login setup is one of its main attractions. Users should avoid any third-party page that asks for their Instagram password.
Can InstaPV view private Instagram accounts?
No, InstaPV cannot view private Instagram accounts. It works only with public content that is already visible online. Any website claiming to unlock private profiles should be treated as risky and unreliable.
Is InstaPV safe for anonymous browsing?
InstaPV can be useful for anonymous browsing, but safety depends on how users interact with the site. The main concerns include intrusive ads, tracking networks, fake download prompts, and possible redirects. Users should never share login details or personal information.
Who should use this tool?
This tool may suit casual users who want to view public Instagram content privately, as well as marketers researching competitors, influencers, and public engagement patterns. It is best for ethical public browsing, not for private account access or invasive monitoring.

Is There a Good International School in Samui? What Every Relocating Family Needs to Know First

Total Sportek Exposed: Why Millions of Football Fans Are Switching to This Sports Platform

What Is 51cg? The Viral Gossip Platform Everyone Is Searching For

Best Ways to Layer a Heavyweight Zip Up Hoodie

The Hidden Side of InstaPV: How Anonymous Instagram Viewing Is Changing Social Media

Muha Review: Why London Diners Are Choosing Budget Burgers Over Fancy Restaurants

The 15 Highest-Paid Rugby Players in the World
Nancy Hallam: The Inspiring Life, Career, and Success Story Behind Ian Wright’s Wife
Draven Duncan: Tim Duncan’s Rising Star Son and His Inspiring Basketball Journey
Who Is Maisie Mae Roffey? The Private Life, Family Story, and Quiet Success of Julie Walters’ Daughter
Johnny Carell: Inside the Life, Family, and Rising Success of Steve Carell’s Son
Simon Dixon Biography: Lifestyle, Net Worth, Family, Career and Success Story
-
 Sports1 month ago
The 15 Highest-Paid Rugby Players in the World
-
 Celebrity7 months ago
Nancy Hallam: The Inspiring Life, Career, and Success Story Behind Ian Wright’s Wife
-
 Celebrity5 months ago
Draven Duncan: Tim Duncan’s Rising Star Son and His Inspiring Basketball Journey
-
 Celebrity7 months ago
Who Is Maisie Mae Roffey? The Private Life, Family Story, and Quiet Success of Julie Walters’ Daughter
-
 Celebrity8 months ago
Johnny Carell: Inside the Life, Family, and Rising Success of Steve Carell’s Son
-
 Business6 months ago
Simon Dixon Biography: Lifestyle, Net Worth, Family, Career and Success Story
-

 Celebrity5 months ago
Who Is Linda Susan Agar? The Private Life, Legacy, and Story of Shirley Temple’s Eldest Daughter
-

 Celebrity5 months ago
Who Is Mark Gero? Inside the Life, Art, and Quiet Legacy of an American Creative